DISCLAIMER: This is a post from my old blog that I copied here to help out anyone interested in installing CUDA on Ubuntu. Please keep in mind that it was written a few years ago with Ubuntu 10.04 and the CUDA toolkit 3.2.16. Obviously some things have changed, but it should at least provide a decent starting place.
Downloads
For those crazy enough to dive into the world of GPGPU, one option is NVIDIA’s CUDA. For this walkthrough, I will give you a tutorial on how to set up the CUDA SDK on Linux (specifically, Ubuntu). I recommend going here as a starting place:
https://developer.nvidia.com/category/zone/cuda-zone
Download the CUDA SDK here: https://developer.nvidia.com/cuda-downloads
I’ve created a step-by-step guide on getting CUDA running in Ubuntu. Note that in a couple weeks, Ubuntu or CUDA might change, and these steps will no longer apply. I hope it works as a good starting place, though.
Pre-requisites
1) CUDA-enabled graphics card (I’m using a GTX 470)
2) A supported Linux distribution (I’m using Ubuntu 10.04 LTS 32-bit)
3) GCC installed. If it is not installed, call the following:
$ sudo apt-get install gcc build-essential
4) You can check the version of gcc with:
$ gcc –version
5) For this post, I installed gcc 4.4.3
Download
From the “Downloads” page on NVIDIA’s “GPU Computing” site, navigate to the Linux section and download the following files:
- Developer Drivers for Linux (32-bit)
- CUDA Toolkit for Ubuntu Linux 10.04 (32-bit)
- GPU Computing SDK code samples
Save them to some directory on your computer. ~/Downloads sounds nice.
Install the Driver
1) Exit the GUI by pressing Ctrl+Alt+F1
2) Log in using username/password
3) Kill the X server by issuing:
$ sudo /etc/init.d/gdm stop
4) Assuming you only have the 3 NVIDIA files in your ~/Downloads directory, give them all execution permission:
$ cd ~/Downloads
$ chmod +x *
5) Execute the driver install .run file as superuser (note the version/filename might be different):
$ sudo ./devdriver_3.2_linux_32_260.19.26.run
6) If you get an error about the script failing, say “OK” to continue anyway.
7) Say “No” if asked to run the nvidia-xconfig utility.
8) Restart the GUI with:
$ sudo /etc/init.d/gdm start
OR reboot the system:
$ sudo shutdown –r now
9) Login and make sure that the correct version of the driver was installed: System -> Administration -> NVIDIA X Server Settings. Check the “NVIDIA Driver Version” field in “X Server Information.” It should match the file version you just installed (260.19.26 in this case).
Install the CUDA Toolkit and SDK
1) If, for some reason, you have used the CUDA SDK previously, remove all the files from /usr/local/cuda and ~/NVIDIA_GPU_Computing_SDK.
2) Install the toolkit:
$ sudo ./cudatoolkit_3.2.16_linux_32_ubuntu10.04.run
3) Define PATH variables to include the new directory (note: change lib to lib64 for 64-bit installations):
$ export PATH=/usr/local/cuda/bin:$PATH
$ export LD_LIBRARY_PATH=/usr/local/cuda/lib:$LD_LIBRARY_PATH
4) Optional: You many notice that you have to re-type the export lines every time you restart the computer. This can quickly become a real pain. If you want to have Ubuntu (or any Linux variant with Bash) call them on startup, use your favorite editor to open ~/.bashrc and add the following lines (I put them at the end):
# CUSTOM – Add export path for CUDA
export PATH=/usr/local/cuda/bin:$PATH
export LD_LIBRARY_PATH=/usr/local/cuda/lib:$LD_LIBRARY_PATH
5) Install the SDK as a regular user (when asked, install to the default directory):
$ ./gpucomputingsdk_3.2.16_linux.run
Test the Installation
1) Check the version of nvcc:
$ nvcc -V
2) Before you can compile any of the examples, you need a few libraries:
$ sudo apt-get install libglut3-dev
$ sudo apt-get install libxi-dev
$ sudo apt-get install libxmu-dev
3) Create a few links so the code knows where to find the libraries:
$ sudo rm /usr/lib/libGL.so
$ sudo ln -s /usr/lib/libGL.so.1 /usr/lib/libGL.so
4) Compile the examples in the SDK
$ cd ~/NVIDIA_GPU_Computing_SDK/C
$ make
5) Run the device query project to determine if programs can access the GPU:
$ cd ~/NVIDIA_GPU_Computing_SDK/C/bin/linux/release
$ ./deviceQuery
The top line should report the device (or devices) available. Additionally, the bottom line should show a “PASSED” if all the tests passed.
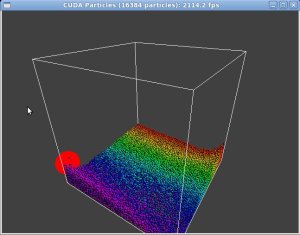
6) Run a compiled example project for fun. We’ll use particles because it’s fun:
$ ./particles
Make sure you get a cool box with falling particles. If so, then everything has been installed correctly and you can now compile and run CUDA code!
Hello World
In the spirit of all good programming assignments, we’ll start off with a simple “Hello World” app that will give a good starting place for making your own programs.
Create a new folder in your CUDA work directory and open a new file:
$ mkdir ~/Documents/CUDA/CUDA_Hello_World
$ cd ~/Documents/CUDA/CUDA_Hello_World
$ nano CUDA_Hello_World.cu
In that file, write out the basic Hello World program:
#include <stdio.h>

__global__ void kernel(void) {
}

int main(void) {
    kernel<<<1,1>>>();
    printf("Hello, World!\n");
    return 0;
}
Save and exit the editor. Then, compile the program:
$ nvcc CUDA_Hello_World.cu -o CUDA_Hello_World
There shouldn’t be any errors. Therefore, you can just run it!
$ ./CUDA_Hello_World
And that’s it! Granted, the GPU doesn’t do a whole lot….but it’s a nice template for making your own programs.
Next time, I’ll cover building and running the Hidden Markov Model engine for CUDA. Stay tuned!


