This tutorial will guide you through setting up WiFi on the A13-OLinuXino-MICRO board and connecting to a WPA-enabled network. Because the MICRO board has no wired Ethernet, we’re going to have to download Debian packages for wpa_supplicant on the host machine and install them on the MICRO.
I am using an Edimax EW-7811Un USB WiFi dongle, which uses the Realtek rtl8192cu chipset. If you have been following along and built Sunxi Debian from scratch with all the defaults, a 8192cu driver was already included in the kernel. If you are using another WiFi module, you might have to install the driver (check with the sunxi-linux kernel configuration file first, though).
References
http://linux-sunxi.org/Wifi
http://ubuntuforums.org/showthread.php?t=263136
http://kerneldriver.wordpress.com/2012/10/21/configuring-wpa2-using-wpa_supplicant-on-the-raspberry-pi/
Install wpa_supplicant
Download the following packages on the host machine (you want the armhf architecture):
– libc-bin 2.13-38
– libc6 2.13-38
– libdbus-1-3
– libnl-3
– libnl-gen-3
– libpcsclite1
– libreadline5
– wpasupplicant 1.0-3
Copy each of the .deb packages to the /home folder on the OLinuXino (/dev/sdX is the location of the SD card).
sudo mount /dev/sdX2 /mnt
sudo cp <package_name> /mnt/home
Boot up the OLinuXino board and install the packages in the exact order listed above. Use the dkpg command to install each package.
cd /home
dpkg -i <package_name>
WiFi Setup
Plug in USB WiFi dongle
ifconfig wlan0 up
iwlist scan
Pick a WiFi AP and write down the SSID. Assuming it’s WPA, you’ll need to know the password for the network. Using the SSID and password for the network, enter in:
wpa_passphrase <SSID> <WIFIPASSWORD>
Copy down the long number that appears after “psk=”. This is the pre-shared key that we will feed to wpa_supplicant.
nano /etc/wpa_supplicant/wpa_supplicant.conf
Copy the following into the config file:
ctrl_interface=/var/run/wpa_supplicant
ctrl_interface_group=0
update_config=1

network={
ssid="<SSID>"
psk=<PSK>
proto=WPA
key_mgmt=WPA-PSK
pairwise=TKIP
group=TKIP
id_str="<NICKNAME>"
}
Where <SSID> is the SSID of the network, <PSK> is the long string of hex numbers from the step above, and <NICKNAME> is a name for the network (I just use <SSID>). Note that the quotes (“) are needed for the ssid and id_str fields, but should be left out of the psk field. Save and exit (ctrl+x, y, <enter>). Now, we need to setup the interfaces file.
nano /etc/network/interfaces
Delete everything in the file and replace it with the following:
auto lo
iface lo inet loopback

#auto eth0
#iface eth0 inet dhcp

allow-hotplug wlan0
iface wlan0 inet manual
wpa-roam /etc/wpa_supplicant/wpa_supplicant.conf
iface default inet dhcp
Notice that we commented out the eth0 lines. The MICRO board does not have a wired Ethernet connection, so we don’t need eth0. If you have one of the other boards with a physical Ethernet jack, feel free to un-comment those lines. Save and exit.
I highly recommend a reboot at this point.
reboot
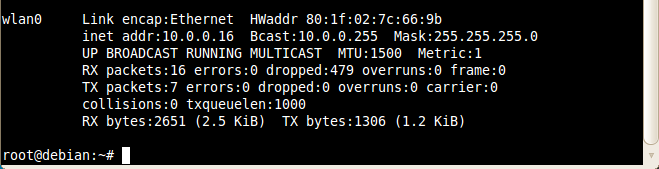
Once you log in, check the status of the WiFi connection.
ifconfig
You should see that the wlan0 interface got an IP address (e.g. 192.168.1.5, 10.0.0.8, etc.). If you need to restart the networking daemon, issue the command:
/etc/init.d/networking restart
If you have errors such as “No DHCPOFFERS received” you might want to try rebooting the board.
If you’re lucky, everything should work smoothly. As an added benefit, when you restart the board, WiFi should automatically connect!
If WiFi doesn’t connect on startup, you can start things manually. More than likely, the USB WiFi adapter wasn’t up in time, but you can just get things running with the following:
ifconfig wlan0 up
wpa_supplicant -B -Dwext -iwlan0 -c/etc/wpa_supplicant/wpa_supplicant.conf
dhclient wlan0