MQTT is one of the most widely used protocols in IoT. It is a lightweight and efficient protocol, especially in unreliable or high-latency networks. It’s perfect for devices that need to push sensor readings or receive commands with minimal overhead. See my previous post to learn more about MQTT.
Mosquitto is a free, open source broker maintained by the Eclipse Foundation. It’s also intentionally lightweight: Mosquitto focuses solely on MQTT message brokering. That means you don’t get dashboards, rule engines, or databases out of the box. You can plug it into any backend system you want and scale up at your own pace.
In this tutorial, I’ll walk you through::
- Installing Mosquitto inside a fresh Debian container
- Enabling username/password authentication
- Generating a self-signed certificate
- Configuring TLS for secure communication
- Testing with Mosquitto clients and MQTTX
This follows exactly the same process shown in the accompanying YouTube video, so feel free to follow along in either format.
Table of Contents
Why Mosquitto?
If you’re developing IoT prototypes, running edge devices, or building your own cloud-ish platform, hosting your own broker gives you full control. However, MQTT itself is not secure by default: everything, including credentials, is sent in plaintext unless you enable TLS.
In a previous blog post, I explained how TLS and certificates work in detail. Here, we’ll assume that background knowledge and focus directly on implementation.
A quick reminder:
- Self-signed certificates are great for testing.
- Do not use them in production unless you fully understand the risks.
- For public deployments, use a trusted CA (e.g. Let’s Encrypt being the most popular free option)
Create a Debian Container
Throughout my Iot With ESP-IDF series, I use a clean Debian environment running inside Docker. This ensures repeatability and keeps your host OS untouched. Pull the image and start an interactive shell:
docker pull debian:stable-20241223-slim
docker run --rm -it \
  -p 1883:1883 -p 8883:8883 \
  debian:stable-20241223-slim /bin/bash
We expose ports 1883 (unencrypted MQTT) and 8883 (MQTT over TLS). Inside the container, update and install a few tools:
apt-get update
apt-get install -y nano procps
Install Mosquitto and the Client Tools
Next, install the broker and the CLI utilities:
apt-get install -y mosquitto mosquitto-clientsWe’ll also configure a username/password for simple authentication:
mosquitto_passwd -c /etc/mosquitto/passwd iotYou’ll be prompted to enter a password. In the video, I used:
- Username: iot
- Password: mosquitto
Fix Permissions for the PID File
Mosquitto needs a writable directory for storing its PID when running as a daemon.
mkdir -p /run/mosquitto
chown mosquitto:mosquitto /run/mosquitto
chmod 755 /run/mosquitto
Configure the Broker (Non-TLS Setup First)
Before we add TLS, let’s make sure Mosquitto works in its simplest secure form: username/password authentication on port 1883. Open the main config:
nano /etc/mosquitto/mosquitto.confAdd:
allow_anonymous false
password_file /etc/mosquitto/passwd
Start the broker:
mosquitto -c /etc/mosquitto/mosquitto.conf -dTest publishing and subscribing
Open a subscriber:
mosquitto_sub -h localhost -p 1883 -t "kitchen/+" -u "iot" -P "mosquitto" &Publish a message:
mosquitto_pub -h localhost -p 1883 \
  -t "kitchen/my-sensor" -m '{"temp":25}' \
  -u "iot" -P "mosquitto"
Try publishing with bad credentials. You should get a connection refusal.
When finished, kill mosquitto:
ps -ax | grep mosquitto
kill <PID>
At this point, MQTT is working but not secure. Any device on the network can sniff traffic. Let’s fix that.
Install OpenSSL and Generate Certificates
Install OpenSSL:
apt-get install -y opensslWe’ll create:
- A private certificate authority (CA)
- A server certificate signed by that CA
This lets the client verify the identity of the server.
Create a CA
cd /etc/mosquitto
mkdir -p ca_certificates
cd ca_certificates
openssl genrsa -out ca.key 4096
openssl req -new -x509 -days 36500 \
  -key ca.key -out ca.crt \
  -subj "/C=US/ST=Colorado/L=Denver/O=custom-ca/CN=custom-ca"
Fix Permissions
You never want world-readable private keys. So, we fix that here:
cd ..
chown -R mosquitto:mosquitto ca_certificates
chmod 755 ca_certificates
chmod 600 ca_certificates/ca.key
chmod 644 ca_certificates/ca.crt
Create the Server Certificate
Now generate the key pair for the broker itself.
mkdir -p certs
cd certs
openssl genrsa -out server.key 4096
Create a certificate signing request (CSR):
openssl req -new -key server.key \
  -out /etc/mosquitto/certs/server.csr \
  -subj "/C=US/ST=Colorado/L=Denver/O=custom-ca/CN=localhost"
A few notes:
- The CN (Common Name) must match the hostname clients use.
- For real deployments, use DNS names or include SAN fields.
- For production, don’t self-sign! Use Let’s Encrypt or another trusted CA.
Now sign the CSR using our CA:
openssl x509 -req -CAcreateserial -days 36500 \
  -in server.csr \
  -CA ../ca_certificates/ca.crt \
  -CAkey ../ca_certificates/ca.key \
  -out server.crt
Set appropriate permissions:
cd ..
chown -R mosquitto:mosquitto certs
chmod 755 certs
chmod 600 certs/server.key
chmod 644 certs/server.crt
Configure Mosquitto With TLS
Open the config again:
nano /etc/mosquitto/mosquitto.confReplace the file with:
pid_file /run/mosquitto/mosquitto.pid
persistence true
persistence_location /var/lib/mosquitto/
log_dest file /var/log/mosquitto/mosquitto.log
include_dir /etc/mosquitto/conf.d
allow_anonymous false
password_file /etc/mosquitto/passwd

# Standard MQTT (unencrypted)
listener 1883 0.0.0.0

# MQTT over TLS
listener 8883 0.0.0.0
cafile /etc/mosquitto/ca_certificates/ca.crt
certfile /etc/mosquitto/certs/server.crt
keyfile /etc/mosquitto/certs/server.key
Restart Mosquitto:
mosquitto -c /etc/mosquitto/mosquitto.conf -dTest TLS Using mosquitto_pub and mosquitto_sub
Subscribe securely:
mosquitto_sub -h localhost -p 8883 \
  --cafile /etc/mosquitto/ca_certificates/ca.crt \
  -t "kitchen/+" \
  -u "iot" -P "mosquitto" &
Publish:
mosquitto_pub -h localhost -p 8883 \
  --cafile /etc/mosquitto/ca_certificates/ca.crt \
  -t "kitchen/my-sensor" -m '{"temp":25}' \
  -u "iot" -P "mosquitto"
If everything is configured correctly, the subscriber will receive the message just as before (except now the entire connection is encrypted).
Test With MQTTX
MQTTX is a nice GUI tool for validating broker behavior. Feel free to install it on your host computer. Make sure that the Mosquitto server is still running in your Docker container.
On your host machine, first copy out the CA certificate from the container:
docker ps
docker cp <CONTAINER_ID>:/etc/mosquitto/ca_certificates/ca.crt ./ca.crt
Open MQTTX and configure a new connection:
- Protocol: mqtts://
- Host: localhost
- Port: 8883
- Username: iot
- Password: mosquitto
- SSL/TLS: enabled
- SSL Secure: enabled

- Certificate: CA or Self signed certificates
This will drop down a new Certificates section. You need to point the CA File field to the ca.crt we generated in the previous step. You can leave Client Certificate File and Client key file blank, as they are used for mutual TLS (mTLS).

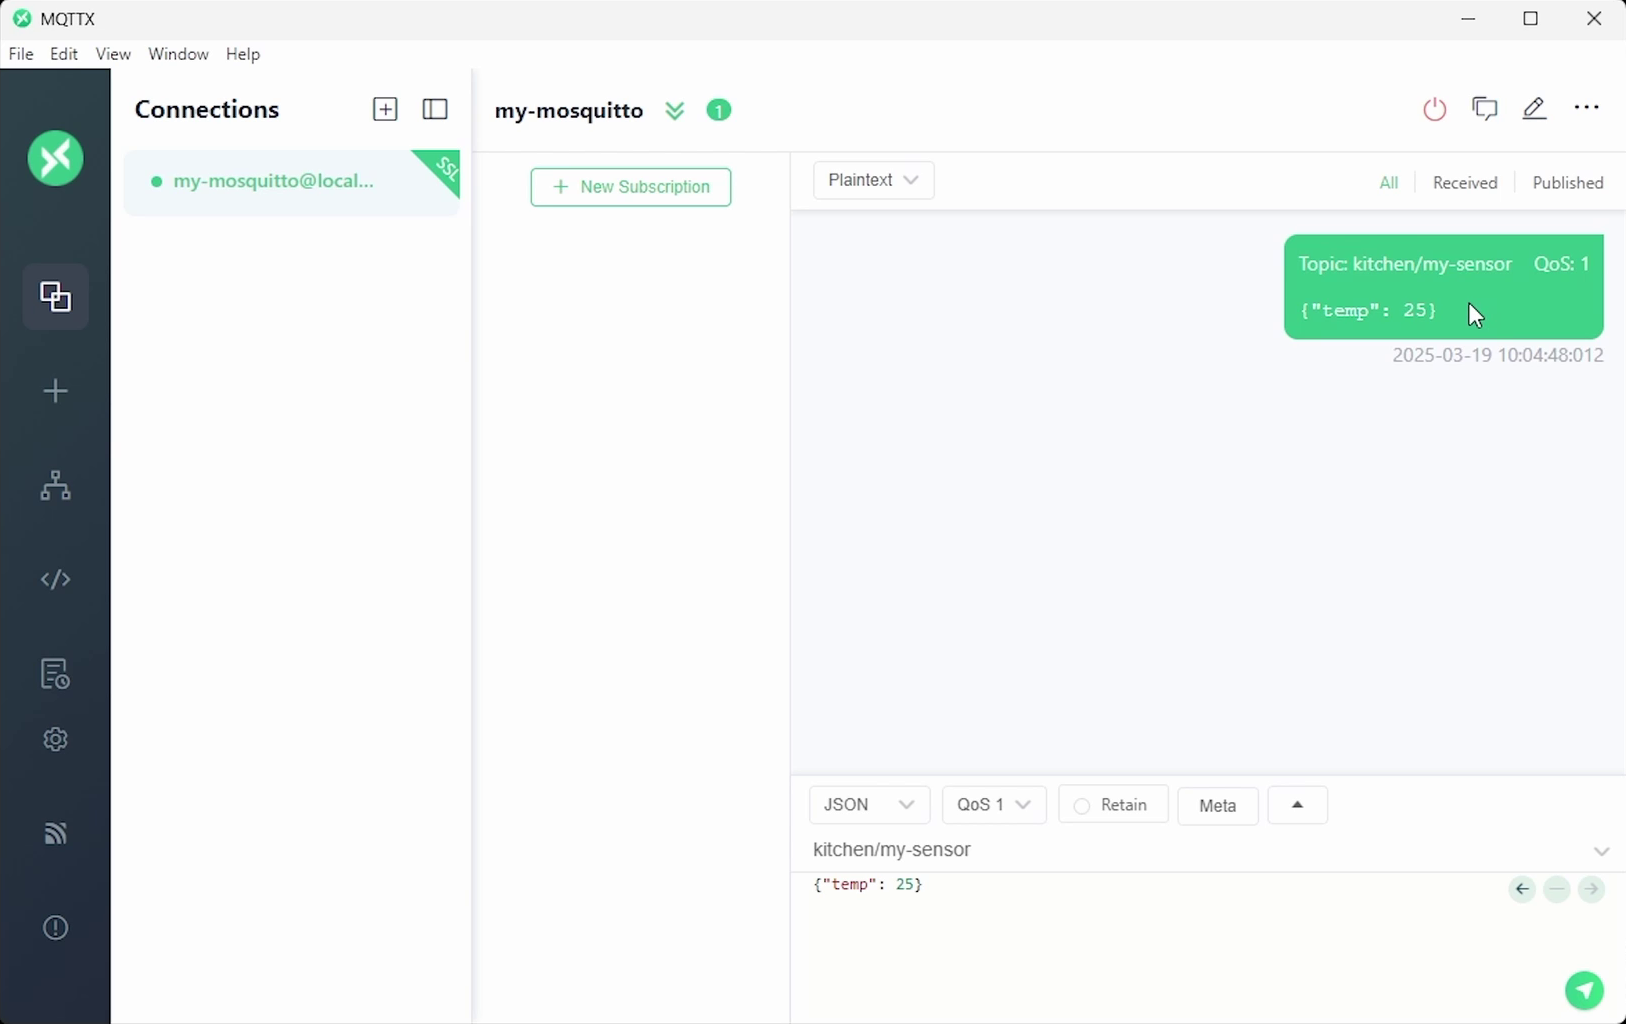
Click connect in the top-right corner. Subscribe to kitchen/my-sensor and publish a message like:
{"temp": 25}You should see it appear instantly.
Security Best Practices
This tutorial uses self-signed certificates, which are perfect for learning and local testing. However, they are not recommended for production! Before deploying anything on a real network, keep the following in mind:
- Use a trusted certificate authority (e.g. Let’s Encrypt)
- Configure a tool to automatically request new certificates before they expire (e.g. certbot)
- Protect private keys
- Only allow encrypted traffic via TLS, close port 1883
- Consider using access-control lists to determine which IoT clients should be able to talk to your broker
- Firewalls, SSH security, automatic patching, and container isolation all help reduce attack surface
Conclusion
Mosquitto is a fantastic entry point into building your own IoT infrastructure. By pairing it with TLS, username/password authentication, and good certificate handling, you give your devices a secure and reliable foundation.
However, Mosquitto is quite barebones. If you need a full-featured broker, consider something like HiveMQ. If you want a full IoT platform (with databases and dashboards), consider starting with ThingsBoard. You can also scale up to full enterprise platforms with e.g. AWS IoT.
I hope this helps you get started with your own MQTT broker and IoT network!
If you would like to see MQTT in action, check out my IoT Firmware Development with ESP32 and ESP-IDF course. In the course, we cover the basics of ESP-IDF, reading from sensors, connecting to the internet via WiFi, posting data via HTTP REST calls, securing connections with TLS, and interacting with MQTT brokers.

Wow — so many steps! You can have it much easier and just deploy our open-source Transitive framework, which includes Mosquitto as the MQTT broker, a reverse proxy for SSL termination, fully automated SSL certificate generation using Let’s Encrypt, and starter code for actually using all this to write your own, full-stack (robot + cloud + web) robotics applications. All you need is Docker and Docker Compose and then run `curl https://transitiverobotics.com/deploy | bash`.
Example code for using this with ROS here: https://github.com/transitiverobotics/transitive/blob/main/capabilities/initializer/files/robot/main.js