In the last part, we added the Phaser framework to a web page and said “hello” on a canvas element. In this part, we create a simple sprite (a ball) and move it around the canvas.
Why a ball? I consider it to be a test of whether gaming is possible on a particular platform. In the simplest sense, reading user input and moving an object (a filled circle, in this case) shows that real time interactivity is possible. This can be on a computer with a keyboard or on an 8×7 LED array with a joystick.
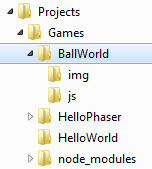
Directory Structure
In your Games directory, create a new folder named BallWorld. In that directory, create two more directories, js and img. This process should look familiar; the only new thing is that we added an img directory, which is where we’ll store our image files.
Draw a Sprite
There are plenty of ways to create 2D graphics for your game. In these tutorials, we will rely on the free GNU Image Manipulation Program (GIMP) to create sprites. Head to GIMP’s download page and download the latest stable version for your operating system. Run the installer, accepting all the defaults.
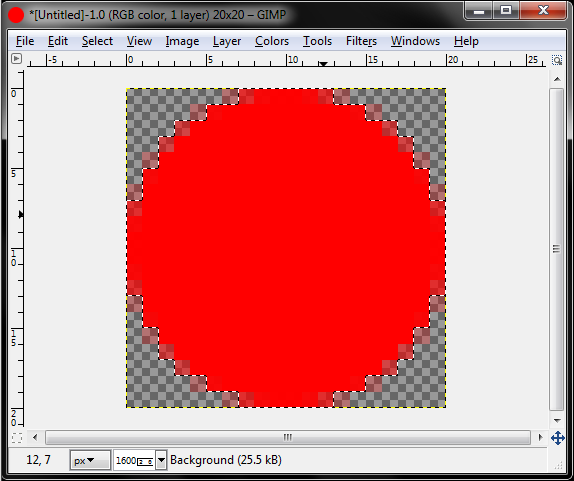
Open up GIMP, and select File > New. You will be presented with a new image dialog. Set the Width to 20 and Height to 20. Click on Advanced Options and set Fill with to Transparency.
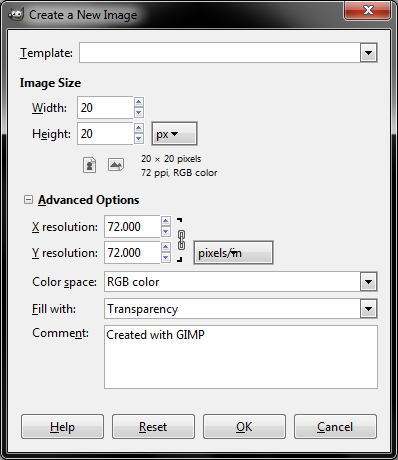
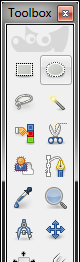
Click OK to create a new image. If you don’t see the Toolbox window, select Windows > Toolbox. From the Toolbox, click on the Ellipse Select Tool.
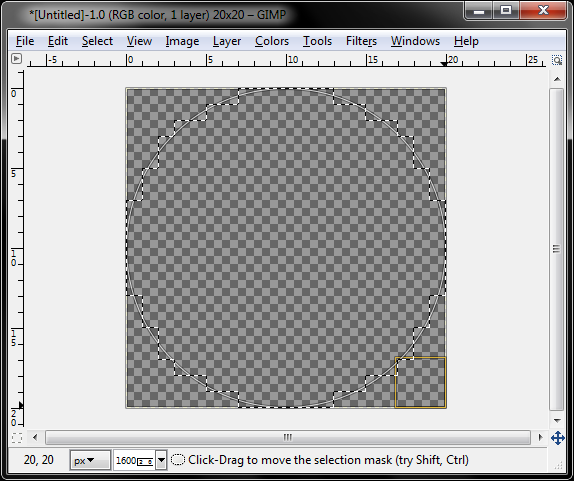
Back in your image window, create a circle by dragging a region from one corner to the opposite corner.
In the Toolbox, select the Bucket Fill Tool.
Click the color swatch at the bottom of the Toolbox to select a new color. In the Change Foreground Color window, choose the color red (e.g. set the HTML notation to ff0000).
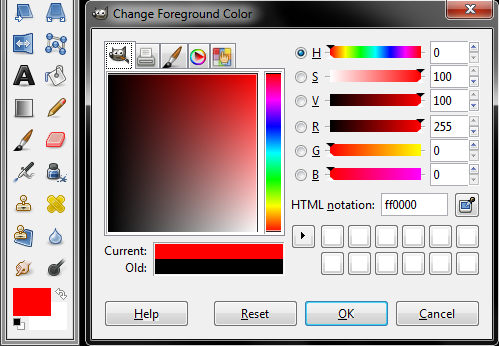
Click OK. Click inside the selection circle in the main image window. The circle will fill in with red, and you will notice that some of the pixels around the edge are semi-transparent. This is a technique called antialiasing, which works to make the edges of an image look smoother.
Select File > Export As… Save the file as ball.png in …/Projects/Games/BallWorld/img. When prompted, keep the default options in the Export Image as PNG window.
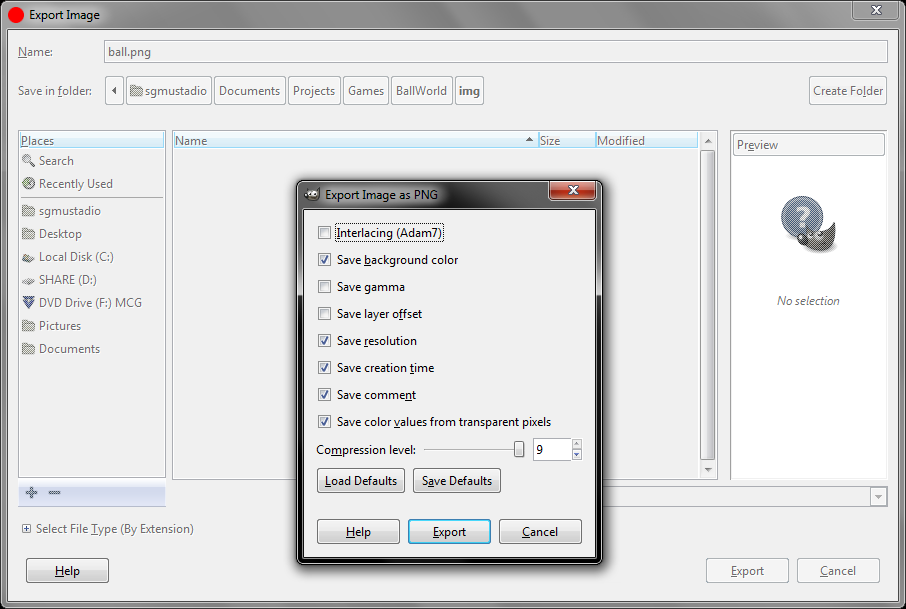
Click Export. And that’s it! Creating a simple ball sprite is relatively easy. Creating great looking sprites, however, is its own art form. If you are feeling particularly lazy, you are welcome to save the sprite from this image:
![]()
Create the Web Page
In an editor, enter the following:
<!DOCTYPE HTML>
<html>
<head>
    <meta charset="utf-8" />
    <title>Ball World</title>
    <style>
        body {
            margin: 0;
            padding: 0;
            background: #000000;
        }
    </style>
    <script src="js/phaser.min.js"></script>
</head>
<body>
    <script src="js/start.js"></script>
</body>
</html>
Save it as index.html in …/Projects/Games/BallWorld. There are a few difference between the HTML in this example and in the last part.
We change the title to <title>Ball World</title> , which simply updates the name of the page. The name is often displayed in the tab on the browser.
We also add
margin: 0;
padding: 0;
to the body’s CSS. This explicitly sets the margin and padding of the body element to nothing. The body element contains all of the page’s main content. In this case, it holds the Phaser canvas, and by explicitly setting the margin and padding, we can later configure the canvas to fill up the browser window (as much as possible while still maintaining the original aspect ratio).
Additionally, we change the page’s background color to black (#000000 ), which works well for many games, as it mimics a black border or bezel.
Finally, we removed the line <div id=”area”></div> as we want Phaser to just append its own div to the page. By letting Phaser control the div, we can more easily set the canvas to fill up the browser window.
Write Some JavaScript
To install Phaser, copy phaser.min.js from the downloaded Phaser ZIP file to …/Projects/Games/BallWorld/js.
We will write the main game code one piece at a time so we can discuss each section. The code in its entirety will be posted at the end (if you just want to scroll down and copy it).
Create a new text file and start by defining a new Phaser game object. Note that we no longer specify the div parameter as we did in Part 2. By leaving the div id parameter as an empty string, Phaser will automatically create a canvas element and append it to the page’s body.
// Create a new Phaser game object with a single state that has 3 functions
var game = new Phaser.Game(500, 500, Phaser.AUTO, '', {
    preload: preload,
    create: create,
    update: update
});
To this, add the preload() , create() , and update() functions. For now, leave the functions empty. This is our single-state Phaser template.
// Create a new Phaser game object with a single state that has 3 functions
var game = new Phaser.Game(500, 500, Phaser.AUTO, '', {
    preload: preload,
    create: create,
    update: update
});

// Called first
function preload() {

}

// Called after preload
function create() {

}

// Called once every frame, ideally 60 times per second
function update() {

}
In the create() function, set the scaleMode and pageAlign properties. By setting scaleMode to SHOW_ALL , the canvas stretches to fill as much of the browser window as possible while maintaining the previously defined proportions (1:1 in this case, as we set the game area to 500×500). By setting pageAlignHorizontally and pageAlignVertically to true , we move the game area to the middle of the page.
Stretching the game area and moving it to the middle works as a good compromise for playing games on desktop and mobile devices, regardless of portrait or landscape orientation.
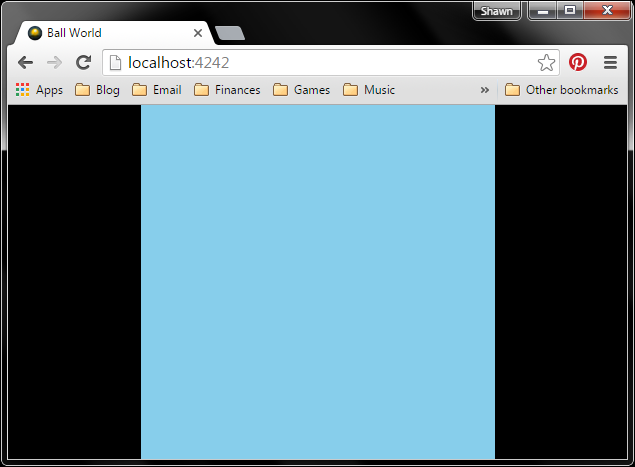
Finally, set the game area’s background color to light blue (#87CEEB ), which contrasts the web page’s black background.
// Create a new Phaser game object with a single state that has 3 functions
var game = new Phaser.Game(500, 500, Phaser.AUTO, '', {
    preload: preload,
    create: create,
    update: update
});

// Called first
function preload() {

}

// Called after preload
function create() {

    // Center game canvas on page
    game.scale.scaleMode = Phaser.ScaleManager.SHOW_ALL;
    game.scale.pageAlignHorizontally = true;
    game.scale.pageAlignVertically = true;

    // Change background color
    game.stage.backgroundColor = '#87CEEB';
}

// Called once every frame, ideally 60 times per second
function update() {

}
At this point, you should be able to run the game with:
node SimpleServer.js BallWorld/
Open up a web page, navigate to http://localhost:4242/, and you should be presented with a blue square that stretches to fill up the height or width of the page (whichever is smaller).
Back in the code, add game.load.image(‘ball’, ‘img/ball.png’) to the preload() function. We use the game object to load the ball.png image (the one that we made in the Draw a Sprite section) and assign it to the asset label ‘ball’ (also known as a key).
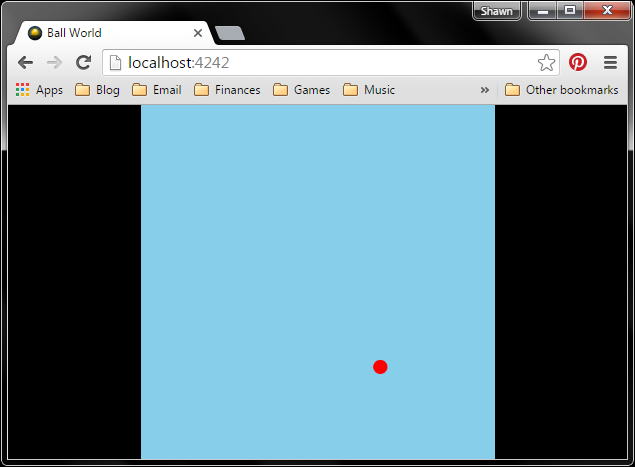
In create() , we add the sprite using game.add.sprite() and position it at the center of the game area, which can be found with game.world.centerX and game.world.centerY . We then set the origin of the sprite, using this.ball.anchor.set(0.5, 0.5) , to the middle of the sprite to make it easier to center.
// Create a new Phaser game object with a single state that has 3 functions
var game = new Phaser.Game(500, 500, Phaser.AUTO, '', {
    preload: preload,
    create: create,
    update: update
});

// Called first
function preload() {

    // Load our image assets
    game.load.image('ball', 'img/ball.png');
}

// Called after preload
function create() {

    // Center game canvas on page
    game.scale.scaleMode = Phaser.ScaleManager.SHOW_ALL;
    game.scale.pageAlignHorizontally = true;
    game.scale.pageAlignVertically = true;

    // Change background color
    game.stage.backgroundColor = '#87CEEB';

    // Add the ball to the middle of the game area
    this.ball = game.add.sprite(game.world.centerX, game.world.centerY, 'ball');
    this.ball.anchor.set(0.5, 0.5);
}

// Called once every frame, ideally 60 times per second
function update() {

}
Note that after adding the sprite to the game, we assign the sprite object to the variable ball. If we just use var ball , the object would only live within the scope of the create() function. In order to access the ball object from other functions, like update() , we attach the object to this , which refers to the game state (created as the fifth parameter in new Phaser.Game(…) . Any time we want to access the ball object within this particular game state, we need to use this.ball .
If you refresh the page (assuming the server is still running), you should see a red circle appear in the middle of the game area.

To move the ball, we need to define a default velocity for the ball (i.e. how many pixels does the ball move each frame) and add some key listeners to the game.
We could hardcode the ball’s velocity, but that’s generally considered bad practice. By keeping all of the game’s parameters in one place, we can tweak the game design without having to hunt down all the hardcoded values. For our purposes, we will define a single global object with the game’s name. This object will hold key/value pairs that set the game’s parameters.
To hold the game’s parameters (we only have 1 right now), create a global object with var BallWorld , and assign it the property velocity: 8 .
In create() , create a keyboard listener using game.input.keyboard.createCursorKeys() and assign it to this.keys (another custom game state property).
In the update() function, we check for specific key presses with this.keys.KEY_NAME.isDown . We can then move the ball’s position using this.ball.x and this.ball.y .
// Global object to store our game parameters
var BallWorld = {
    velocity: 8
};

// Create a new Phaser game object with a single state that has 3 functions
var game = new Phaser.Game(500, 500, Phaser.AUTO, '', {
    preload: preload,
    create: create,
    update: update
});

// Called first
function preload() {

    // Load our image assets
    game.load.image('ball', 'img/ball.png');
}

// Called after preload
function create() {

    // Center game canvas on page
    game.scale.scaleMode = Phaser.ScaleManager.SHOW_ALL;
    game.scale.pageAlignHorizontally = true;
    game.scale.pageAlignVertically = true;

    // Change background color
    game.stage.backgroundColor = '#87CEEB';

    // Add the ball to the middle of the game area
    this.ball = game.add.sprite(game.world.centerX, game.world.centerY, 'ball');
    this.ball.anchor.set(0.5, 0.5);

    // Add key input to the game
    this.keys = game.input.keyboard.createCursorKeys();
}

// Called once every frame, ideally 60 times per second
function update() {

    // Poll the arrow keys to move the ball
    if (this.keys.left.isDown) {
        this.ball.x -= BallWorld.velocity;
    }
    if (this.keys.right.isDown) {
        this.ball.x += BallWorld.velocity;
    }
    if (this.keys.up.isDown) {
        this.ball.y -= BallWorld.velocity;
    }
    if (this.keys.down.isDown) {
        this.ball.y += BallWorld.velocity;
    }
}
Refresh the page again, and use the arrow keys to move the ball.
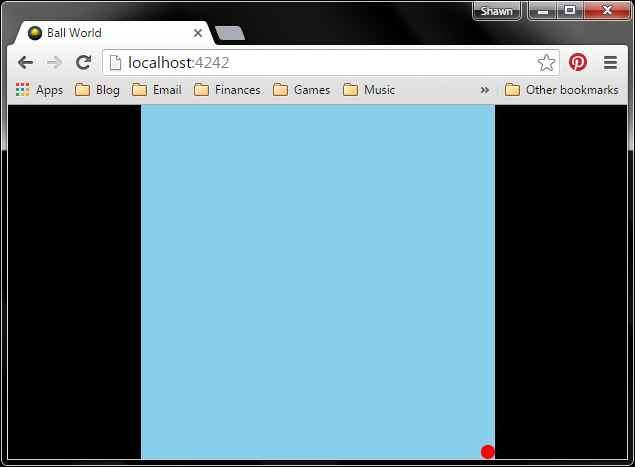
You might notice that you are able to drive the ball past the edges of the game area. This is usually not a desirable behavior, so we can add bounds checking on the ball each frame. This is accomplished by setting the ball’s edges’ x and y coordinates to the bound’s edge should the ball pass the boundary.
In update() , add the following:
// Global object to store our game parameters
var BallWorld = {
    velocity: 8
};

// Create a new Phaser game object with a single state that has 3 functions
var game = new Phaser.Game(500, 500, Phaser.AUTO, '', {
    preload: preload,
    create: create,
    update: update
});

// Called first
function preload() {

    // Load our image assets
    game.load.image('ball', 'img/ball.png');
}

// Called after preload
function create() {

    // Center game canvas on page
    game.scale.scaleMode = Phaser.ScaleManager.SHOW_ALL;
    game.scale.pageAlignHorizontally = true;
    game.scale.pageAlignVertically = true;

    // Change background color
    game.stage.backgroundColor = '#87CEEB';

    // Add the ball to the middle of the game area
    this.ball = game.add.sprite(game.world.centerX, game.world.centerY, 'ball');
    this.ball.anchor.set(0.5, 0.5);

    // Add key input to the game
    this.keys = game.input.keyboard.createCursorKeys();
}

// Called once every frame, ideally 60 times per second
function update() {

    // Poll the arrow keys to move the ball
    if (this.keys.left.isDown) {
        this.ball.x -= BallWorld.velocity;
    }
    if (this.keys.right.isDown) {
        this.ball.x += BallWorld.velocity;
    }
    if (this.keys.up.isDown) {
        this.ball.y -= BallWorld.velocity;
    }
    if (this.keys.down.isDown) {
        this.ball.y += BallWorld.velocity;
    }

    // Prevent ball from escaping outside the stage's boundaries
    var halfWidth = this.ball.width / 2;
    var halfHeight = this.ball.height / 2;
    if ((this.ball.x - halfWidth) < 0) {
        this.ball.x = halfWidth;
    }
    if ((this.ball.x + halfWidth) > game.width) {
        this.ball.x = game.width - halfWidth;
    }
    if ((this.ball.y - halfHeight) < 0) {
        this.ball.y = halfHeight;
    }
    if ((this.ball.y + halfHeight) > game.height) {
        this.ball.y = game.height - halfHeight;
    }
}
Try refreshing the page one more time, and you should notice that the ball is unable to move outside the game’s boundaries.
Conclusion
At this point, you should have the basics for drawing sprites and moving them around the screen. While this is a seemingly simple step, it is an important one for creating the basics of arcade and sprite-based games.
This was very usefull! Thank you!
Glad to hear it helped!
holaa!! estoy realizando un proyecto de un juego en phaser con node.js y mongo db, la idea es crearun juego que registre usuarios y guarde la puntuacion de dicho juego, algun tutorial para guardar los datos de phaser en mongo db?
Sorry, I am not familiar with Mongo. If I do learn it, though, I will definitely post a tutorial.
How to make the background alpha 0 / transparent?
game.stage.backgroundColor = “none”;
game.stage.backgroundColor = “false”;
opacity:0;
transparent: true,
It’s been a while since I’ve used Phaser, so my knowledge is a bit rusty. It looks like you can set a transparent background by changing the sixth parameter in the new Phaser.Game() declaration to “true.” Take a look at the “transparent” parameter in the docs here: https://phaser.io/docs/2.6.2/Phaser.Game.html.
thanks for your post.
This was very usefull for me :).
can you give me references to understand about drawing sprite and also about movement.
especially for parts :
1. // Add the ball to the middle of the game area
2. // Poll the arrow keys to move the ball
3. // Prevent ball from escaping outside the stage’s boundaries
I’m glad it helped! Please keep in mind that this tutorial is 3 years old, so many things have likely changed, and I have not kept up with Phaser’s development. The Phaser API docs (https://photonstorm.github.io/phaser3-docs/) is likely your best bet for that kind of information. Specifically, you’ll want to look at the input objects and GameObject.sprite.