Key listener in Phaser

Getting Started with Phaser Part 3: Sprites and Movement

In the last part, we added the Phaser framework to a web page and said “hello” on a canvas element. In this part, we create a simple sprite (a ball) and move it around the canvas.

Why a ball? I consider it to be a test of whether gaming is possible on a particular platform. In the simplest sense, reading user input and moving an object (a filled circle, in this case) shows that real time interactivity is possible. This can be on a computer with a keyboard or on an 8×7 LED array with a joystick.

Directory Structure

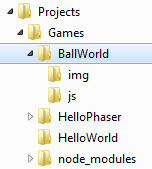
In your Games directory, create a new folder named BallWorld. In that directory, create two more directories, js and img. This process should look familiar; the only new thing is that we added an img directory, which is where we’ll store our image files.

Directory structure for BallWorld

Draw a Sprite

There are plenty of ways to create 2D graphics for your game. In these tutorials, we will rely on the free GNU Image Manipulation Program (GIMP) to create sprites. Head to GIMP’s download page and download the latest stable version for your operating system. Run the installer, accepting all the defaults.

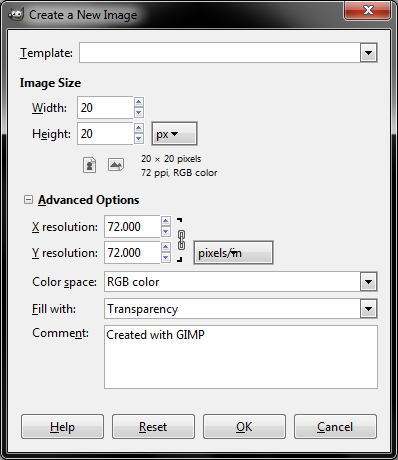
Open up GIMP, and select File > New. You will be presented with a new image dialog. Set the Width to 20 and Height to 20. Click on Advanced Options and set Fill with to Transparency.

Creating a new GIMP image

Click OK to create a new image. If you don’t see the Toolbox window, select WindowsToolbox. From the Toolbox, click on the Ellipse Select Tool.

Ellipse select tool in GIMP

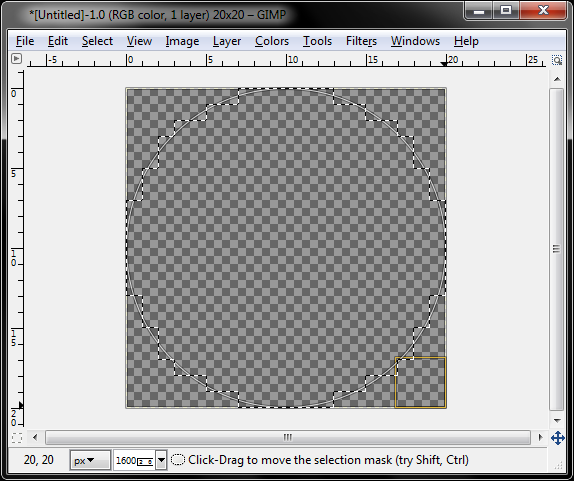
Back in your image window, create a circle by dragging a region from one corner to the opposite corner.

Making a circle in GIMP

In the Toolbox, select the Bucket Fill Tool.

GIMP Bucket Fill Tool

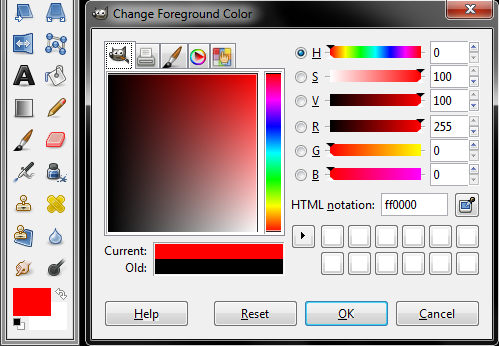
Click the color swatch at the bottom of the Toolbox to select a new color. In the Change Foreground Color window, choose the color red (e.g. set the HTML notation to ff0000).

GIMP color selector

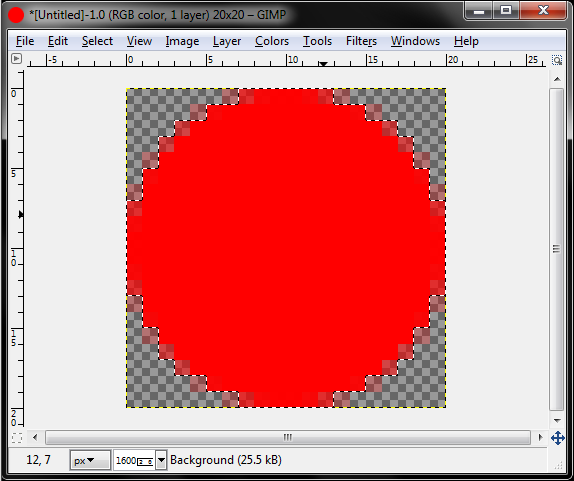
Click OK. Click inside the selection circle in the main image window. The circle will fill in with red, and you will notice that some of the pixels around the edge are semi-transparent. This is a technique called antialiasing, which works to make the edges of an image look smoother.

Filled circle

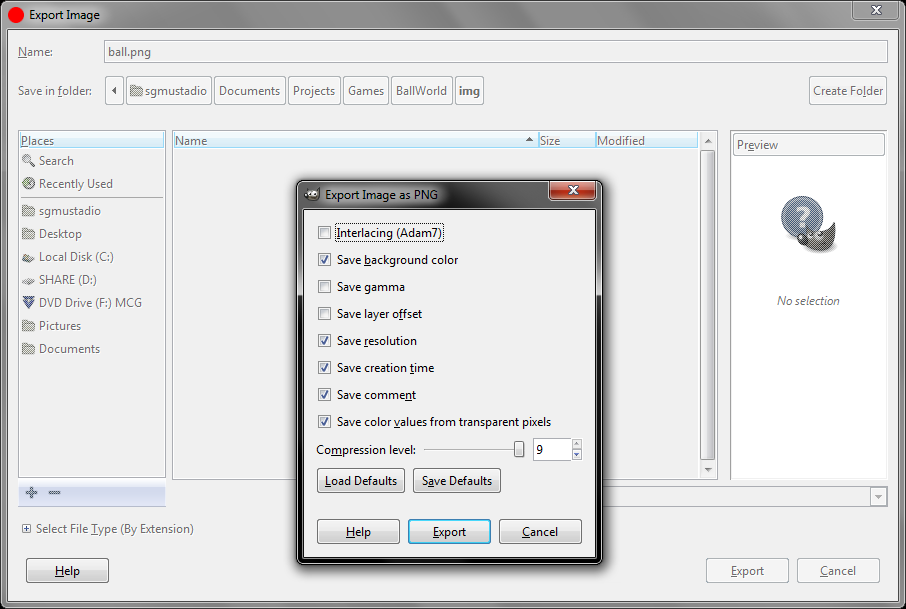
Select File Export As… Save the file as ball.png in …/Projects/Games/BallWorld/img. When prompted, keep the default options in the Export Image as PNG window.

GIMP export image

Click Export. And that’s it! Creating a simple ball sprite is relatively easy. Creating great looking sprites, however, is its own art form. If you are feeling particularly lazy, you are welcome to save the sprite from this image:

Ball sprite

Create the Web Page

In an editor, enter the following:

<!DOCTYPE HTML>
<html>
<head>
    <meta charset="utf-8" />
    <title>Ball World</title>
    <style>
        body {
            margin: 0;
            padding: 0;
            background: #000000;
        }
    </style>
    <script src="js/phaser.min.js"></script>
</head>
<body>
    <script src="js/start.js"></script>
</body>
</html>

Save it as index.html in …/Projects/Games/BallWorld. There are a few difference between the HTML in this example and in the last part.

We change the title to <title>Ball World</title> , which simply updates the name of the page. The name is often displayed in the tab on the browser.

We also add

margin: 0;
padding: 0;

to the body’s CSS. This explicitly sets the margin and padding of the body element to nothing. The body element contains all of the page’s main content. In this case, it holds the Phaser canvas, and by explicitly setting the margin and padding, we can later configure the canvas to fill up the browser window (as much as possible while still maintaining the original aspect ratio).

Additionally, we change the page’s background color to black (#000000 ), which works well for many games, as it mimics a black border or bezel.

Finally, we removed the line <div id=”area”></div> as we want Phaser to just append its own div to the page. By letting Phaser control the div, we can more easily set the canvas to fill up the browser window.

Write Some JavaScript

To install Phaser, copy phaser.min.js from the downloaded Phaser ZIP file to …/Projects/Games/BallWorld/js.

We will write the main game code one piece at a time so we can discuss each section. The code in its entirety will be posted at the end (if you just want to scroll down and copy it).

Create a new text file and start by defining a new Phaser game object. Note that we no longer specify the div parameter as we did in Part 2. By leaving the div id parameter as an empty string, Phaser will automatically create a canvas element and append it to the page’s body.

// Create a new Phaser game object with a single state that has 3 functions
var game = new Phaser.Game(500, 500, Phaser.AUTO, '', {
    preload: preload,
    create: create,
    update: update
});

To this, add the preload() , create() , and update()  functions. For now, leave the functions empty. This is our single-state Phaser template.

// Create a new Phaser game object with a single state that has 3 functions
var game = new Phaser.Game(500, 500, Phaser.AUTO, '', {
    preload: preload,
    create: create,
    update: update
});

// Called first
function preload() {

}

// Called after preload
function create() {

}

// Called once every frame, ideally 60 times per second
function update() {

}

In the create()  function, set the scaleMode  and pageAlign  properties. By setting scaleMode  to SHOW_ALL , the canvas stretches to fill as much of the browser window as possible while maintaining the previously defined proportions (1:1 in this case, as we set the game area to 500×500). By setting pageAlignHorizontally  and pageAlignVertically  to true , we move the game area to the middle of the page.

Stretching the game area and moving it to the middle works as a good compromise for playing games on desktop and mobile devices, regardless of portrait or landscape orientation.

Finally, set the game area’s background color to light blue (#87CEEB ), which contrasts the web page’s black background.

// Create a new Phaser game object with a single state that has 3 functions
var game = new Phaser.Game(500, 500, Phaser.AUTO, '', {
    preload: preload,
    create: create,
    update: update
});

// Called first
function preload() {

}

// Called after preload
function create() {

    // Center game canvas on page
    game.scale.scaleMode = Phaser.ScaleManager.SHOW_ALL;
    game.scale.pageAlignHorizontally = true;
    game.scale.pageAlignVertically = true;
    
    // Change background color
    game.stage.backgroundColor = '#87CEEB';
}

// Called once every frame, ideally 60 times per second
function update() {

}

At this point, you should be able to run the game with:

node SimpleServer.js BallWorld/

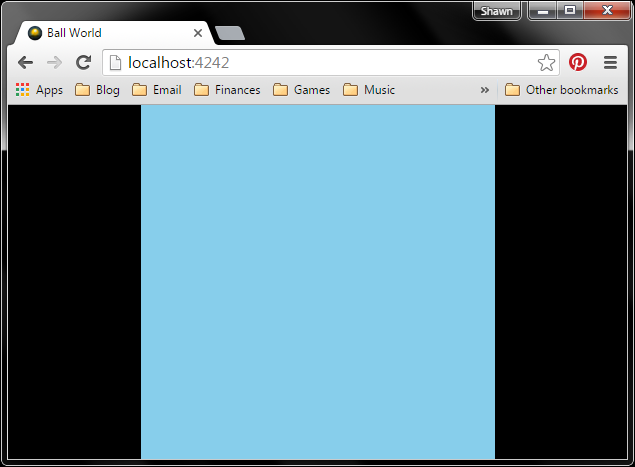
Open up a web page, navigate to http://localhost:4242/, and you should be presented with a blue square that stretches to fill up the height or width of the page (whichever is smaller).

Blue background in Phaser

Back in the code, add game.load.image(‘ball’, ‘img/ball.png’) to the preload()  function. We use the game object to load the ball.png image (the one that we made in the Draw a Sprite section) and assign it to the asset label ‘ball’  (also known as a key).

In create() , we add the sprite using game.add.sprite()  and position it at the center of the game area, which can be found with game.world.centerX  and game.world.centerY . We then set the origin of the sprite, using this.ball.anchor.set(0.5, 0.5) , to the middle of the sprite to make it easier to center.

// Create a new Phaser game object with a single state that has 3 functions
var game = new Phaser.Game(500, 500, Phaser.AUTO, '', {
    preload: preload,
    create: create,
    update: update
});

// Called first
function preload() {

    // Load our image assets
    game.load.image('ball', 'img/ball.png');
}

// Called after preload
function create() {

    // Center game canvas on page
    game.scale.scaleMode = Phaser.ScaleManager.SHOW_ALL;
    game.scale.pageAlignHorizontally = true;
    game.scale.pageAlignVertically = true;
    
    // Change background color
    game.stage.backgroundColor = '#87CEEB';

    // Add the ball to the middle of the game area
    this.ball = game.add.sprite(game.world.centerX, game.world.centerY, 'ball');
    this.ball.anchor.set(0.5, 0.5);
}

// Called once every frame, ideally 60 times per second
function update() {

}

Note that after adding the sprite to the game, we assign the sprite object to the variable ball. If we just use var ball , the object would only live within the scope of the create()  function. In order to access the ball object from other functions, like update() , we attach the object to this , which refers to the game state (created as the fifth parameter in new Phaser.Game(…) . Any time we want to access the ball object within this particular game state, we need to use this.ball .

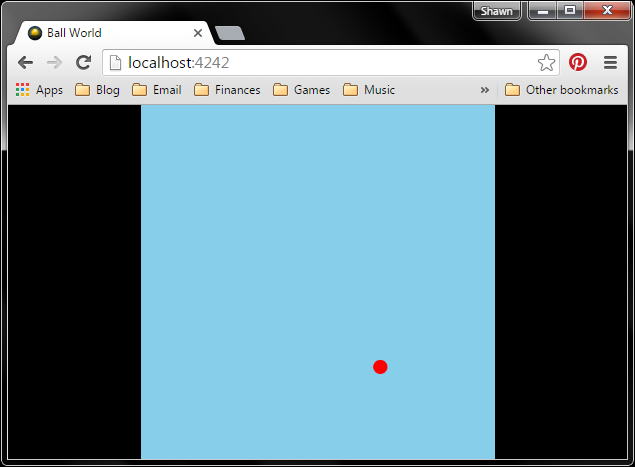
If you refresh the page (assuming the server is still running), you should see a red circle appear in the middle of the game area.

Loading a sprite in Phaser

To move the ball, we need to define a default velocity for the ball (i.e. how many pixels does the ball move each frame) and add some key listeners to the game.

We could hardcode the ball’s velocity, but that’s generally considered bad practice. By keeping all of the game’s parameters in one place, we can tweak the game design without having to hunt down all the hardcoded values. For our purposes, we will define a single global object with the game’s name. This object will hold key/value pairs that set the game’s parameters.

To hold the game’s parameters (we only have 1 right now), create a global object with var BallWorld , and assign it the property velocity: 8 .

In create() , create a keyboard listener using game.input.keyboard.createCursorKeys()  and assign it to this.keys  (another custom game state property).

In the update()  function, we check for specific key presses with this.keys.KEY_NAME.isDown . We can then move the ball’s position using this.ball.x  and this.ball.y .

// Global object to store our game parameters
var BallWorld = {
    velocity: 8
};

// Create a new Phaser game object with a single state that has 3 functions
var game = new Phaser.Game(500, 500, Phaser.AUTO, '', {
    preload: preload,
    create: create,
    update: update
});

// Called first
function preload() {

    // Load our image assets
    game.load.image('ball', 'img/ball.png');
}

// Called after preload
function create() {

    // Center game canvas on page
    game.scale.scaleMode = Phaser.ScaleManager.SHOW_ALL;
    game.scale.pageAlignHorizontally = true;
    game.scale.pageAlignVertically = true;
    
    // Change background color
    game.stage.backgroundColor = '#87CEEB';

    // Add the ball to the middle of the game area
    this.ball = game.add.sprite(game.world.centerX, game.world.centerY, 'ball');
    this.ball.anchor.set(0.5, 0.5);

    // Add key input to the game
    this.keys = game.input.keyboard.createCursorKeys();
}

// Called once every frame, ideally 60 times per second
function update() {

    // Poll the arrow keys to move the ball
    if (this.keys.left.isDown) {
        this.ball.x -= BallWorld.velocity;
    }
    if (this.keys.right.isDown) {
        this.ball.x += BallWorld.velocity;
    }
    if (this.keys.up.isDown) {
        this.ball.y -= BallWorld.velocity;
    }
    if (this.keys.down.isDown) {
        this.ball.y += BallWorld.velocity;
    }
}

Refresh the page again, and use the arrow keys to move the ball.

Key listener in Phaser

You might notice that you are able to drive the ball past the edges of the game area. This is usually not a desirable behavior, so we can add bounds checking on the ball each frame. This is accomplished by setting the ball’s edges’ x and y coordinates to the bound’s edge should the ball pass the boundary.

In update() , add the following:

// Global object to store our game parameters
var BallWorld = {
    velocity: 8
};

// Create a new Phaser game object with a single state that has 3 functions
var game = new Phaser.Game(500, 500, Phaser.AUTO, '', {
    preload: preload,
    create: create,
    update: update
});

// Called first
function preload() {

    // Load our image assets
    game.load.image('ball', 'img/ball.png');
}

// Called after preload
function create() {

    // Center game canvas on page
    game.scale.scaleMode = Phaser.ScaleManager.SHOW_ALL;
    game.scale.pageAlignHorizontally = true;
    game.scale.pageAlignVertically = true;
    
    // Change background color
    game.stage.backgroundColor = '#87CEEB';

    // Add the ball to the middle of the game area
    this.ball = game.add.sprite(game.world.centerX, game.world.centerY, 'ball');
    this.ball.anchor.set(0.5, 0.5);

    // Add key input to the game
    this.keys = game.input.keyboard.createCursorKeys();
}

// Called once every frame, ideally 60 times per second
function update() {

    // Poll the arrow keys to move the ball
    if (this.keys.left.isDown) {
        this.ball.x -= BallWorld.velocity;
    }
    if (this.keys.right.isDown) {
        this.ball.x += BallWorld.velocity;
    }
    if (this.keys.up.isDown) {
        this.ball.y -= BallWorld.velocity;
    }
    if (this.keys.down.isDown) {
        this.ball.y += BallWorld.velocity;
    }

    // Prevent ball from escaping outside the stage's boundaries
    var halfWidth = this.ball.width / 2;
    var halfHeight = this.ball.height / 2;
    if ((this.ball.x - halfWidth) < 0) {
        this.ball.x = halfWidth;
    }
    if ((this.ball.x + halfWidth) > game.width) {
        this.ball.x = game.width - halfWidth;
    }
    if ((this.ball.y - halfHeight) < 0) {
        this.ball.y = halfHeight;
    }
    if ((this.ball.y + halfHeight) > game.height) {
        this.ball.y = game.height - halfHeight;
    }
}

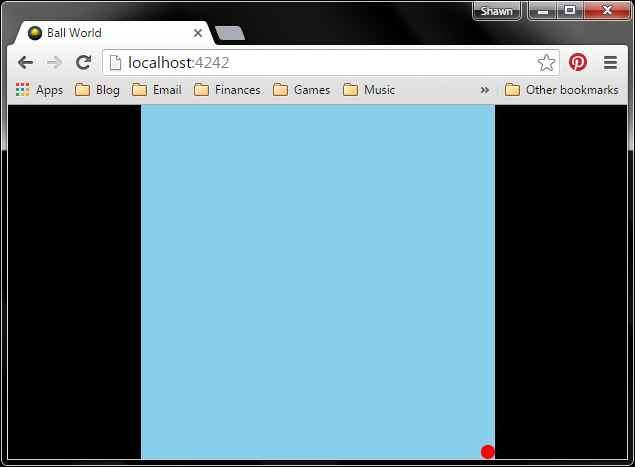
Try refreshing the page one more time, and you should notice that the ball is unable to move outside the game’s boundaries.

Checking game boundaries with Phaser

Conclusion

At this point, you should have the basics for drawing sprites and moving them around the screen. While this is a seemingly simple step, it is an important one for creating the basics of arcade and sprite-based games.



My first Phaser game!

Getting Started with Phaser Part 2: Drawing Text

In the first part, we created a simple web server and page. We didn’t even touch Phaser! However, that is about to change. In the second part of this series, we create a game area in an HTML div and draw some simple text on it using Phaser.

Directory Structure

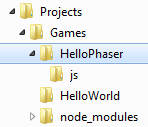
In your Games directory, create another folder named HelloPhaser. Much like HelloWorld in the previous example, this will house our HTML and JavaScript files for serving the web page and game. Within HelloPhaser, create directory named js. This folder will hold all of our JavaScript.

Directory structure for HelloPhaser

Install Phaser

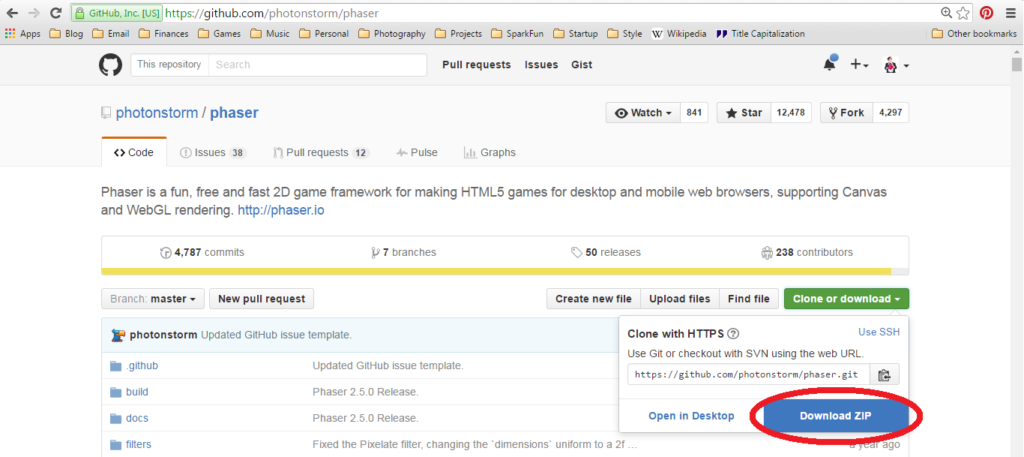
To install Phaser, we are going to download the library and simply copy it to our js directory. Start by navigating to Phaser’s GitHub page, and click Clone or download followed by Download ZIP.

Download the Phaser library

Once downloaded, unzip the file. Find the unzipped directory, and navigate to phaser-master/phaser-master/build. There, copy the file phaser.min.js. Go back to your Projects directory and paste the file in Games/HelloPhaser/js.

Create the Web Page

Create a new text document and copy in the following (note: I recommend manually typing each line so you get a feel for writing HTML and JavaScript. I’ll talk about what the code does after the code block).

<!DOCTYPE HTML>
<html>
<head>
    <meta charset="utf-8" />
    <title>Hello</title>
    <style>
        body {
            background: #FFFFFF;
        }
    </style>
    <script src="js/phaser.min.js"></script>
</head>
<body>
    <div id="area"></div>
    <script src="js/start.js"></script>
</body>
</html>

Save the document as index.html in Games/HelloPhaser.

This file acts as our basic web page. Its primary purpose is to set up a game area (div) on the page and load in JavaScript. The JavaScript handles the bulk of the drawing in the game area.

In the <head> section, we use some simple CSS via the background property to set the web page’s background color to white (#FFFFFF). See this table for colors and their hexadecimal codes. We also load in the Phaser library using the <script> tag.

In <body>, we define a <div> and name it “area.” We will reference this div later in our JavaScript code and draw Phaser objects in it. Finally, we load in another script, named “start.js,” which is where our main game code will live. We have not written start.js yet; that comes next.

Write Some JavaScript

Create a file and copy in:

// Create a new Phaser game object with a single state that has 3 functions
var game = new Phaser.Game(500, 500, Phaser.AUTO, 'area', {
    preload: preload,
    create: create,
    update: update
});

// Called first
function preload() {
}

// Called after preload
function create() {
    
    // Create some text in the middle of the game area
    var helloText = game.add.text(250, 250, 'Hello, Phaser!', { 
        fontSize: '32px', 
        fill: '#00F' 
    });
    helloText.anchor.set(0.5, 0.5);
}

// Called once every frame, ideally 60 times per second
function update() {
}

Save the file as start.js in Games/HelloPhaser/js.

At this point, you should have index.html in your page’s directory (HelloPhaser). Under the js directory in HelloPhaser, you should have phaser.min.js and start.js.

Files in HelloPhaser

Let’s look at what the code is doing. In the very first line (after the //… comment), we create a Phaser.Game  object and assign it to the the variable game . Phaser.Game is predefined in the Phaser library (documentation on it can be found here), and it is the core of the Phaser framework.

The first two parameters for Game  define the resolution of the game area. In this case, we set it to 500 pixels wide and 500 pixels high. I’m a big fan of square game areas, as it works well on desktop and mobile devices without needing to skew the graphics when switching between portrait and landscape modes. Feel free to change it for your application, though.

The next parameter, Phaser.AUTO, sets the renderer for the game area. As of the time of this blog post, there are three types available:

  • Phaser.CANVAS – Canvas element for drawing 2D graphics. Canvas is supported on most modern browsers.
  • Phaser.WEBGL – Use hardware-accelerated graphics to draw on the canvas. Some browsers support WebGL, and the user’s device must have the requisite hardware. 3D graphics are possible with WebGL.
  • Phaser.HEADLESS – Do not use any renderer. This is useful when you don’t want any graphics (such as running a game server).

In general, Phaser.AUTO is advisable, as it initially tries to use WEBGL and if the browser does not support it, the renderer reverts back to CANVAS.

The fourth parameter, ‘area’, tells the Game object where to draw. In this case, it is creating a canvas inside the div named ‘area’ (remember how we created a <div> element with the id “area” in our HTML?). If you leave this parameter blank, Phaser will simply append the Game object to the page.

The fifth parameter is the initial game state. If this parameter is set, Phaser will immediately start running the functions in this state. Note that Phaser supports multiple states in a game, and these can be things like start screen, game play, game over screen, menus, etc. For now, we will only use one state. Examining this state object, we see:

{
    preload: preload,
    create: create,
    update: update
}

Phaser states have a number of reserved names for functions. We are using preload , create , and update . We assign the functions (similarly named preload, create, and update) to the specially named keys, which are defined by Phaser.

The state will first run preload() , which is generally where assets like sprites and sounds are loaded. Since we don’t have any assets, the function is left blank. The function is still explicitly written here for the sake of clarity; we will add code to it later.

Second, the state will automatically run the create()  function once the preload has finished. This is where you can draw sprites, text, add key handlers, and so on. We add a single line of text, “Hello, Phaser!” to the game area, set at (250, 250), which is the middle of the area. We set the text’s anchor to (0.5, 0.5), which changes the origin point for the text to its center. For anchors, (0, 0) is the top left, and (1, 1) is the bottom right.

Finally, we define the update()  function. This function is automatically called every frame, and it is where we would put things like input polling, checking for collisions, etc. Because our “game” is just static text right now, there is no need to have anything happen in the update function.

Run It!

Open up a command prompt, navigate to your Games directory, and run the server (note that we need to specify HelloPhaser as our web page directory):

cd <PATH_TO_PROJECTS>/Games
node SimpleServer.js HelloPhaser/

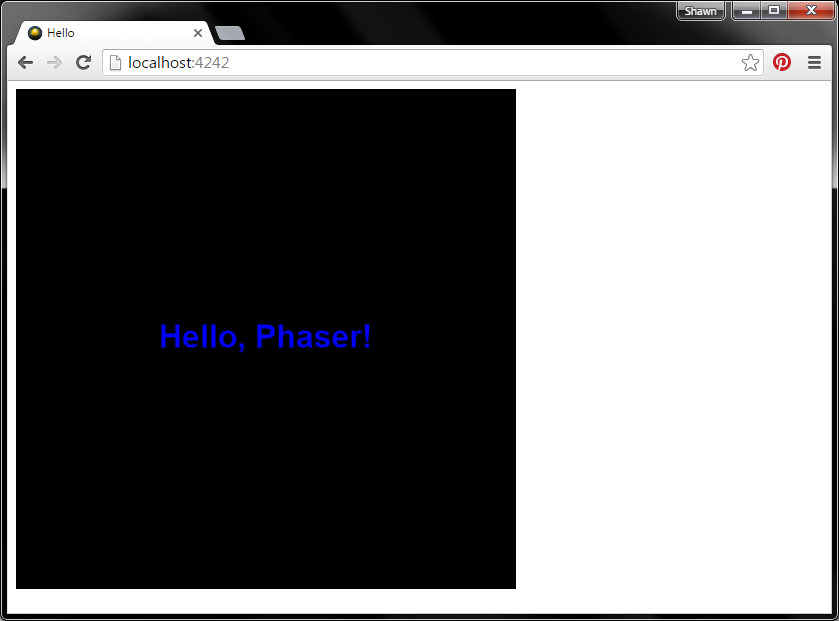
Open up a web browser and navigate to http://localhost:4242. You should see your game (albeit a rather boring game):

My first Phaser game!

You can’t do much with this game, as we have not added any type of input handling or graphics updating. That will come next.

Conclusion

While it was not much of a game, we did use the Phaser framework to create some text in a canvas element, which is a huge step! This template (index.html, phaser.min.js, and start.js) will form the basis for future tutorials. You can simply copy phaser.min.js into your other games, although I recommend checking Phaser’s GitHub page for updates regularly.

If you are new to JavaScript, I highly recommend working through some chapters in the book Eloquent JavaScript (it is the book I used to teach myself JavaScript). The book is available online for free as well as in paperback copy on Amazon.

Continue to Part 3 to learn how to create sprites and add movement with key presses.

Phaser logo

Getting Started with Phaser Part 1: Web Server

As I learn to use the Phaser framework to make simple browser-based games, I figured I would chronicle my adventures and hopefully help others out.

“Why a web web server?” As it turns out, when most browsers run a page as a local file, it locks down access to many other files, which we need for our games. To read more about this, see this article.

To properly serve these files, we can use any number of existing web server software, but we will write a simple one using the Express framework in Node.js. In the future, we can modify this simple server to receive information back from our game to do things like control hardware and *gasp* make multiplayer games.

Install Node.js

Navigate to the Node.js download page and choose the installer for your operating system. Run it, and accept all the defaults to install Node.js on your computer.

If you are using Linux, most package managers can install it for your. For Debian, try apt-get install nodejs npm . For other distros, see this page.

If you are weird like me and enjoy the Linux command line but work in Windows, I highly recommend installing Git Bash through the Windows git installer. We’ll need to use git later, as GitHub allows us to host our projects for free. All of my command line screenshots will be from Git Bash.

Install a Text Editor

For these simple programs, we’ll use a basic text editor to write our code. If you haven’t already, install the text editor of your choice. You can use Notepad, but I’ll make a few recommendations for programming-focused editors:

Directory Structure

Create a folder named Games in a place where you like to keep your projects (e.g. My Documents/Projects). In Games, create another folder named HelloWorld.

Directory structure for our game server

The goal is to create a web server that lives in Games. Whenever we want to test a game, we run the server with Node.js and pass it the folder (as an argument) of the desired web site (e.g. “HelloWorld”).

A web site, in a practical sense, is just a collection of files on a computer that get served to a client upon request. For us, each project folder under Games will be its own site, and we just point our simple server to that folder in order to host the site.

Install Express.js

Express.js is a web application framework made for doing, well, lots of web stuff in Node.js. For our purposes, we are going to use it to make a simple web server that just serves files when asked (via HTTP requests). We could write our own server using the http module, but Express.js just makes things easier.

Open up a command prompt (e.g. Git Bash), navigate to your Games directory, and install Express.

cd <PATH_TO_PROJECTS>/Games
npm install express

You might notice that this creates a directory named node_modules in Games. This is where Node.js modules, like Express, are stored.

When you execute node and it attempts to load a module (i.e. through the require() instruction), Node.js first looks in the current directory for a folder named node_modules. If a module with the name in require() is not found, it begins to work its way up directories looking for node_modules. If the module is not found at all, the require() command will throw an error, and your program will fail.

Write the Server Code

Open up your text editor and copy in the code:

/**
 * Simple web server based on 
 * http://expressjs.com/en/starter/hello-world.html
 *
 * Prerequisites:
 *  - Node
 *  - Express (npm install express)
 * 
 * To use, save as a file (e.g. SimpleServer.js) and run with:
 *  node SimpleServer.js /PATH/TO/WWW/
 */
 
// Parameters
var sitePath = process.argv[2] || ".";
var port = 4242;

// Libraries
var express = require('express');
var app = express();

// Request logging
app.use(function(req, res, next) {
    console.log(req.url);
    next();
});

// Start server
console.log(sitePath);
console.log("Starting server in: " + __dirname + '/' + sitePath);
app.use(express.static(__dirname + '/' + sitePath));
app.listen(port, function() { 
    console.log("Server running at: http://localhost:" + port)
});

That’s right, in about 15 lines of actual code, we have a functioning web server. Neat. In all honesty, though, Express is doing most of the heavy lifting for us.

Save the file as SimpleServer.js in the Games directory.

Create a Simple Web Site

Our site will be a single page with a title and some text in the body. In later parts, we will add a Canvas element and begin using Phaser to create games.

Create a new text document in your editor and copy in the following:

<!DOCTYPE HTML>
<html>
<head>
    <meta charset="utf-8" />
    <title>My Page</title>
</head>
<body>
    <h1>Hello, world</h1>
    <p>This is my page. There are many like it, but this one is mine.</p>
</body>
</html>

Save it as index.html in Games/HelloWorld. At this point, your directory structure in <PATH_TO_PROJECTS>/Games should look like this:

Games directory tree


Run the Server

In your command prompt, navigate to the Games directory and run the server, specifying the HelloWorld directory as the root for your web site.

cd <PATH_TO_PROJECTS>/Games
node SimpleServer.js HelloWorld/

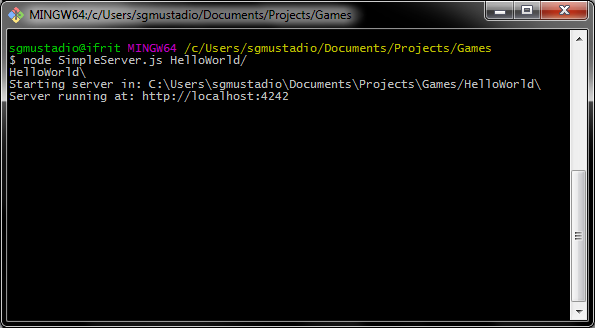
If all goes well, you should see a note appear in the console that the server is running at http://localhost:4242.

Running a simple server

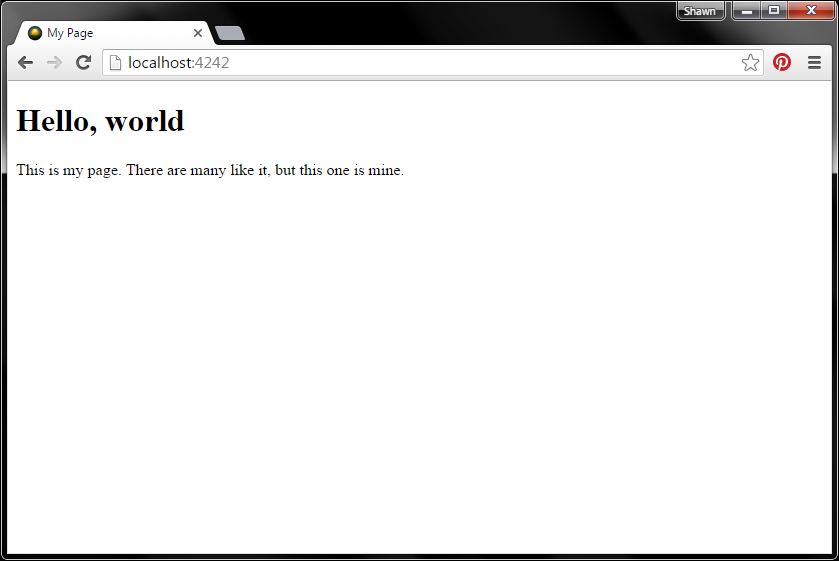
Open up a web browser and navigate to http://localhost:4242. You should see your page.

My first page

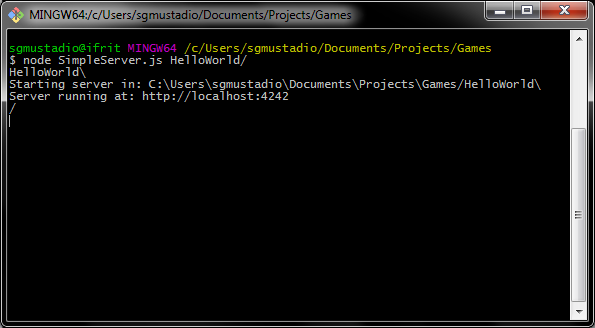
If you look at the console, you’ll see that a ‘/’ has appeared.

Console showing HTTP request

This means that a client requested the website’s root directory (‘/’). The server responded by sending index.html as a result, which is the default file for most websites. In this case, the root directory is HelloWorld, as we specified when we started the server.

Conclusion

We did not even touch Phaser in this part. Crazy, I know, but we needed to create a basic structure for hosting our games before we can even make them. Such are the joys of browser-based games.

If you aren’t familiar with HTML, now is a good time to play with the web page, index.html. We won’t actually do too much in HTML, but it’s good to be familiar with how tags, loading files from source, and a little bit of CSS work. Geek Champ has a great getting started with HTML tutorial.

When you are ready, continue to Part 2.