When you’re building projects with ESP-IDF, you’ll quickly notice just how many libraries, drivers, and middleware options are available. From Wi-Fi and Bluetooth stacks to peripheral drivers and logging systems, the sheer number of options can feel overwhelming. Manually editing header files or juggling different CMakeLists.txt entries just to try out a new feature gets old fast.
This is where Kconfig comes in. Originally developed to help maintain the enormous Linux kernel codebase, Kconfig provides a consistent way to select which features and components should be compiled into your project. ESP-IDF adopts this system to let you choose, configure, and manage components with just a few keystrokes. Even better, you can use Kconfig to create your own project-specific options: things like enabling debug logs, switching between sensor drivers, or adjusting buffer sizes.
In this tutorial, I’ll walk you through how Kconfig works in ESP-IDF. We’ll create a simple project, add a Kconfig file, and show how to use idf.py menuconfig to toggle features on and off.
You can watch a video version of this guide here:
What is Kconfig?
The Kconfig system was originally created in the early 2000s to solve a very specific (and very large) problem: how do you configure the Linux kernel, which is made up of thousands of features, drivers, and options? Manually editing header files or makefiles for every single build variation simply wasn’t scalable.
Kconfig introduced a declarative syntax for configuration. Developers could write simple rules describing which options existed, their default values, and how they related to other options. Tools could then read those rules and present them in a menu-driven interface, allowing users to select features without having to dig through source code. If you’ve ever run make menuconfig when compiling a Linux kernel, you’ve already used Kconfig.
Although its syntax can feel a little dated, Kconfig is still widely used today. Beyond the Linux kernel, many embedded frameworks (e.g. ESP-IDF and Zephyr RTOS) adopted it because it provides a consistent and flexible way to manage project configuration. In ESP-IDF, Kconfig powers the familiar idf.py menuconfig tool, letting you turn features on or off, set parameter values, and even create your own custom configuration symbols.
Kconfig offers some unique advantages for embedded systems:
- Scalability: You can easily manage hundreds of options without cluttering your code.
- Flexibility: It’s simple to add new configuration options specific to your project.
- Maintainability: Instead of hardcoding values, you can expose them in a config file, making it easier to build variants of your project.

Create Demo Project
For this tutorial, I’ll assume you already have the ESP-IDF toolchain installed and working (if not, check out my Getting Started with ESP-IDF post first). Create a new project with the following structure:
/workspace/apps/kconfig-demo/
├── CMakeLists.txt
└── main/
    ├── CMakeLists.txt
    └── main.c
In the top-level CMakeLists.txt, enter the following:
# Set the minimum required version of CMake for a project
cmake_minimum_required(VERSION 3.16)

# Include ESP-IDF build system
include($ENV{IDF_PATH}/tools/cmake/project.cmake)

# Add external components to the project
list(APPEND EXTRA_COMPONENT_DIRS ../../components)

# Set the project name
project(app)
In main/CMakeLists.txt, enter the following:
idf_component_register(
    SRCS "main.c"
    INCLUDE_DIRS ""
)
In main/main.c, enter the following:
#include <stdio.h>

#include "esp_log.h"
#include "freertos/FreeRTOS.h"

#include "say_hello.h"

// Settings
static const uint32_t sleep_time_ms = 1000;

// Tag for log messages
static const char *TAG = "kconfig_demo";

void app_main(void)
{
    // Superloop
    while (1) {

        // Log messages
        printf("Log messages:\n");
        ESP_LOGE(TAG, "Error");
        ESP_LOGW(TAG, "Warning");
        ESP_LOGI(TAG, "Info");
        ESP_LOGD(TAG, "Debug");
        ESP_LOGV(TAG, "Verbose");

        // Say hello
#ifdef CONFIG_SAY_HELLO
        say_hello();
#endif

        // Delay
        vTaskDelay(sleep_time_ms / portTICK_PERIOD_MS);
    }
}
In this code, we simply log some messages out over the serial port. We can define the log level in Kconfig. You’ll also notice that we have the conditional preprocessor #ifdef here:
// Say hello
#ifdef CONFIG_SAY_HELLO
        say_hello();
#endif
We have not defined this function yet, but you’ll notice that the code will still compile. That’s because we also did not define the CONFIG_SAY_HELLO symbol yet, and so the compiler ignores this call to say_hello(). In the next section, we’ll create our own SAY_HELLO Kconfig symbol, which we can enable and disable in menuconfig.
Add a Kconfig Component
In ESP-IDF, each component can expose its own configuration options through a Kconfig file. When you run idf.py menuconfig, ESP-IDF collects all Kconfig files across the project and external components (including anything you’ve added via EXTRA_COMPONENT_DIRS) and merges them into a single configuration UI. Selections you make there become C preprocessor symbols (like CONFIG_SAY_HELLO) that you can use in your code. Note that Kconfig automatically adds the CONFIG_ prefix to symbols so you can access them in your code.
Because you already added:
list(APPEND EXTRA_COMPONENT_DIRS ../../components)in your top-level CMakeLists.txt, ESP-IDF will automatically look for components under ../../components relative to your project folder. We’ll place say_hello there.
Create the component folder
From your workspace root (/workspace/), create the external components directory (if it doesn’t exist) and the say_hello component inside it:
/workspace/components/
└── say_hello/
    ├── CMakeLists.txt
    ├── Kconfig
    ├── include/
    │   └── say_hello.h
    └── say_hello.c
In components/say_hello/CMakeLists.txt, add:
# Set source files and include directories
set(srcs)
set(include_dirs "include")

# Conditionally add source files
if(CONFIG_SAY_HELLO)
    list(APPEND srcs
        "say_hello.c")
endif()

# Register the component
idf_component_register(SRCS "${srcs}"
                       INCLUDE_DIRS "${include_dirs}")
That tells ESP-IDF to compile say_hello.c and expose headers from include/ to anything that depends on this component.
In components/say_hello/Kconfig:
# Create a new option in menuconfig
config SAY_HELLO
    bool "Basic print test to console"
    default n   # Set the library to be disabled by default
    help
        Adds say_hello() function to print a basic message to the console.
A few notes:
SAY_HELLO is a boolean toggle that controls whether the feature is enabled. When set, it defines CONFIG_SAY_HELLO.
Because your main.c already wraps the call in:
#ifdef CONFIG_SAY_HELLO
    say_hello();
#endif
The compiler will only include that call when the option is enabled. This is a classic pattern in ESP-IDF: use Kconfig to expose a switch, use #ifdef CONFIG_* to conditionally include features, and keep code paths clean.
In components/say_hello/include/say_hello.h:
#ifndef MY_LIB_H_
#define MY_LIB_H

void say_hello();

#endif
This functions as your public-facing interface for your say_hello() function, as you might expect for any C program.
Finally, define the say_hello() function in components/say_hello/say_hello.c:
#include <stdio.h>

#include "say_hello.h"

void say_hello()
{
    printf("Hello, world!\r\n");
}
We simply include our header file and print “Hello, world!” to the console (or out over the serial port, in the case of our ESP32).
Build check (before configuring)
At this point, you can try a build:
idf.py buildSAY_HELLO defaults to n (as we set), so the call in main.c is compiled out. The component still builds because we’re compiling it regardless, but the function won’t be referenced unless the define is present.
Using menuconfig
With the say_hello component and its Kconfig definition in place, it’s time to use ESP-IDF’s configuration menu to flip options on and off and set values. Menuconfig is the text-based interface you might have seen before, if you have messed with underlying Linux drivers or built your own Linux distro (using e.g. Yocto). Under the hood, it writes your choices into a file called sdkconfig at the project root and generates CONFIG_* macros that your C/C++ code can read at compile time.
From your project root (/workspace/apps/kconfig-demo), run menuconfig with idf.py:
cd /workspace/apps/kconfig-demo\
idf.py menuconfig
In a few seconds, your text-based interface should open. You navigate with the arrow keys, press Enter to select, Space to toggle booleans, Esc (or q) to go back, and / to search. Either search for your symbol (SAY_HELLO) or navigate to Component config and find the description of your custom symbol (likely at the bottom with “Basic print test to console”).
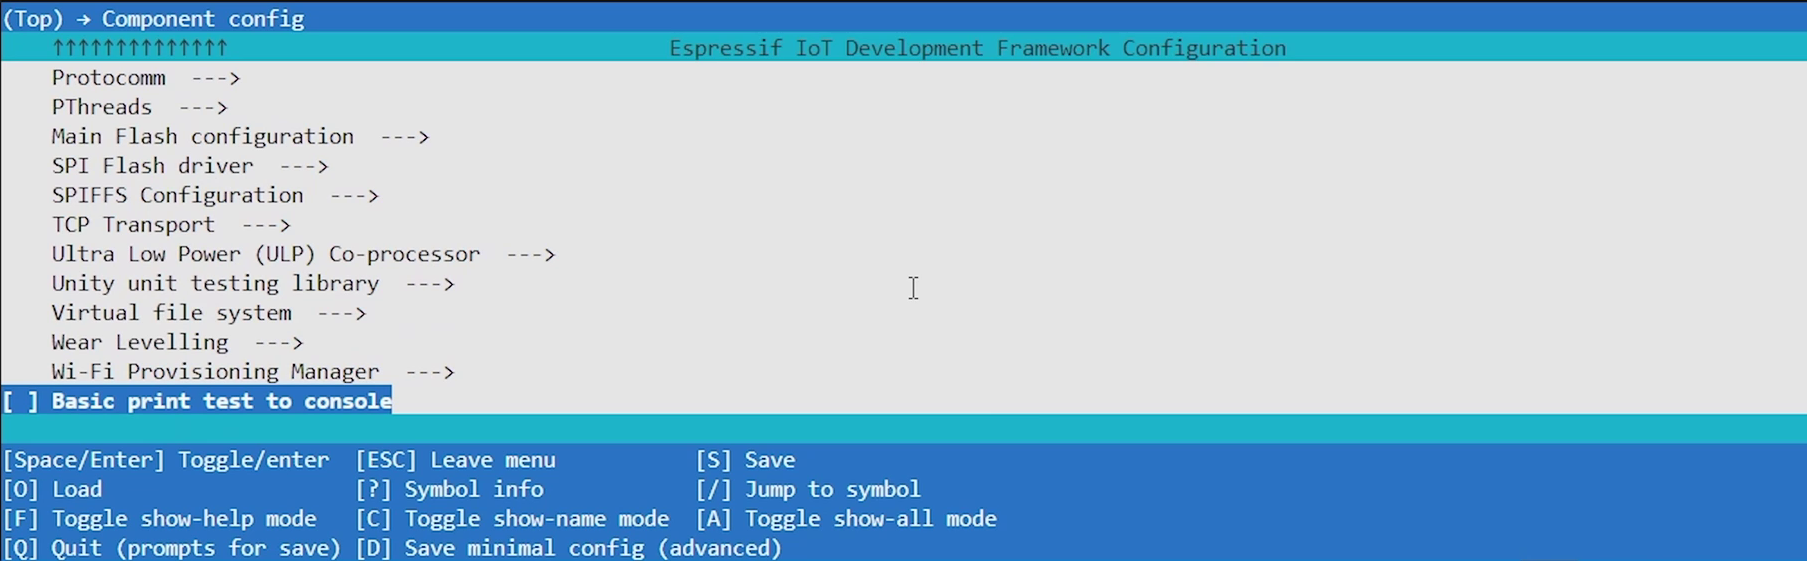
You can press ? to get more information about your custom symbol (press esc to exit the info screen). With “Basic print test to console” highlighted, press spacebar to enable it.

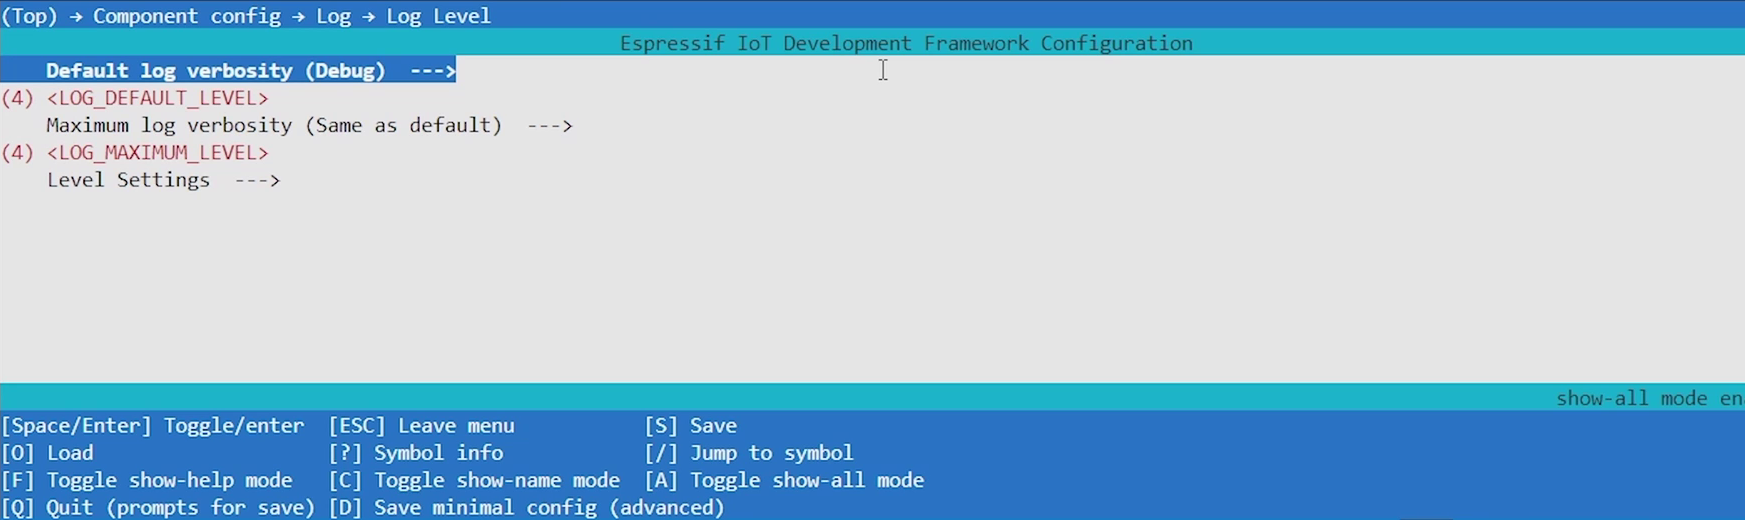
Feel free to try changing the log verbosity in menuconfig. Navigate into Component config > Log > Log Level. Highlight Default log verbosity, press enter to go into the selection, highlight a new verbosity level (e.g. Debug), and press space to select it.
Press q to exit and y to save your changes.
You should see that a file named sdkconfig has been added to your project. This is a human-readable snapshot of your choices (kept in version control for reproducible builds).
You can try running this in the QEMU emulator:
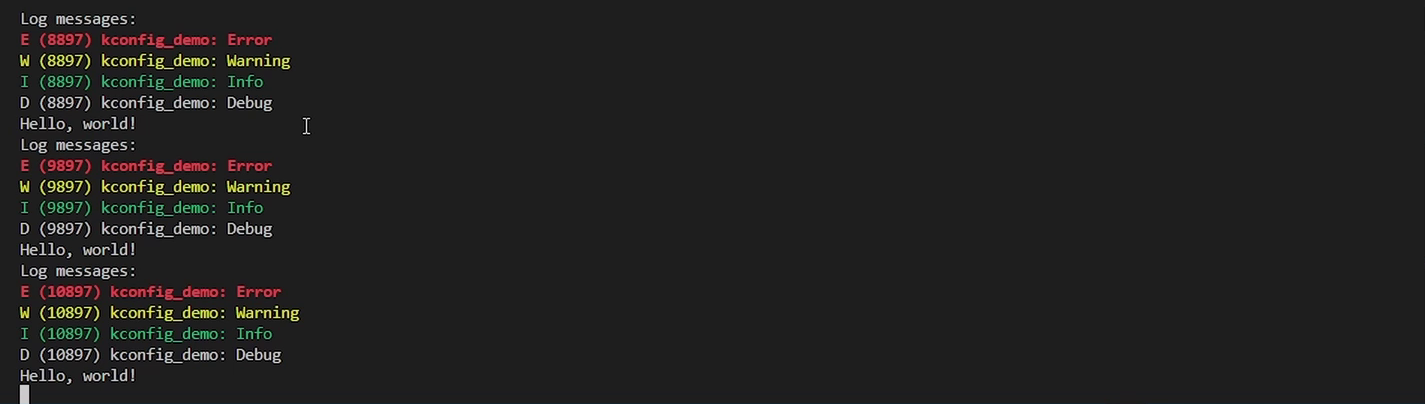
idf.py qemu monitorAfter building, QEMU should start, and you should see both the log messages running along with the “Hello, world!” string that we print to the console, thanks to enabling our custom symbol!
Going Further
ESP-IDF has some built-in naming schemes around sdkconfig if you wish to save Kconfig defaults for your project. I recommend looking through this tutorial to learn more.
If you would like to dig deeper, consider taking my IoT Firmware Development with ESP32 and ESP-IDF course, where we cover the basics of ESP-IDF, reading from sensors, connecting to the internet via WiFi, posting data via HTTP REST calls, securing connections with TLS, and interacting with MQTT brokers.
