If you’ve been working with the Arduino UNO Q, you’ve probably noticed that Arduino’s official approach pushes you toward using App Lab: a server-based development environment that runs on the UNO Q. While App Lab is a great starting point for beginners, I found it to be quite limiting. In this tutorial, I’ll walk you through how to develop for the Arduino UNO Q using the command-line interface (CLI) and your favorite local development tools. By the end, you’ll have a working LED blink project running on your UNO Q, and you’ll understand how to structure future projects.
If you want to cut to the chase, here is the blink example with some instructions on how to run it using the CLI: https://github.com/ShawnHymel/arduino_uno_q_blink_cli
Why Choose CLI Over App Lab?
Before we dive into the technical details, let’s talk about why you might want to skip App Lab entirely (or at least use it minimally). App Lab locks you into a web-based IDE and limits you to Arduino’s built-in tools. With the CLI approach, you can work in VS Code with full IntelliSense, GitHub Copilot, and all your favorite extensions and linters. Or if you don’t like VS Code, feel free to use the editor of your choice.
When you develop in App Lab, your code lives on the UNO Q, which can make it tricky to access if you need to back it up or put it under version control (e.g. Git). The CLI approach also gives you the control and automation capabilities that professional developers expect. You can script your build and deployment processes, set up continuous integration pipelines, and create reproducible builds with version-locked dependencies.
Instead of black-box abstractions, you get full visibility into what’s happening during builds and deployments, the ability to customize build configurations, and the freedom to organize your project structure however you want. The initial setup might take a few extra minutes, but the productivity gains and development flexibility are well worth it.
Understanding the Arduino UNO Q Architecture
The Arduino UNO Q is unique because it’s actually two processors in one board:
- MPU (Microprocessor Unit): Qualcomm Dragonwing™ QRB2210 that runs Debian Linux and handles heavy processing tasks like USB communication, networking, and AI workloads. You program this side with Python.
- MCU (Microcontroller Unit): A traditional Arduino-style microcontroller (STM32U585) for real-time pin control and low-level hardware interaction. You program this side with C++ using the classic Arduino libraries. Note that not all Arduino libraries work for this processor!
Most UNO Q projects combine both: Python on the MPU for complex logic, and Arduino code on the MCU for hardware control. The App Lab CLI orchestrates building, deploying, and running both halves together on the UNO Q.
Configure the UNO Q
As the UNO Q is quite new, you will likely need to install some updates to it when you first open the box. Feel free to do this using the CLI following these instructions, but I honestly find it easiest to simply install App Lab, run it, connect it to your UNO Q, and follow the prompts to update the firmware. During the setup process, you will set a username and password along with configure the WiFi settings. This will enable an SSH server on the UNO Q that you can connect to.
In App Lab, once connected to the UNO Q, click the command line icon (>_) in the bottom left. This should open a command prompt. Enter the password you set earlier. The IP address should be given in your login prompt (e.g. arduino@<UNO_Q_IP_ADDRESS>). If not, enter:
ip addr showLook for your IP address under the wlan0 tag.
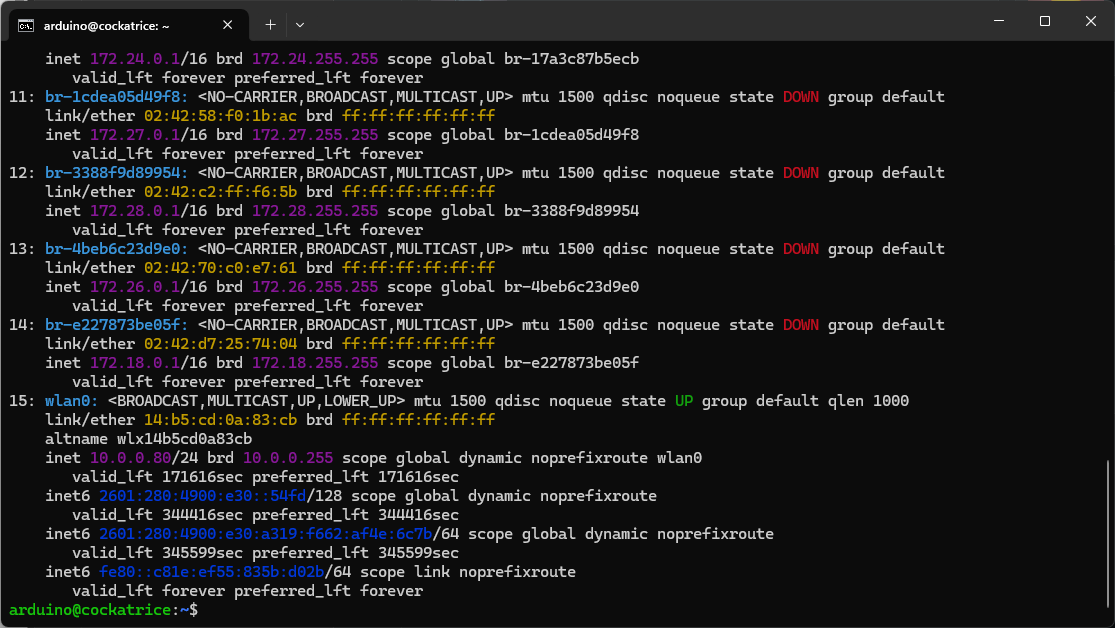
If you don’t like the idea of this changing due to DHCP on your network, you can optionally use the MAC address given under the same wlan0 tag to set a preferred IP address on your router.
Once you’re able to log in via SSH, you can close App Lab.
Project Structure
UNO Q projects are a little more involved than traditional Arduino (MCU only) projects. They usually combine a Python script for running heavy processing loads (e.g. USB, networking, AI) on Debian Linux on the MPU and a lightweight Arduino sketch that runs on the MCU (for e.g. pin control).
On your host computer, create a project structure as follows:
uno_q_blink/
├── README.md
├── app.yaml
├── python/
│   ├── main.py
│   └── requirements.txt
└── sketch/
    ├── sketch.ino
    └── sketch.yaml
Let’s take a look at each of the files. Note that naming is important, as the UNO Q runtime environment looks for these filenames in these particular directories!
- README.md is not required, but it’s a good thing to have to describe your project and how to run it.
- app.yaml is the App Lab app manifest for the Linux side. It ties the Python entry point (your python/main.py), any App Lab “Bricks”/services, and the linkage to the MCU sketch so the App Lab/CLI can build, deploy, and orchestrate both halves together on the UNO Q.
- python/main.py is the Python sketch that runs on the MPU.
- python/requirements.txt lists the Python libraries required for the Python sketch. When you run your project, these libraries will automatically be downloaded and installed.
- sketch/sketch.ino is the Arduino sketch that runs on the MCU.
- sketch/skecth.yaml is the Arduino CLI sketch project file. It declares the board (FQBN), required core/platform versions, libraries, and (optionally) multiple build profiles for reproducible MCU builds.
Recreating Blink
Now, let’s recreate the blinky example from App Lab.
README.md
Put any instructions or descriptions for your user. Feel free to leave this blank for now.
app.yaml
This describes your overall project, including the project name, version, description, optional icon, etc. You can also list any exposed ports and “bricks.” Bricks are special libraries unique to the UNO Q and offer high-level functionality like web servers, computer vision, and AI. Feel free to read about them here.
If you are new to the YAML syntax, I recommend reading through this guide.
name: LED Control Demo
description: "Simple LED control app demonstrating Bridge communication between Python (MPU) and Arduino (MCU)"
icon: 🔴
version: "1.0.0"

# Optional: Define any exposed ports (not needed for this simple example)
ports: []

# Optional: Define bricks if using pre-built components
bricks: []
python/main.py
This is your main Python program that runs on the MPU (in parallel with the Arduino sketch running on the MCU). Notice that we import arduino.app_utils at the top. It comes pre-installed on the UNO Q. It gives us access to the Bridge, a built-in remote procedure call (RPC) library that allows us to easily call functions in the Arduino sketch (running on the MCU).
To call a function on the MCU side, we simply use the Bridge.call() function and provide it the string associated with the registered function (along with any arguments).
# SPDX-FileCopyrightText: Copyright (C) 2025 ARDUINO SA <http://www.arduino.cc>
#
# SPDX-License-Identifier: MPL-2.0

from arduino.app_utils import *
import time

led_state = False

def loop():
    global led_state
    time.sleep(1)
    led_state = not led_state
    Bridge.call("set_led_state", led_state)
    print("boop")

App.run(user_loop=loop)
python/requirements.txt
This is a standard pip requirements file. Any dependencies (and their associated version) get installed automatically when you launch the project. Leave this blank for now.
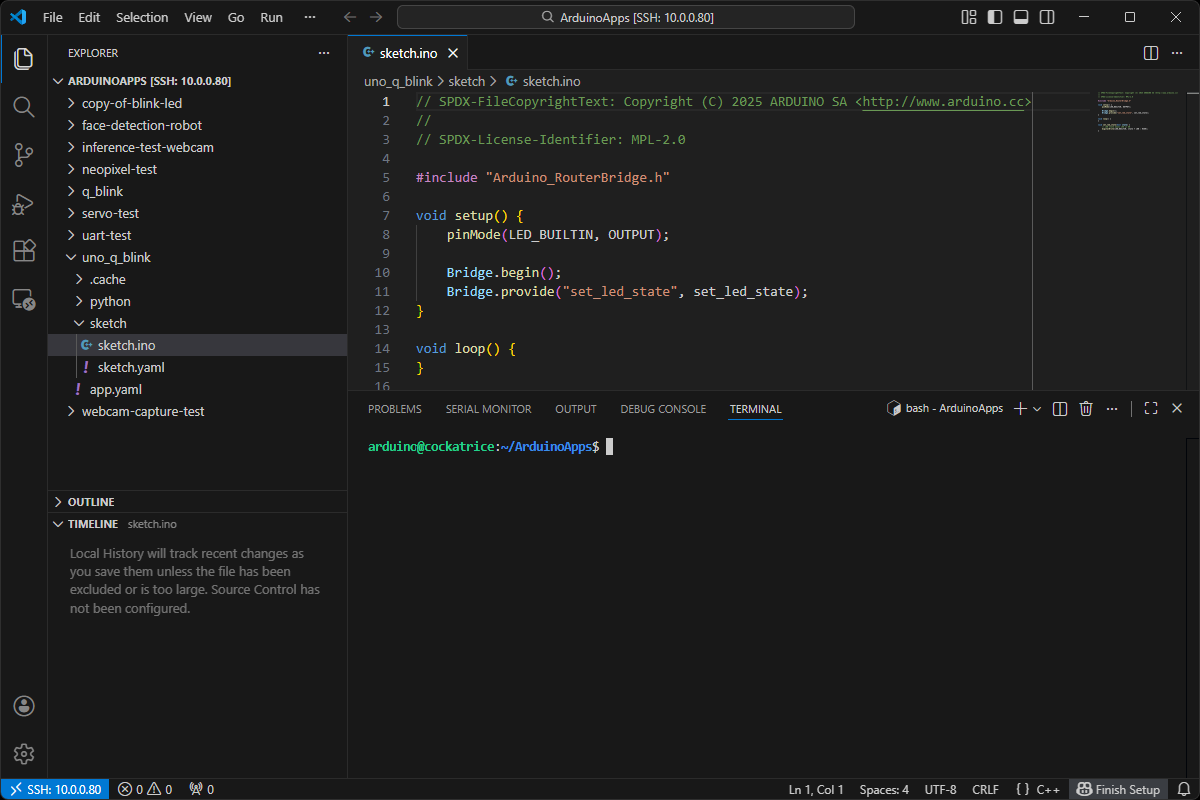
sketch/sketch.ino
This file holds your standard Arduino sketch written in C++. It runs on the MCU (in parallel with the Python program running on the MPU). Similar to the app_utils we imported in the Python code, we include the Arduino_RouterBridge library here. It gives us access to the same Bridge, but on the MCU side.
Notice that we initialize the Bridge and then “provide” the set_led_state function, which the Python side can call to blink the LED.
// SPDX-FileCopyrightText: Copyright (C) 2025 ARDUINO SA <http://www.arduino.cc>
//
// SPDX-License-Identifier: MPL-2.0

#include "Arduino_RouterBridge.h"

void setup() {
    pinMode(LED_BUILTIN, OUTPUT);

    Bridge.begin();
    Bridge.provide("set_led_state", set_led_state);
}

void loop() {
}

void set_led_state(bool state) {
    // LOW state means LED is ON
    digitalWrite(LED_BUILTIN, state ? LOW : HIGH);
}
sketch/sketch.yaml
This file lists information about the Arduino sketch portion of the project along with any dependencies. The only part that you may need to modify is the libraries section. You can list the name of any registered Arduino library here (even third-party libraries work, so long as you can find them in the Arduino library manager). Note that you must get the spelling exactly correct for the runtime environment to find the library, download it, and install it. I recommend using App Lab to find the registered library name.
For example, say you want to use the Servo library. In App Lab, start a new project, click the Add Library button, and search for “Servo.” Add the Servo library to your project. Now, open sketch/sketch.yaml in your project to find the exact name of the library (which is just “Servo” in this case). At this time, App Lab does not support editing sketch.yaml, so head back to your local project and add the appropriate item under libraries (e.g. “– Servo (1.3.0)”).
profiles:
  default:
    fqbn: arduino:zephyr:unoq
    platforms:
      - platform: arduino:zephyr
    libraries:
      - MsgPack (0.4.2)
      - DebugLog (0.8.4)
      - ArxContainer (0.7.0)
      - ArxTypeTraits (0.3.1)
default_profile: default
Run Your Project
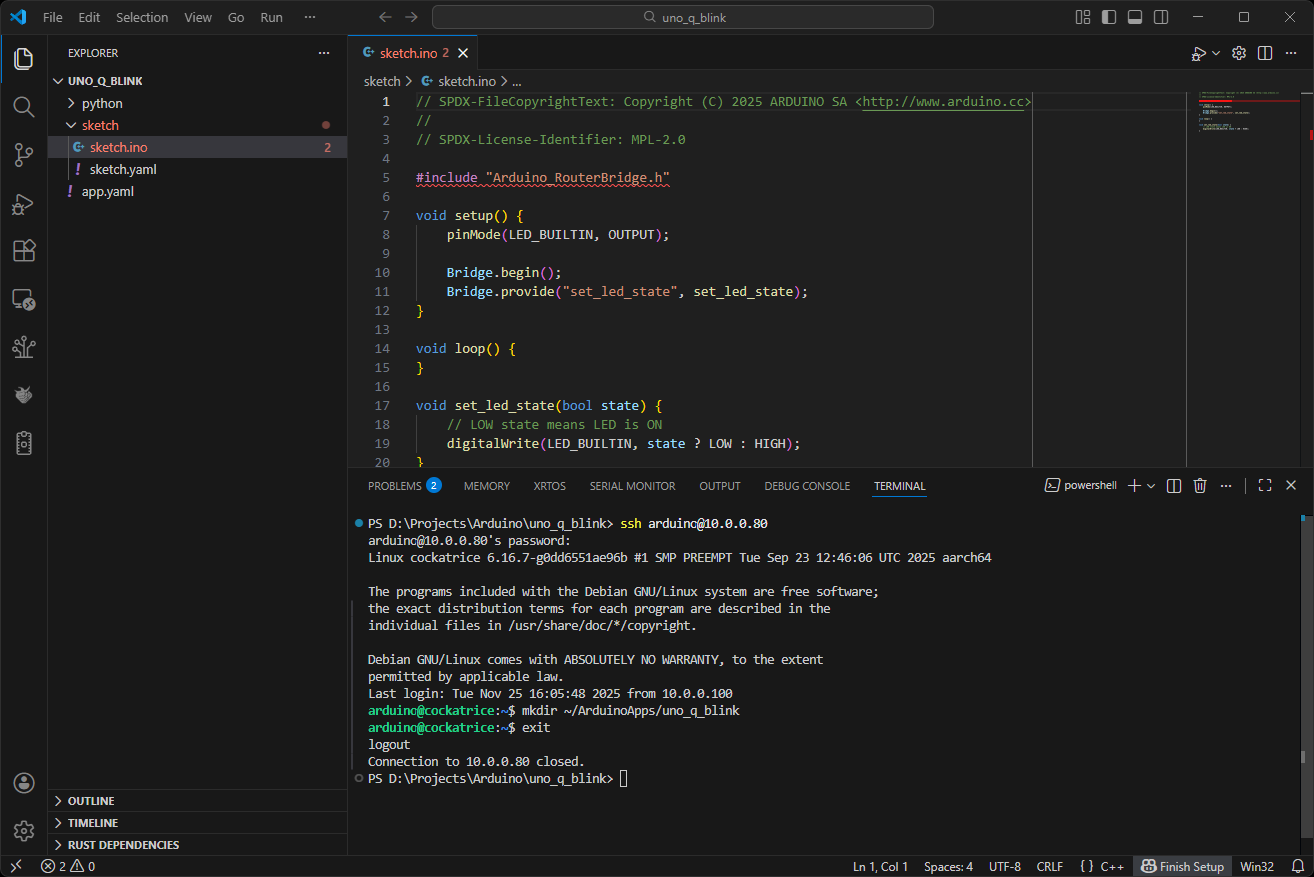
Make sure that you have saved all your work. We will now copy our entire project to the UNO Q using the Secure Copy Protocol (SCP). Before we do that, we need to create a directory on the UNO Q to hold our files. Open a command line window on your local machine. If you are on Windows, you should use PowerShell or WSL. If you are on macOS or Linux, ssh and scp should be installed by default.
Enter the following to SSH into the UNO Q:
ssh arduino@<UNO_Q_IP_ADDRESS>Enter ‘y’ if prompted to save the SSH fingerprint. Enter your UNO Q password when prompted. Once you have a Debian shell, enter the following:
mkdir ~/ArduinoApps/uno_q_blink
exit
You should only need to do this once per project to initialize the folder on the UNO Q.
Back on your host computer, copy the files from your local directory to the folder we just created on the UNO Q (enter the password for the UNO Q if prompted):
scp -r * arduino@<UNO_Q_IP_ADDRESS>:~/ArduinoApps/uno_q_blink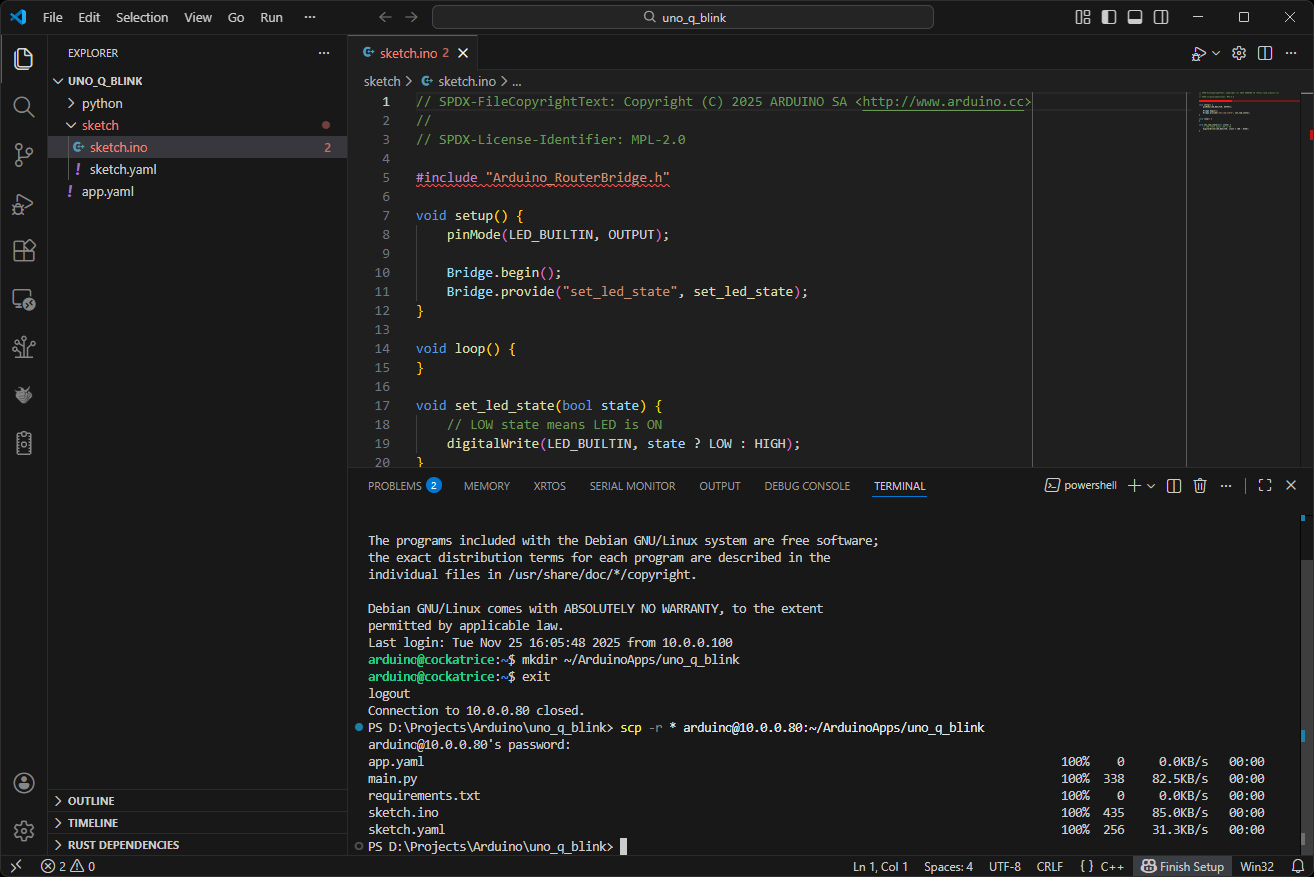
Now, you’re ready to run the project! SSH back into the UNO Q:
ssh arduino@<UNO_Q_IP_ADDRESS>Enter your password when prompted. In the Debian shell, run the following to start the program, which loads and runs both the Python and Arduino sketch in the MPU and MCU, respectively. Note that it might take a while to start, especially on the first run if you need to install Python or Arduino libraries.
arduino-app-cli app start ~/ArduinoApps/uno_q_blink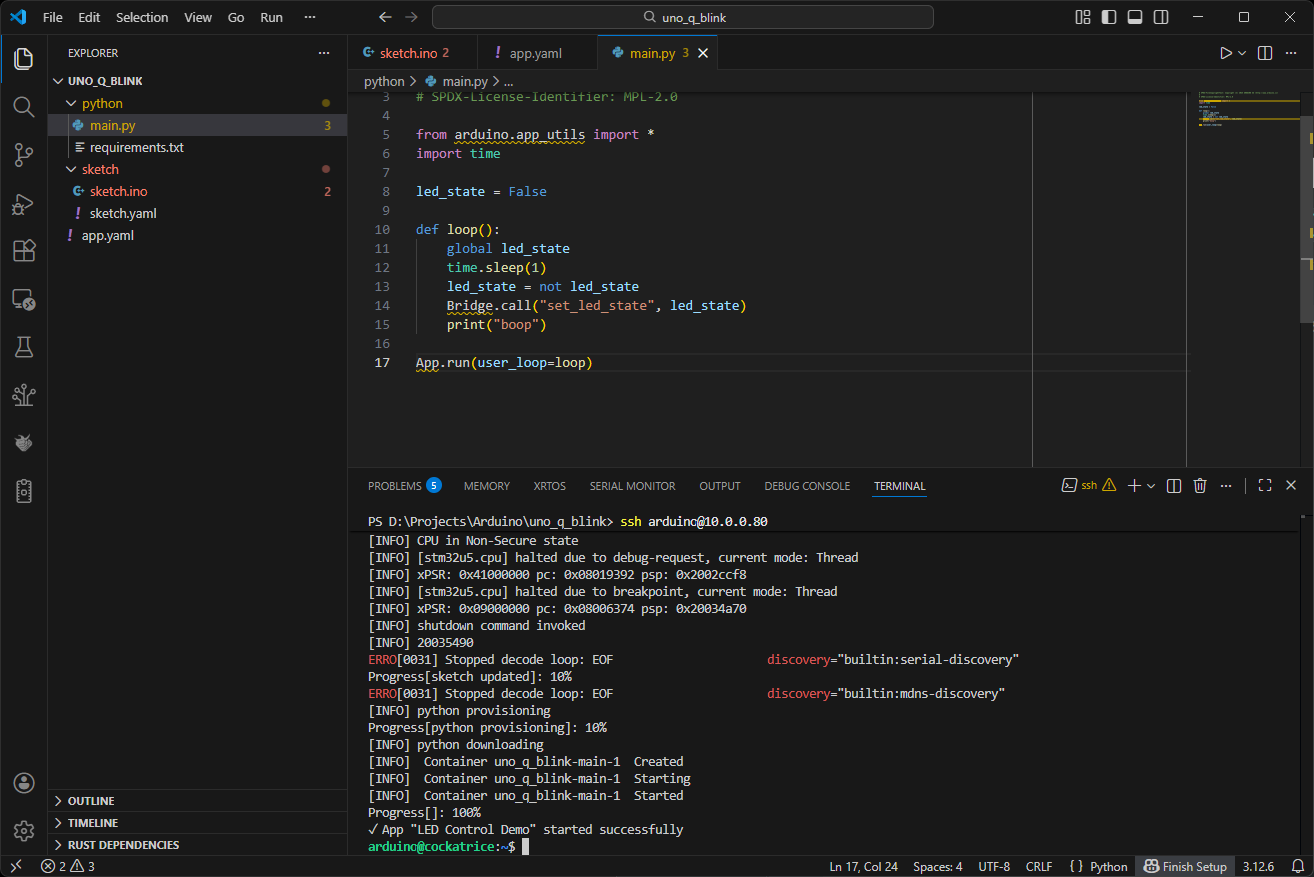
You can ignore the EOL errors for now. You should see the LED on the UNO Q blinking.

Note that Python code prints to a log file rather than the console. To view the logs, run:
arduino-app-cli app logs ~/ArduinoApps/uno_q_blinkYour app runs in the background. You can stop it with:
arduino-app-cli app stop ~/ArduinoApps/uno_q_blink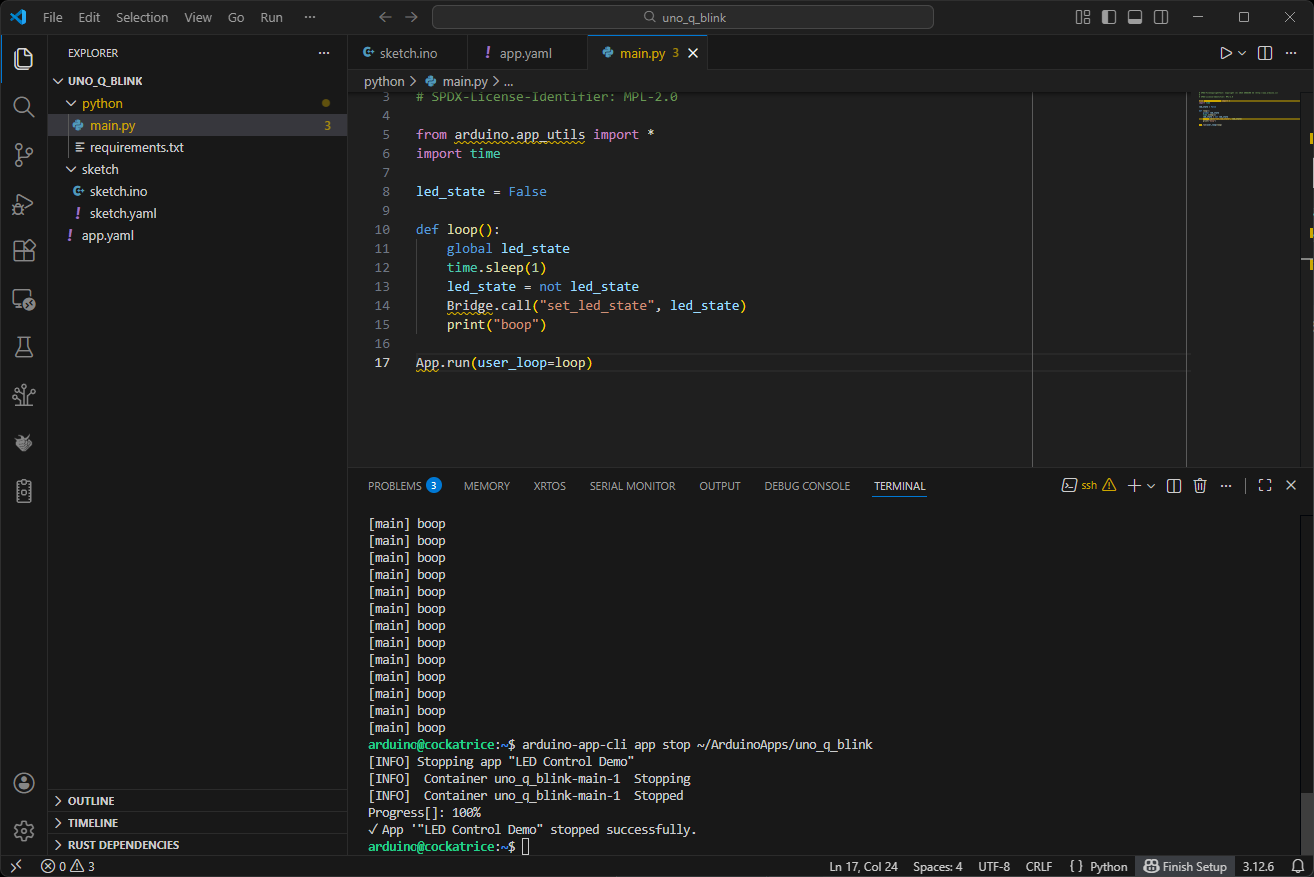
VS Code
If you want to easily browse files on the UNO Q, I recommend installing VS Code and the Remote-SSH extension. Click on the Connection icon in the bottom-left of VS Code and select Connect to Host… Enter arduino@<UNO_Q_IP_ADDRESS>, select Linux when asked about the server’s OS, and enter your UNO Q password. You can then select File > Open Folder… to get to your ~/ArduinoApps directory.
Troubleshooting
If you see:
ERRO[0052] Stopped decode loop: EOF                      discovery="builtin:serial-discovery"
Progress[sketch updated]: 10%
ERRO[0052] Stopped decode loop: EOF                      discovery="builtin:mdns-discovery"
[INFO] python provisioning
Progress[python provisioning]: 10%
It likely means that you do not have App.run() in your Python code. This line is required to start the Python app and ensure it runs in the Arduino UNO Q context (e.g. so it can call the Bridge functions and write to the log file). Make sure you have something like this in your Python script:
App.run(user_loop=loop)Going Further
While App Lab provides a quick start for Arduino UNO Q development, using the CLI approach unlocks the full power of professional development tools and workflows. You get the flexibility of local development, the power of your favorite IDE, and the control of command-line tools.
Feel free to check out the following resources to go further with the UNO Q:
- Arduino App CLI (note that I avoided ADB in the above tutorial)
- Arduino App CLI repo
- Understanding Bricks
- Bricks source code
- Bricks examples
Any tips on writing custom bricks?
Sorry, I haven’t dug into custom bricks yet! I might recommend checking out the README here: https://github.com/arduino/app-bricks-py
insightful article, thanks a lot.
Is there any good VSCode extension that you would recommend to use with the Uno Q?
I’ve had some issues, getting the Arduino community extension to work with the Uno Q.
I haven’t tried any Arduino-specific extensions, so I’m not sure. I would imagine that the Python and C/C++ extensions are still quite useful along with any of the AI assistants (e.g. Copilot) if you like those.
agreed, syntax highlighting and intellisense work out of the box. But unfortunately the regular VSCode extensions don’t reflect the Uno Q specific “double brain” Python / C++ (MPU/MCU) build pipeline with Bricks, libraries, bindings and stuff. Not to mention the more complex Uno Q monitoring and debugging situation.
The VSCode Arduino Community extension does a decent job with standard Arduinos but doesn’t cover Uno Q specialities.