Using an ESP32 as a web server and using WebSockets to control hardware

How to Create a Web Server (with WebSockets) Using an ESP32 in Arduino

A few months ago, I created a video showing how to use WebSockets with an ESP32. WebSockets have proven to be very fast (relatively speaking) at controlling hardware over WiFi. They still rely on TCP, but they have little overhead, so the latency is much less than other methods (e.g. using separate web pages). However, I’ve had a few requests to show how to implement a web server on the ESP32. So, this tutorial will cover exactly that (but I’m still keeping WebSockets, because they’re cool).

If you like your tutorials in video format, here you go:


Overview

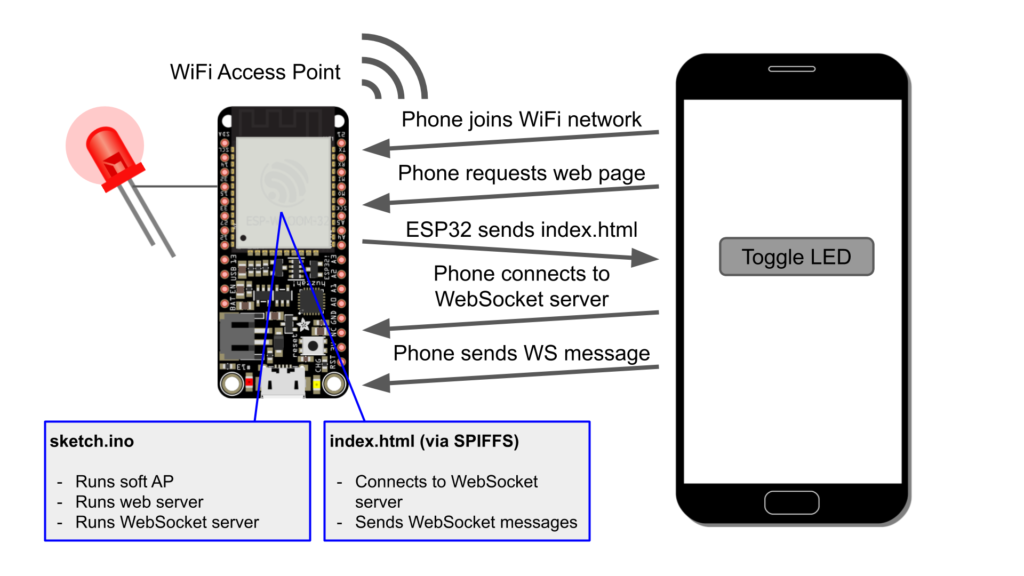
Rather than just host a simple web page, we’re going to build on the WebSocket idea. Let’s have our ESP32 be an access point (AP) and host a web page. When a browser requests that page, the ESP32 will serve it. As soon as the page loads, the client will immediately make a WebSocket connection back to the ESP32. That allows us to have fast control of our hardware connected to the ESP32.

ESP32 web server and WebSocket server diagram

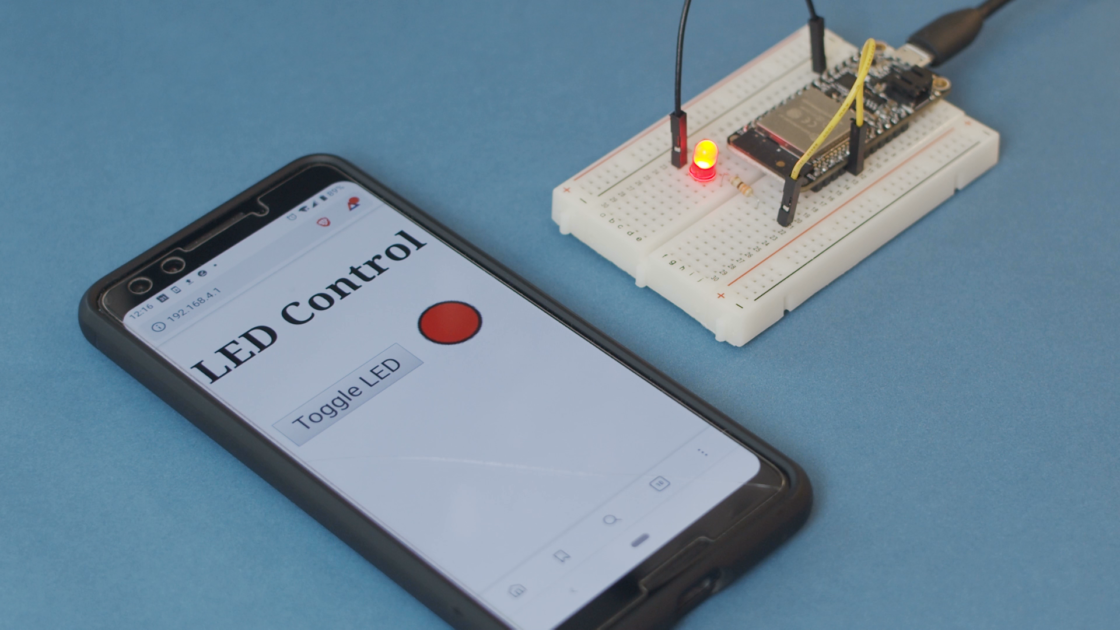
The WebSocket connection is two-way. Whenever the page loads, it first inquires about the state of the LED from the ESP32. If the LED is on, the page will update a circle (fill in red) to reflect that. The circle on the page will be black if the LED is off. Then, whenever a user presses the “Toggle LED” button, the client will send a WebSocket packet to the ESP32, telling it to toggle the LED. This packet is followed by another request asking about the LED state so that the client can keep the browser updated with the state of the LED.

Hardware Hookup

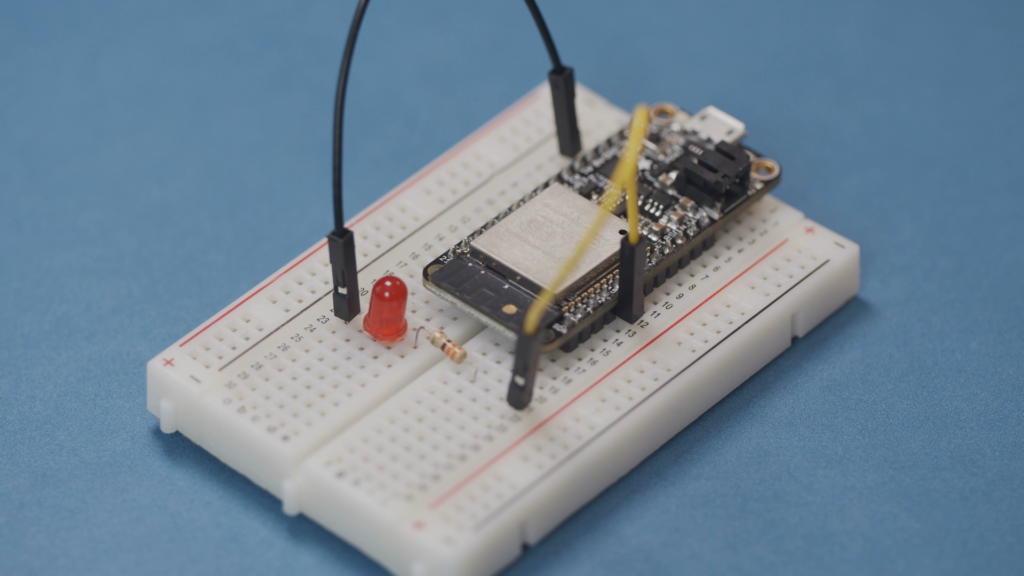
Connect an LED to pin 15 of your ESP32 (don’t forget a limiting resistor! Something like 330Ω should work). Note that I’m using an Adafruit Feather HUZZAH32, so your pin numbering might be different.

Connecting LED to ESP32


Install SPIFFS Plugin

An ESP32 with an attached flash storage chip, like our HUZZAH32, can be configured to hold files, much like a mass storage device. However, it uses a very basic file system (there are no folders–files are just stored in a flat structure). This file system is known as the “Serial Peripheral Interface Flash File System” (SPIFFS). You can read more about SPIFFS here.

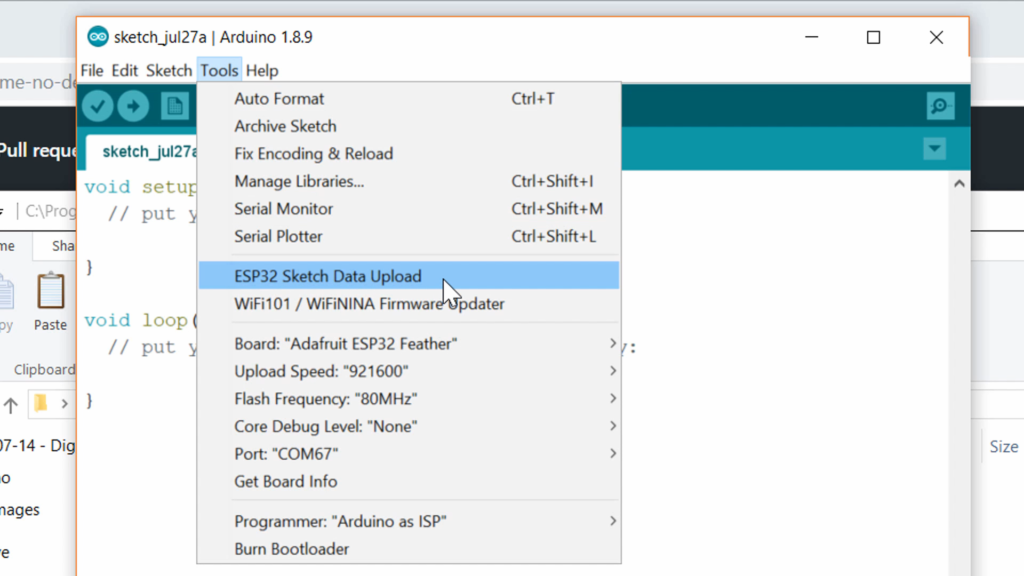
We need to use a special program to upload files over SPI. Head to https://github.com/me-no-dev/arduino-esp32fs-plugin and follow the instructions to install the Arduino plugin. Once done, restart Arduino, and you should see the option ESP32 Sketch Data Upload in the Tools menu.

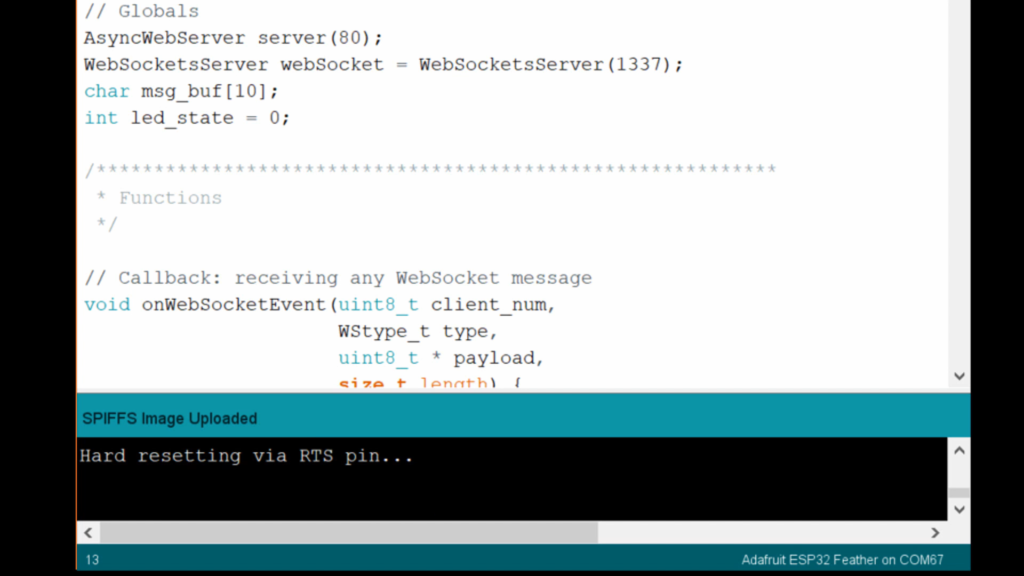
ESP32 SPIFFS upload plugin in Arduino

Install Arduino Libraries

Make sure you have the ESP32 board definition installed for your particular board. If you’re using a board that’s supported by the Espressif Arduino board manager (such as the Adafruit HUZZAH32), you can follow the directions here.

Download the .zip files for the following libraries and install them in Arduino.

Arduino Code

Enter the following code into a new Arduino sketch. Take note of the SSID and password–we’ll need these to connect our phone/computer to the ESP32’s AP.

#include <WiFi.h>
#include <SPIFFS.h>
#include <ESPAsyncWebServer.h>
#include <WebSocketsServer.h>

// Constants
const char *ssid = "ESP32-AP";
const char *password =  "LetMeInPlz";
const char *msg_toggle_led = "toggleLED";
const char *msg_get_led = "getLEDState";
const int dns_port = 53;
const int http_port = 80;
const int ws_port = 1337;
const int led_pin = 15;

// Globals
AsyncWebServer server(80);
WebSocketsServer webSocket = WebSocketsServer(1337);
char msg_buf[10];
int led_state = 0;

/***********************************************************
 * Functions
 */

// Callback: receiving any WebSocket message
void onWebSocketEvent(uint8_t client_num,
                      WStype_t type,
                      uint8_t * payload,
                      size_t length) {

  // Figure out the type of WebSocket event
  switch(type) {

    // Client has disconnected
    case WStype_DISCONNECTED:
      Serial.printf("[%u] Disconnected!\n", client_num);
      break;

    // New client has connected
    case WStype_CONNECTED:
      {
        IPAddress ip = webSocket.remoteIP(client_num);
        Serial.printf("[%u] Connection from ", client_num);
        Serial.println(ip.toString());
      }
      break;

    // Handle text messages from client
    case WStype_TEXT:

      // Print out raw message
      Serial.printf("[%u] Received text: %s\n", client_num, payload);

      // Toggle LED
      if ( strcmp((char *)payload, "toggleLED") == 0 ) {
        led_state = led_state ? 0 : 1;
        Serial.printf("Toggling LED to %u\n", led_state);
        digitalWrite(led_pin, led_state);

      // Report the state of the LED
      } else if ( strcmp((char *)payload, "getLEDState") == 0 ) {
        sprintf(msg_buf, "%d", led_state);
        Serial.printf("Sending to [%u]: %s\n", client_num, msg_buf);
        webSocket.sendTXT(client_num, msg_buf);

      // Message not recognized
      } else {
        Serial.println("[%u] Message not recognized");
      }
      break;

    // For everything else: do nothing
    case WStype_BIN:
    case WStype_ERROR:
    case WStype_FRAGMENT_TEXT_START:
    case WStype_FRAGMENT_BIN_START:
    case WStype_FRAGMENT:
    case WStype_FRAGMENT_FIN:
    default:
      break;
  }
}

// Callback: send homepage
void onIndexRequest(AsyncWebServerRequest *request) {
  IPAddress remote_ip = request->client()->remoteIP();
  Serial.println("[" + remote_ip.toString() +
                  "] HTTP GET request of " + request->url());
  request->send(SPIFFS, "/index.html", "text/html");
}

// Callback: send style sheet
void onCSSRequest(AsyncWebServerRequest *request) {
  IPAddress remote_ip = request->client()->remoteIP();
  Serial.println("[" + remote_ip.toString() +
                  "] HTTP GET request of " + request->url());
  request->send(SPIFFS, "/style.css", "text/css");
}

// Callback: send 404 if requested file does not exist
void onPageNotFound(AsyncWebServerRequest *request) {
  IPAddress remote_ip = request->client()->remoteIP();
  Serial.println("[" + remote_ip.toString() +
                  "] HTTP GET request of " + request->url());
  request->send(404, "text/plain", "Not found");
}

/***********************************************************
 * Main
 */

void setup() {
  // Init LED and turn off
  pinMode(led_pin, OUTPUT);
  digitalWrite(led_pin, LOW);

  // Start Serial port
  Serial.begin(115200);

  // Make sure we can read the file system
  if( !SPIFFS.begin()){
    Serial.println("Error mounting SPIFFS");
    while(1);
  }

  // Start access point
  WiFi.softAP(ssid, password);

  // Print our IP address
  Serial.println();
  Serial.println("AP running");
  Serial.print("My IP address: ");
  Serial.println(WiFi.softAPIP());

  // On HTTP request for root, provide index.html file
  server.on("/", HTTP_GET, onIndexRequest);

  // On HTTP request for style sheet, provide style.css
  server.on("/style.css", HTTP_GET, onCSSRequest);

  // Handle requests for pages that do not exist
  server.onNotFound(onPageNotFound);

  // Start web server
  server.begin();

  // Start WebSocket server and assign callback
  webSocket.begin();
  webSocket.onEvent(onWebSocketEvent);
  
}

void loop() {
  
  // Look for and handle WebSocket data
  webSocket.loop();
}

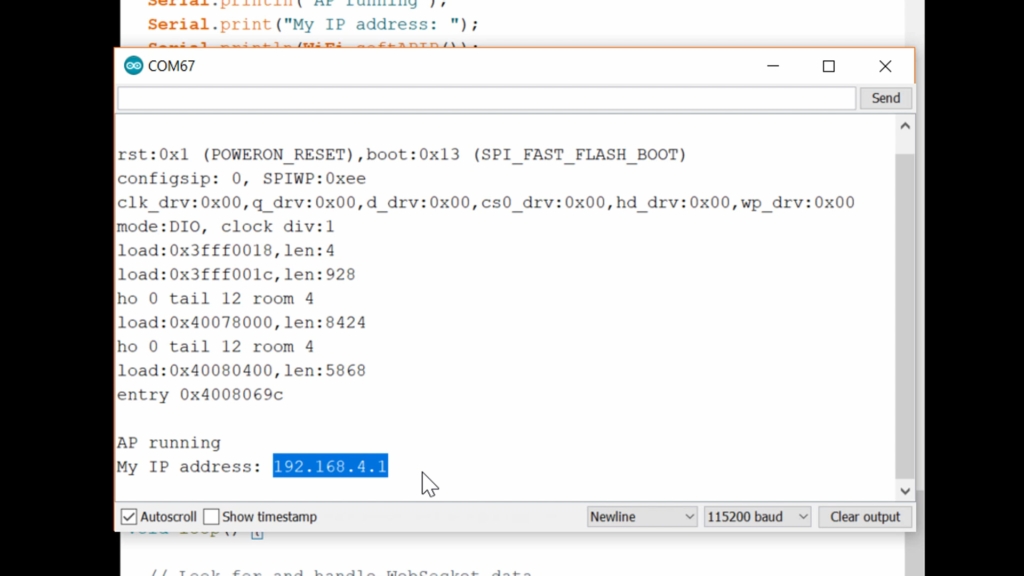
Save your code (we’ll need the Arduino directory structure for SPIFFS in an upcoming step). I’ll give my program a name like “esp32_websocket_host.” Upload the program to your ESP32 and open a serial console with a baud rate of 115200. You should see the IP address of the ESP32 printed to the screen. When you run the Arduino soft access point software on the ESP32, the default IP address is 192.168.4.1.

ESP32 Access Point IP Address

Web Page Code

Let’s write a simple web page! Like most modern pages, it will contain a mixture of HTML and JavaScript. We leave out CSS, but you’re welcome to create your own .css file, if you wish to make the page look a little nicer. If you look back up in the Arduino code, you’ll see that we have a function to serve up a .css file. However, we will not be making a .css file for the sake of simplicity in this tutorial.

For SPIFFS to work, we need to put the files we wish to upload to the ESP32 in a folder named data/ inside the Arduino project directory:

esp32_websocket_host
 |_ esp32_websocket_host.ino
 |_ data
     |_ index.html

In Arduino, click Sketch > Show Sketch Folder to navigate to your project directory. Create a folder named data and create a new file named index.html inside that new folder. Open index.html with your favorite editor.

In index.html, paste the following code:

<!DOCTYPE html>
<meta charset="utf-8" />
<title>WebSocket Test</title>

<script language="javascript" type="text/javascript">

var url = "ws://192.168.4.1:1337/";
var output;
var button;
var canvas;
var context;

// This is called when the page finishes loading
function init() {

    // Assign page elements to variables
    button = document.getElementById("toggleButton");
    output = document.getElementById("output");
    canvas = document.getElementById("led");
    
    // Draw circle in canvas
    context = canvas.getContext("2d");
    context.arc(25, 25, 15, 0, Math.PI * 2, false);
    context.lineWidth = 3;
    context.strokeStyle = "black";
    context.stroke();
    context.fillStyle = "black";
    context.fill();
    
    // Connect to WebSocket server
    wsConnect(url);
}

// Call this to connect to the WebSocket server
function wsConnect(url) {
    
    // Connect to WebSocket server
    websocket = new WebSocket(url);
    
    // Assign callbacks
    websocket.onopen = function(evt) { onOpen(evt) };
    websocket.onclose = function(evt) { onClose(evt) };
    websocket.onmessage = function(evt) { onMessage(evt) };
    websocket.onerror = function(evt) { onError(evt) };
}

// Called when a WebSocket connection is established with the server
function onOpen(evt) {

    // Log connection state
    console.log("Connected");
    
    // Enable button
    button.disabled = false;
    
    // Get the current state of the LED
    doSend("getLEDState");
}

// Called when the WebSocket connection is closed
function onClose(evt) {

    // Log disconnection state
    console.log("Disconnected");
    
    // Disable button
    button.disabled = true;
    
    // Try to reconnect after a few seconds
    setTimeout(function() { wsConnect(url) }, 2000);
}

// Called when a message is received from the server
function onMessage(evt) {

    // Print out our received message
    console.log("Received: " + evt.data);
    
    // Update circle graphic with LED state
    switch(evt.data) {
        case "0":
            console.log("LED is off");
            context.fillStyle = "black";
            context.fill();
            break;
        case "1":
            console.log("LED is on");
            context.fillStyle = "red";
            context.fill();
            break;
        default:
            break;
    }
}

// Called when a WebSocket error occurs
function onError(evt) {
    console.log("ERROR: " + evt.data);
}

// Sends a message to the server (and prints it to the console)
function doSend(message) {
    console.log("Sending: " + message);
    websocket.send(message);
}

// Called whenever the HTML button is pressed
function onPress() {
    doSend("toggleLED");
    doSend("getLEDState");
}

// Call the init function as soon as the page loads
window.addEventListener("load", init, false);

</script>

<h2>LED Control</h2>

<table>
    <tr>
        <td><button id="toggleButton" onclick="onPress()" disabled>Toggle LED</button></td>
        <td><canvas id="led" width="50" height="50"></canvas></td>
    </tr>
</table>

Save this file. With your ESP32 plugged into your computer, open Arduino and click Tools > ESP32 Sketch Data Upload. Wait a moment, and all the files in the data/ folder (well, just the 1 file, index.html, for this example) should be uploaded to the ESP32.

Uploading files to the ESP32 using SPIFFS

Run It!

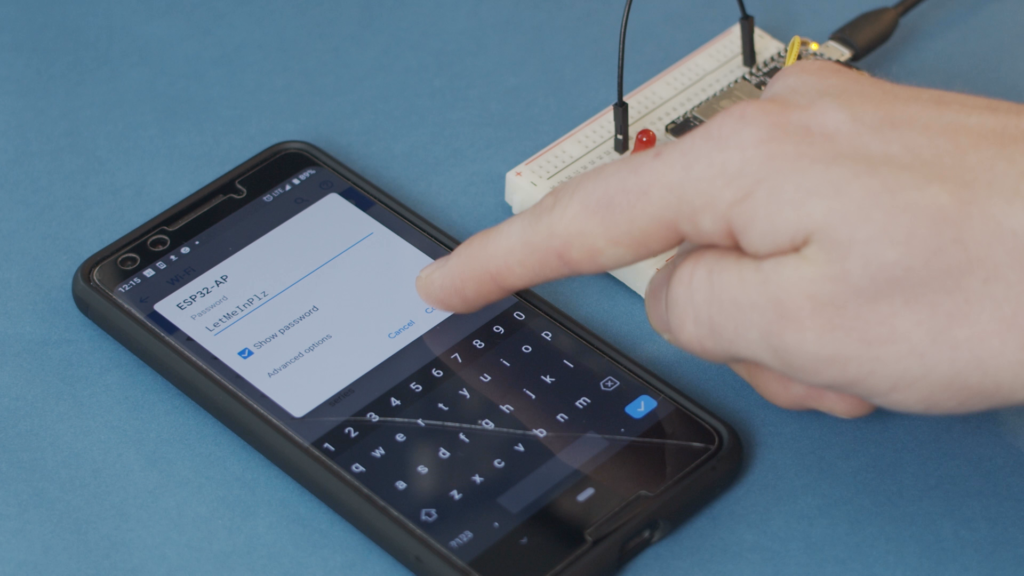
With the index.html file uploaded and the Arduino code running, you should be able to connect to the ESP32’s access point. Using your phone or computer, search for open WiFi access points and connect to the one named ESP32-AP. When asked for a password, enter LetMeInPlz (or whatever you set the AP password to in the Arduino code).

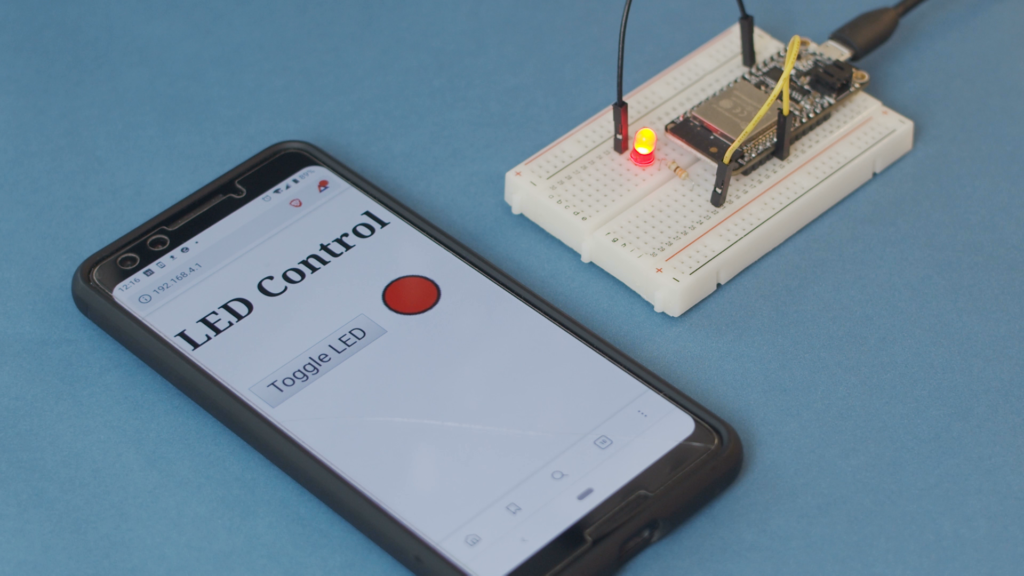
Since we are not running a captive portal, we will need to specifically browse to the IP address of the ESP32. Open a browser and enter 192.168.4.1 (or whatever you discovered the IP address of the ESP32 to be). You should be served the index.html page from the ESP32, which looks like a button and a circle. Zoom in, if needed (as we’re not doing any fancy formatting or CSS here).

Press the Toggle LED button, and you should see the LED connected to the ESP32 flicker to life. The circle on the page should also turn red to denote the state of the LED.

Using an ESP32 as a web server and using WebSockets to control hardware

Going Further

Feel free to use this as the basis for your next Internet-controlled hardware project. I suppose it fits in the category of “IoT,” and WebSockets can be super useful for controlling hardware with much less latency than many other methods. You can also use them to get fast updates, if you wish to create a custom dashboard showing sensor data.



Worksheets for Your Maker Workshops (Arduino, Soldering, Raspberry Pi)

If you are looking to teach a workshop to a group of people, it can be incredibly helpful to have a worksheet made up for the class. Unlike a traditional teaching environment (e.g. school, college), students in a workshop will often arrive with a wide variety of skill levels. Additionally, you are often limited to only a few hours to demonstrate a tool or impart a skill on willing minds.

I picked up a great trick from my friends at SparkFun: print out a worksheet for each attendee.

This handout serves a few useful purposes. First, it provides a sort of syllabus for what the students will be learning. Second, it gives them something to take home and reference, should they need it. Finally, and most importantly, it allows people with experience in the subject matter to work ahead.

At the beginning of the workshop, I always hand out the worksheet and say, “I will not be offended if you work ahead.” This gives the advanced students permission (read: empowered) to skip the parts they might already be familiar with. The trick to making this work, at least for the advanced students, is to put one or more challenges in the worksheet. the challenges will hopefully allow students to try new things with the technology while you, the instructor, are still covering the basics.

This past week, I spent some time at my alma mater, Rose-Hulman Institute of Technology, teaching a beginner workshop each evening and covering a variety of topics. I had a wonderful time visiting campus and teaching classes, and I had a few late nights putting together the workshops.

If you are interested in the handouts from the workshops, I’ve included them below. You are welcome to use them as-is or create your own based on them.

Worksheet – Intro to Arduino

Worksheet – Robotics with Arduino

Worksheet – Python and Arduino IoT

Worksheet – Soldering

Worksheet – Intro to Raspberry Pi


SAMD21 PWM with the FDPLL

Arduino Zero (SAMD21) FDPLL with CMSIS

One of the coolest, tucked-away features in the SAMD21 is the fractional digital phase locked loop (FDPLL). I still only have a vague idea of how phase locked loops (PLLs) work, but nonetheless, we can use the SAMD21’s PLL to create a 96 MHz clock.

The bad news is that, to the best of my knowledge, you cannot use this clock signal as the main clock source for the SAMD21 (essentially overclocking it). However, we can use it to power some other peripherals, like the generic clocks, timers, and pulse width modulation (PWM) signals.

If you are not familiar with how the clocks on the SAMD21 work, I recommend reading my previous post. You will also need to refer to the SAMD21 datasheet.

Let’s take a look at how you use the FDPLL on the SAMD21.

Step 1: Select a Clock Source

The FDPLL isn’t a standalone clock. You’ll need to select a source to feed the PLL, and the source clock needs to be in the 32 kHz to 2 MHz range. According to section 16.8.19 (page 208) of the datasheet, there are only 3 acceptable clock sources for the FDPLL: XOSC32, XOSC, and a specific GCLK (known as GCLK_DPLL). You can set the clock source for the PLL in the DPLLCTRLB register.

Clock sources for DPLL on SAMD21

Step 2: Configure FDPLL

Next, you will need to set the frequency multiplier in DPLLRATIO register. There are two numbers you must configure: the ratio (LDR bits) and the ratio fractional part (LDRFRAC bits). The equation below (from section 16.6.8.3, page 158) shows how to calculate the output frequency of the FDPLL. fclk_fdpll96m is the output frequency and fclk_fdpll96m_ref is the reference clock (the input clock source).

SAMD21 FDPLL equation

So, if we want to turn a 1 MHz clock source into a 96 MHz output, we would set LDR to 95 and LDRFRAC to 0.

Step 3: Turn It On

By default, the FDPLL is disabled on reset. To enable it, we just write a 1 to the ENABLE bit in the DPLLCTRLA register.

Step 4: Use It!

The FDPLL can be used as a clock source for any of the generic clocks found in the generic clock controller. This includes the USB clock, watchdog timer, clock channels, SERCOMs, etc. Section 14.8.3 (page 107) has a table (too big to copy here) that gives you an idea of the available GCLKs. If you use one of the GCLK channels, you can use it to clock a peripheral, like PWM!

Example: A More Complicated 1 MHz Signal

In my last post, I showed you how to create a 1 MHz signal using GCLK4, TCC2, and a PWM peripheral. Let’s do the same thing, but in a much more roundabout way!

We’ll feed GCLK4 from the main 48 MHz clock, divide the clock by 48, feed that signal to GCLK_DPLL, which is then sent to the FDPLL. The DPLL will create a 96 MHz clock signal, which we’ll send to GCLK5 to be used as the basis for TCC2 and our PWM signal. This diagram should offer a much better explanation of what’s going on:

SAMD21 PWM with the FDPLL

Because our PWM clock is running twice as fast as in the previous example, we’ll need to adjust the TOP to be twice as high. We’ll use 95 instead of 47 to achieve our 1 MHz signal.

Here is the Arduino code to accomplish this:

// I have no idea why these definitions were left out of the Arduino headers
#define GCLK_GENCTRL_SRC_DPLL96M_Val 0x8ul  // (GCLK_GENCTRL) DPLL96M output
#define GCLK_GENCTRL_SRC_DPLL96M (GCLK_GENCTRL_SRC_DPLL96M_Val << \
                                  GCLK_GENCTRL_SRC_Pos)

// Number to count to with PWM (TOP value). Frequency can be calculated by
// freq = GCLK4_freq / (TCC2_prescaler * (1 + TOP_value))
// With TOP of 95, we get a 1 MHz square wave in this example.
// TCC2 is 16 bits
uint16_t period = 96 - 1;
 
void setup() {

  // Flash wait states NVMCTRL->CTRLB.bit.RWS set to 1 by Arduino framework

  // Configure generic clock generator 4
  GCLK->GENCTRL.reg = GCLK_GENCTRL_IDC |          // Improve duty cycle
                      GCLK_GENCTRL_GENEN |        // Enable generic clock gen
                      GCLK_GENCTRL_SRC_DFLL48M |  // Select 48MHz as source
                      GCLK_GENCTRL_ID(4);         // Apply to GCLK4
  while (GCLK->STATUS.bit.SYNCBUSY);              // Wait for synchronization

  // Set clock divider of 48 to generic clock generator 4 (1 MHz)
  GCLK->GENDIV.reg = GCLK_GENDIV_DIV(48) |        // Divide 48 MHz by 48
                     GCLK_GENDIV_ID(4);           // Apply to GCLK4 4
  while (GCLK->STATUS.bit.SYNCBUSY);              // Wait for synchronization

  // Enable GCLK4 and connect it to GCLK_DPLL
  GCLK->CLKCTRL.reg = GCLK_CLKCTRL_CLKEN |        // Enable generic clock
                      GCLK_CLKCTRL_GEN_GCLK4 |    // Select GCLK4
                      GCLK_CLKCTRL_ID(1);         // Feed GCLK4 to GCLK_DPLL
  while (GCLK->STATUS.bit.SYNCBUSY);              // Wait for synchronization

  // Set DPLL ratio to 1 MHz * (95 + 1) = 96 MHz
  SYSCTRL->DPLLRATIO.reg = SYSCTRL_DPLLRATIO_LDRFRAC(0) | // Ratio fractional
                           SYSCTRL_DPLLRATIO_LDR(95);     // Ratio

  // Configure DPLL to disregard phase lock and select GCLK as source
  SYSCTRL->DPLLCTRLB.reg = SYSCTRL_DPLLCTRLB_LBYPASS |    // Bypass lock
                           SYSCTRL_DPLLCTRLB_WUF |        // Wake up fast
    SYSCTRL_DPLLCTRLB_REFCLK(SYSCTRL_DPLLCTRLB_REFCLK_GCLK_Val); // Select GCLK
  
  // Enable DPLL
  SYSCTRL->DPLLCTRLA.reg |= SYSCTRL_DPLLCTRLA_ENABLE;
  
  // Configure generic clock generator 5
  GCLK->GENCTRL.reg = GCLK_GENCTRL_IDC |          // Improve duty cycle
                      GCLK_GENCTRL_GENEN |        // Enable generic clock gen
                      GCLK_GENCTRL_SRC_DPLL96M |  // Select DPLL as source
                      GCLK_GENCTRL_ID(5);         // Apply to GCLK5
  while (GCLK->STATUS.bit.SYNCBUSY);              // Wait for synchronization

  // Set clock divider of 1 to generic clock generator 5 (96 MHz)
  GCLK->GENDIV.reg = GCLK_GENDIV_DIV(1) |        // Divide 96 MHz by 1
                     GCLK_GENDIV_ID(5);           // Apply to GCLK5
  while (GCLK->STATUS.bit.SYNCBUSY);              // Wait for synchronization

  // Enable GCLK5 and connect it to TCC2 and TC3
  GCLK->CLKCTRL.reg = GCLK_CLKCTRL_CLKEN |        // Enable generic clock
                      GCLK_CLKCTRL_GEN_GCLK5 |    // Select GCLK5
                      GCLK_CLKCTRL_ID_TCC2_TC3;   // Feed GCLK5 to TCC2/TC3
  while (GCLK->STATUS.bit.SYNCBUSY);              // Wait for synchronization
  
  // Divide counter by 1 giving 96 MHz (10.42 ns) on each TCC2 tick
  TCC2->CTRLA.reg |= TCC_CTRLA_PRESCALER(TCC_CTRLA_PRESCALER_DIV1_Val);

  // Use "Normal PWM" (single-slope PWM): count up to PER, match on CC[n]
  TCC2->WAVE.reg = TCC_WAVE_WAVEGEN_NPWM;         // Select NPWM as waveform
  while (TCC2->SYNCBUSY.bit.WAVE);                // Wait for synchronization

  // Set the period (the number to count to (TOP) before resetting timer)
  TCC2->PER.reg = period;
  while (TCC2->SYNCBUSY.bit.PER);

  // Set PWM signal to output 50% duty cycle
  // n for CC[n] is determined by n = x % 4 where x is from WO[x]
  TCC2->CC[0].reg = period / 2;
  while (TCC2->SYNCBUSY.bit.CC0);

  // Configure PA16 (D11 on Arduino Zero) to be output
  PORT->Group[PORTA].DIRSET.reg = PORT_PA16;      // Set pin as output
  PORT->Group[PORTA].OUTCLR.reg = PORT_PA16;      // Set pin to low

  // Enable the port multiplexer for PA16
  PORT->Group[PORTA].PINCFG[16].reg |= PORT_PINCFG_PMUXEN;

  // Connect TCC2 timer to PA16. Function E is TCC2/WO[0] for PA16.
  // n for PMUX[n] is given by floor(pin_num / 2)
  // Odd pin num (2*n + 1): use PMUXO
  // Even pin num (2*n): use PMUXE
  PORT->Group[PORTA].PMUX[8].reg = PORT_PMUX_PMUXE_E;

  // Enable output (start PWM)
  TCC2->CTRLA.reg |= TCC_CTRLA_ENABLE;
  while (TCC2->SYNCBUSY.bit.ENABLE);              // Wait for synchronization
}

void loop() {
  // Do nothing
}

This is certainly a crazy, circuitous route to take for a 1 MHz signal, but it offers much greater control of the PWM frequency. If your application needs this kind of control (e.g. motor controls), firing up the PLL could be incredibly helpful.

In case you’re wondering where I’m going with this project: let’s just say that this fine control of clock speeds lets us create something like a digitally controlled oscillator (DCO).

1 Mhz square wave on Analog Discovery 2

Arduino Zero (SAMD21) Raw PWM Using CMSIS

Arduino has a habit of making pulse width modulation (PWM) pins with a set frequency (or limited frequency options). For the average user, this is not a bad thing, considering it hides all the ugliness (or beauty, depending on your perspective) of manually setting registers.

For those of us that want to dig deeper into the SAMD21, there are a few options. Almost all modern implementations of the ARM Cortex architectures can use the Cortex Microcontroller Software Interface Standard (CMSIS). This is a set of firmware libraries that provide an interface to the registers along with some other functions. Ideally, you should be able to use CMSIS regardless of the manufacturer of the chip (e.g. Microchip, STMicroelectronics, TI).

Some vendors have decided to include their own abstraction layer on top of CMSIS to help people configure and use their parts. In some cases, this can make setting up registers easy (especially if there is a slick GUI program that generates code for you, like STMicro’s STM32CubeMX). Microchip’s abstraction layer is known as the Advanced Software Framework (ASF).

Many professional developers swear by the vendor-provided abstraction layer (e.g. ASF). If you’re like me, you want to know what’s going on at the register level. Not that there is anything wrong with ASF, I just like to learn about the low-level stuff.

Here’s the problem: when it comes to manually configuring registers for 32-bit ARM microcontrollers, it’s vastly more difficult than it is for most other 8- or 16-bit architectures.

I’ve spent the last few days digging through the SAMD21 datasheet and online examples to get some insight into using CMSIS. On the surface, it’s not too bad: you just need to set some values in some registers to get a pin to output a square wave. In reality, it requires a good amount of code to perform this simple action.

Please note that I am just beginning to understand how the SAMD21 works, and this article is simply a chronicle of my learning journey. If you think I missed something or got something wrong, please let me know in the comments!

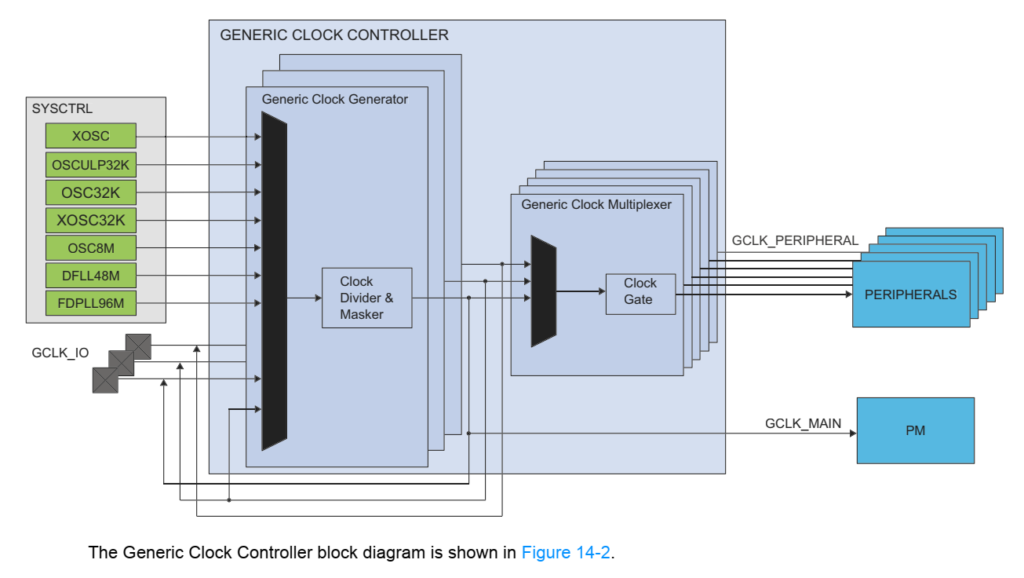
The best description I can find for how this works is from section 14.3 (page 95) in the datasheet:

To configure a pin for PWM requires a good bit of effort. The basic idea is to select a clock source from SYSCTRL (such as the 48 MHz system clock) and connect it to a Generic Clock Generator. The SAMD21 has 9 different generators we can use. We can configure each generator to have its own divider and mask (so that we can run various peripherals off different speeds thanks to having separate clock generators).

Then, we connect our generator to the peripheral we want. In the example below, we’ll be using the Timer/Counter for Control Applications (TCC). The SAMD21 also has a Timer/Counter peripheral (TC), but from what I could grasp, it’s “TCC lite” (i.e. TCC with less features).

Once we have our peripheral configured (TCC, in this case), we then want to connect that to a hardware pin so that we get an actual waveform to appear.

While this might seem extremely complicated, the upside is that the SAMD21 is an extremely powerful chip. We can connect and configure different peripherals in many, many different ways (thanks to all this multiplexing of clock signals!).

Let’s walk through an example of outputting a 1 MHz square wave on pin PA18. Note that PA18 is D10 on the Arduino Zero, Adafruit Feather M0, and the SparkFun SAMD21 Mini Breakout board. If you don’t have one of these boards, check your schematic to see where PA18 goes. Also, note that there are lots of ways to output a 1 MHz square wave on a pin. We’ll be doing this using a 50% duty cycle PWM and the 48 MHz system clock.

Step 1: Enable Clock Source in SYSCTRL

You have a few options for clock sources:

  • External oscillator (0.4 – 32 MHz)
  • External oscillator at 32 kHz
  • Internal oscillator at 32 kHz
  • Ultra low power internal oscillator at 32 kHz
  • Internal oscillator at 8 MHz
  • Digital frequency-locked loop at 48 MHz
  • Fractional digital phase-locked loop (48 – 96 MHz)

Some of these, like the phase-locked loop, can only be used to provide a clock signal for the peripherals. It cannot be used as a system clock. As such, the maximum processing speed of the SAMD21 is 48 MHz.

In most of the Arduino implementations of the SAMD21, the 48 MHz clock is already enabled for us (in the background, as part of the framework). That means we don’t need to initialize it our user code.

Step 2: Configure Clock Generator and Connect It to a Clock Source

Generic clock generators create a square wave (inside the chip) that we can frequency divide, mask, and connect to peripherals. The SAMD21 has 9 clock generators for us to use. We need to pick one, initialize it, and connect it to our clock source.

From what I could find, Generic Clock Generators 0 and 1 were used for other Arduino functions, so you probably want to avoid using those.

Step 3: Configure Peripheral and Connect It to a Clock Generator

The SAMD21 has several peripherals for us to use. We’ll be focusing on the TCC for this example. There are 3 TCCs for us to use, and each one has its own set of unique features. TCC0 and 1 are 24 bits wide whereas TCC2 is limited to 16 bits for its counter. From section 30.1 (page 651) in the datasheet:

SAMD21 TCC configuration chart

With TCC, we can set it to generate a PWM waveform on a pin. We will use a simple, single-slope PWM wave that counts up to a given value. During that counting process, if the value of the counter is equal to the Compare and Capture (CC) register, then the pin will toggle to low. Once the counter reaches the value in the Period (PER) register, then the pin will toggle back to high. The counter resets and starts over again.

From section 30.6.2.5 (page 660) in the datasheet, we get a diagram of how the PWM counter works. Note that TOP, for this mode, refers to the value in the PER register.

SAMD21 Normal PWM operation

WO[x] stands for “waveform output,” and the x is the pin we wish to use. In the datasheet, navigate to section 6.1 (page 21) to see a chart of the pin to function mapping (too long to copy here). Under functions E and F, you’ll see the TCC options. For our PA18 example, you can see that function F is TCC0/WO[2].

Here is the really confusing part: there are only 4 CC options (CC0 through CC3) for setting the duty cycle, but the pin/function mapping chart shows up to WO[7] channels. So, how do we connect a given CC register to a WO pin that’s greater than 3? This poorly labeled chart buried away in part 30.6.3.7 (page 678) holds the key:

SAMD21 output matrix

WO[7] is on the left and WO[0] is on the right. The OTMX configuration bits are found in the WEXCTRL register. By setting the OTMX bits to values 0-3, you can change which CC registers the various WO pins use.

By default, OTMX is set to 0x0, so the top row of the chart is used. Since we are using WO[2], we need to use CC2, according to the chart. If you want to use WO[5], you would use CC1.

Step 4: Set Data Direction and Peripheral for Pin

Because we’ve already configured TCC0/WO[2], that locks us in to pin PA18. Pins have a variety of functions that they can be set to (once again, refer to the chart in section 6.1).  For our project, we need to set PA18 to Function F (TCC0/WO[2]). We also need to set PA18 as an output in the data direction (DIR) register.

Example Code

Now for the moment you’ve all been waiting for (or, let’s be honest, the part you scrolled down for, skipping the above descriptions). Here is some example Arduino code to create a 1 MHz square wave on PA18 (D10 on the Zero, Adafruit Feather M0, or SparkFun SAMD21 Mini).

Note: Many thanks to MartinL on the Arduino forums! Their code snippet (found here) helped me tremendously. The following code is based on that snippet.

// Number to count to with PWM (TOP value). Frequency can be calculated by
// freq = GCLK4_freq / (TCC0_prescaler * (1 + TOP_value))
// With TOP of 47, we get a 1 MHz square wave in this example
uint32_t period = 48 - 1;
 
void setup() {

  // Because we are using TCC0, limit period to 24 bits
  period = ( period < 0x00ffffff ) ? period : 0x00ffffff;

  // Enable and configure generic clock generator 4
  GCLK->GENCTRL.reg = GCLK_GENCTRL_IDC |          // Improve duty cycle
                      GCLK_GENCTRL_GENEN |        // Enable generic clock gen
                      GCLK_GENCTRL_SRC_DFLL48M |  // Select 48MHz as source
                      GCLK_GENCTRL_ID(4);         // Select GCLK4
  while (GCLK->STATUS.bit.SYNCBUSY);              // Wait for synchronization

  // Set clock divider of 1 to generic clock generator 4
  GCLK->GENDIV.reg = GCLK_GENDIV_DIV(1) |         // Divide 48 MHz by 1
                     GCLK_GENDIV_ID(4);           // Apply to GCLK4 4
  while (GCLK->STATUS.bit.SYNCBUSY);              // Wait for synchronization
  
  // Enable GCLK4 and connect it to TCC0 and TCC1
  GCLK->CLKCTRL.reg = GCLK_CLKCTRL_CLKEN |        // Enable generic clock
                      GCLK_CLKCTRL_GEN_GCLK4 |    // Select GCLK4
                      GCLK_CLKCTRL_ID_TCC0_TCC1;  // Feed GCLK4 to TCC0/1
  while (GCLK->STATUS.bit.SYNCBUSY);              // Wait for synchronization

  // Divide counter by 1 giving 48 MHz (20.83 ns) on each TCC0 tick
  TCC0->CTRLA.reg |= TCC_CTRLA_PRESCALER(TCC_CTRLA_PRESCALER_DIV1_Val);

  // Use "Normal PWM" (single-slope PWM): count up to PER, match on CC[n]
  TCC0->WAVE.reg = TCC_WAVE_WAVEGEN_NPWM;         // Select NPWM as waveform
  while (TCC0->SYNCBUSY.bit.WAVE);                // Wait for synchronization

  // Set the period (the number to count to (TOP) before resetting timer)
  TCC0->PER.reg = period;
  while (TCC0->SYNCBUSY.bit.PER);

  // Set PWM signal to output 50% duty cycle
  // n for CC[n] is determined by n = x % 4 where x is from WO[x]
  TCC0->CC[2].reg = period / 2;
  while (TCC0->SYNCBUSY.bit.CC2);

  // Configure PA18 (D10 on Arduino Zero) to be output
  PORT->Group[PORTA].DIRSET.reg = PORT_PA18;      // Set pin as output
  PORT->Group[PORTA].OUTCLR.reg = PORT_PA18;      // Set pin to low

  // Enable the port multiplexer for PA18
  PORT->Group[PORTA].PINCFG[18].reg |= PORT_PINCFG_PMUXEN;

  // Connect TCC0 timer to PA18. Function F is TCC0/WO[2] for PA18.
  // Odd pin num (2*n + 1): use PMUXO
  // Even pin num (2*n): use PMUXE
  PORT->Group[PORTA].PMUX[9].reg = PORT_PMUX_PMUXE_F;

  // Enable output (start PWM)
  TCC0->CTRLA.reg |= (TCC_CTRLA_ENABLE);
  while (TCC0->SYNCBUSY.bit.ENABLE);              // Wait for synchronization
}

void loop() {
  // Do nothing
}

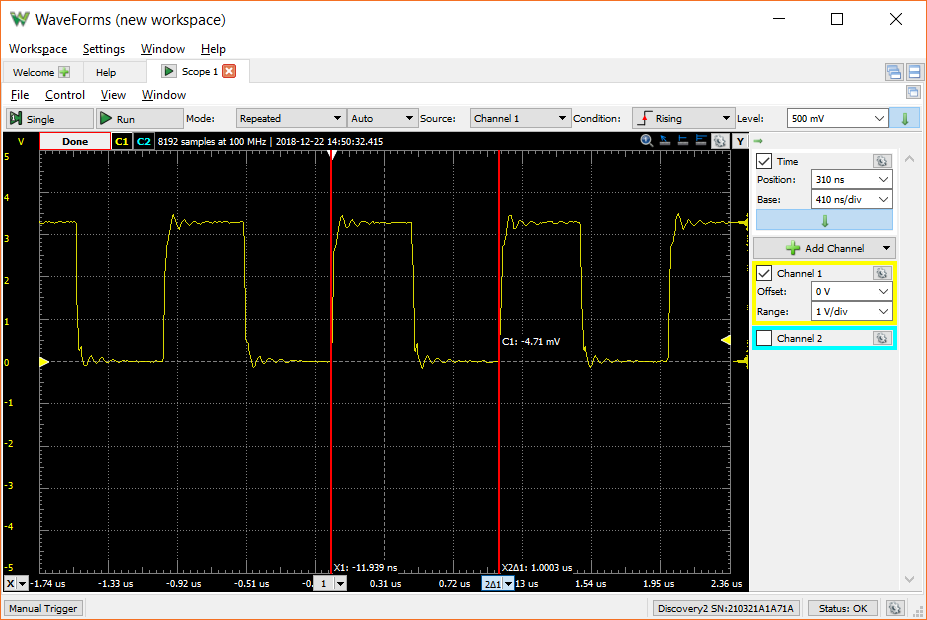
Run it, and connect an oscilloscope to pin PA18. You should get a nice 1 MHz signal (well, as nice as you can expect from a microcontroller). Here is the output as measured on my Analog Discovery 2:

1 Mhz square wave on Analog Discovery 2

That’s it for the setup of a PWM timer on the SAMD21. Feel free to use the code as a starting point for your own project!

Next SAMD21 article: Arduino Zero (SAMD21) FDPLL with CMSIS

Edit [12/23/18]: Added section about TCC counter sizes and updated code to reflect unsigned 24 bit maximum for TCC0.

ESP32 Arduino WebSocket Server

Arduino WebSocket Server Using an ESP32

WebSockets is an incredibly useful protocol that lets you send data to and from a server over TCP without the need for HTTP. Importantly, it lets you push data from the server to a client (e.g. a browser) without needing to make a request. This can be very handy for things like browser-based multiplayer games. I wanted to play around with it for embedded systems to see if I could get low-latency communication between a microcontroller and a computer. Specifically, I wanted the microcontroller to act as a server that supported a connection from a browser (e.g. PC or phone).

Thankfully, GitHub user Links2004 has created an Arduino WebSockets library, which makes testing WebSockets easy. To show it in action, I put together a video where I test the WebSockets library by creating an echo server and test it with a Python script.

For this test, I’m using an Adafruit HUZZAH32 Feather Board, but any ESP32 supported by the Arduino IDE should work. In the Arduino IDE, navigate to File > Preferences and add the following URL to Additional Boards Manager URLs:
https://dl.espressif.com/dl/package_esp32_index.json
Then in Tools > Board > Boards Manager, search for and install the esp32 package by Espressif Systems. Go to Sketch > Include Library > Manage Library. Search for and install the websockets library by Markus Sattler (Links2004). In a new Arduino sketch, enter the code below. Change the ssid  and password variables to match your WiFi network credentials.
#include <WiFi.h>
#include <WebSocketsServer.h>

// Constants
const char* ssid = "MySSID";
const char* password = "MyPassword";

// Globals
WebSocketsServer webSocket = WebSocketsServer(80);

// Called when receiving any WebSocket message
void onWebSocketEvent(uint8_t num,
                      WStype_t type,
                      uint8_t * payload,
                      size_t length) {

  // Figure out the type of WebSocket event
  switch(type) {

    // Client has disconnected
    case WStype_DISCONNECTED:
      Serial.printf("[%u] Disconnected!\n", num);
      break;

    // New client has connected
    case WStype_CONNECTED:
      {
        IPAddress ip = webSocket.remoteIP(num);
        Serial.printf("[%u] Connection from ", num);
        Serial.println(ip.toString());
      }
      break;

    // Echo text message back to client
    case WStype_TEXT:
      Serial.printf("[%u] Text: %s\n", num, payload);
      webSocket.sendTXT(num, payload);
      break;

    // For everything else: do nothing
    case WStype_BIN:
    case WStype_ERROR:
    case WStype_FRAGMENT_TEXT_START:
    case WStype_FRAGMENT_BIN_START:
    case WStype_FRAGMENT:
    case WStype_FRAGMENT_FIN:
    default:
      break;
  }
}

void setup() {

  // Start Serial port
  Serial.begin(115200);

  // Connect to access point
  Serial.println("Connecting");
  WiFi.begin(ssid, password);
  while ( WiFi.status() != WL_CONNECTED ) {
    delay(500);
    Serial.print(".");
  }

  // Print our IP address
  Serial.println("Connected!");
  Serial.print("My IP address: ");
  Serial.println(WiFi.localIP());

  // Start WebSocket server and assign callback
  webSocket.begin();
  webSocket.onEvent(onWebSocketEvent);
}

void loop() {

  // Look for and handle WebSocket data
  webSocket.loop();
}

Select your ESP32 board and COM port. Upload the program, and open a serial monitor. Your ESP32 should connect to your wireless network and print out its IP address. Copy down the IP address, as we’ll need it in the next part.

Arduino WebSocket Server serial output

Make sure you have Python installed on your computer. Open a terminal and enter the following command:

pip install websocket-client

This will install a WebSocket client package that we can use to test our server with. In a new text document, enter the following Python code (change the IP address to match the address obtained from the Arduino serial console):

import websocket

# Connect to WebSocket server
ws = websocket.WebSocket()
ws.connect("ws://192.168.1.123")
print("Connected to WebSocket server")

# Ask the user for some input and transmit it
str = input("Say something: ")
ws.send(str)

# Wait for server to respond and print it
result = ws.recv()
print("Received: " + result)

# Gracefully close WebSocket connection
ws.close()

Make sure your computer is on the same network as your ESP32. With the WebSocket server still running, run your Python script:

python ws_test.py

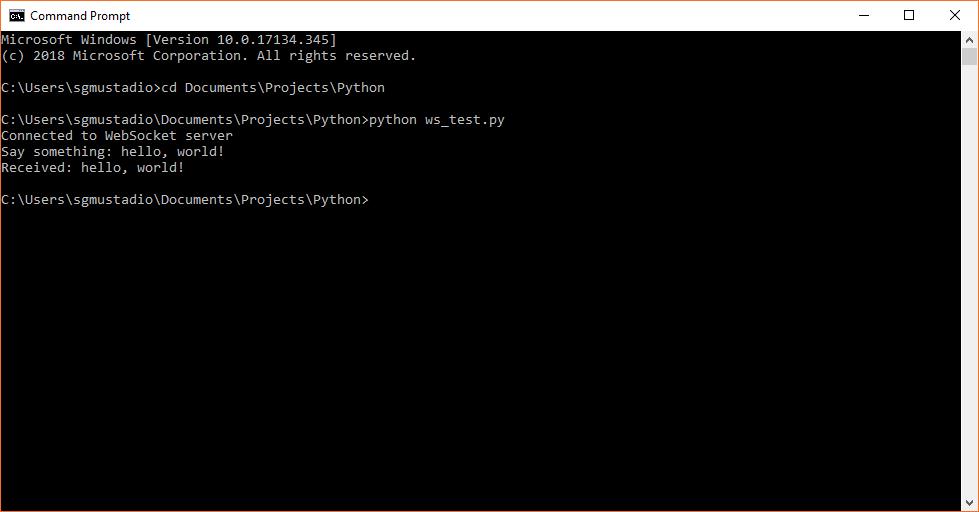
This should connect to the WebSocket server and ask for some input. Enter in some text, press enter, and you should see your message echoed back to you.

WebSocket test Python script

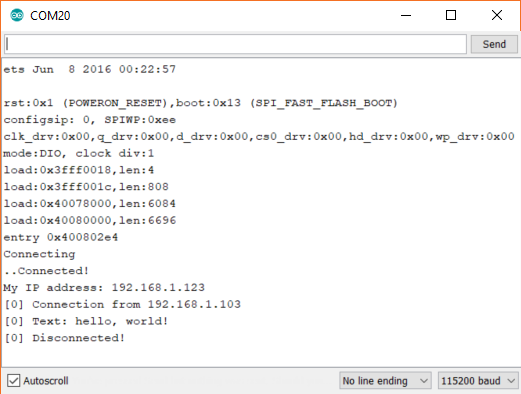
If you look at the Arduino serial console, you should see that a WebSocket client has connected, sent a message, and then disconnected.

Arduino ESP32 WebSockets test server

I’m hoping to use WebSockets as a way to transmit data between a browser and an Arduino in an upcoming project. Hopefully, the latency is low enough that controls and displays can be updated quickly enough (for human needs).

[Update 9/9/2019] I’ve taken this a step further and turned the ESP32 into a full web server while still using WebSockets to control hardware. You can see the tutorial for that here: How to Create a Web Server (with WebSockets) Using an ESP32 in Arduino

SparkFun ESP8266 Thing

Quick Tip: HTTP GET with the ESP8266 Thing

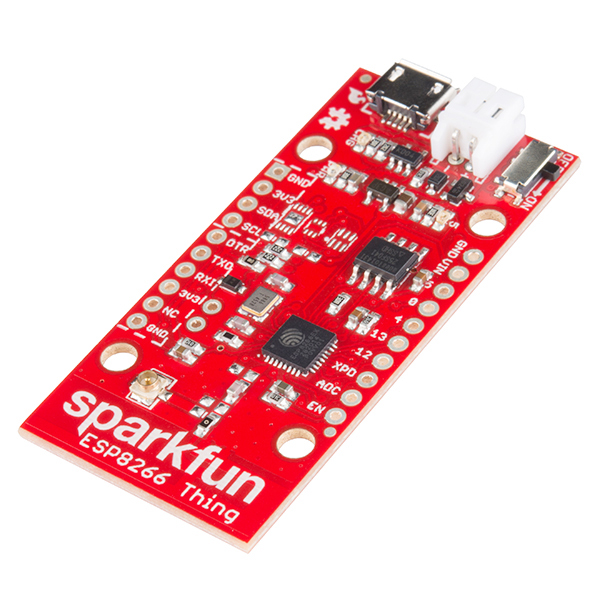
The SparkFun ESP8266 “Thing” is one of the cheapest Internet of Things (IoT) platforms available.

SparkFun ESP8266 Thing
Photo courtesy of sparkfun.com

There are some great examples on how to post data to data.sparkfun.com, but we need to modify that code in order to pull data from a website. That is accomplished with the humble HTTP GET request. I put together a quick example that pulls www.example.com and prints it to the serial console. Note that you will need perform some slight modifications to the board (or use Realterm) to see the serial data.

Continue Reading
Teensy LC input capture test

Learning the Teensy LC: Input Capture

Teensy LC input capture test

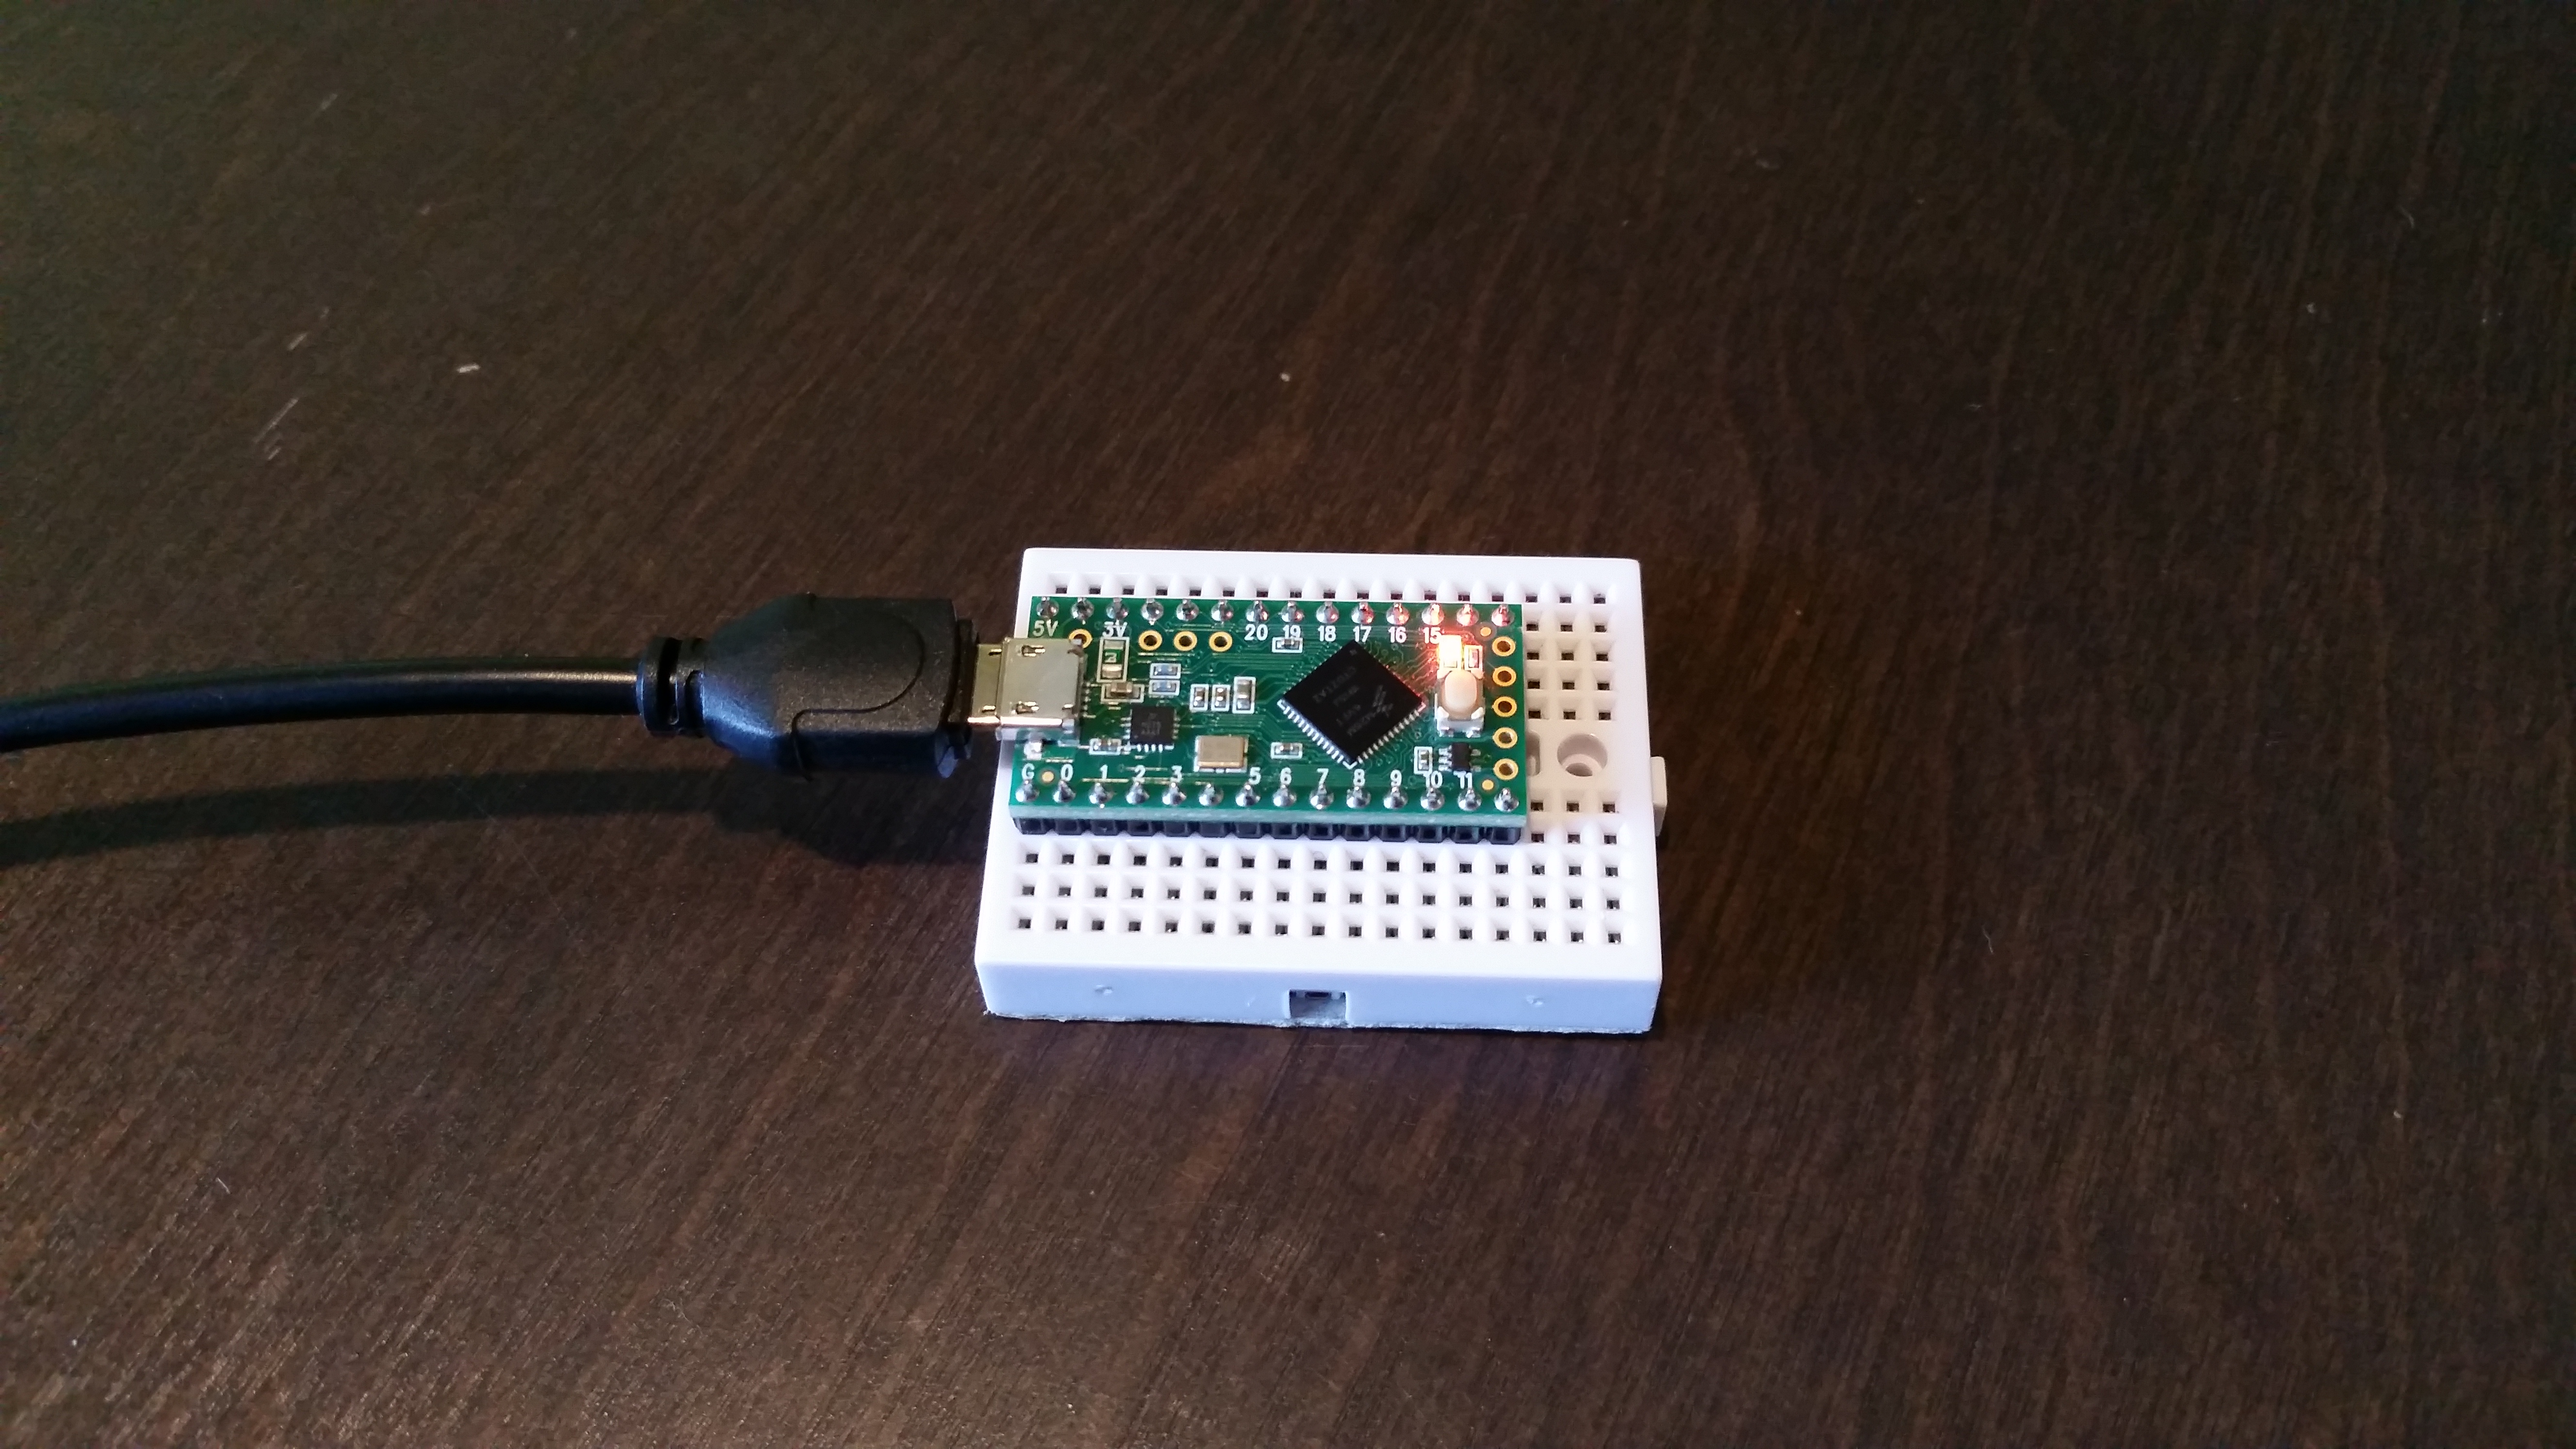
As a third step to learning the Teensy LC, I decided to tackle input capture. I discovered that there is no separate interrupt vector for input capture; it is the same vector used by the timer interrupt. This means that if we are looking for a timer overflow event as well as a pin change for input capture, we must check for that specific interrupt flag within the interrupt service routine (ISR).

Continue Reading
Custom ISR in the Teensy LC

Learning the Teensy LC: Interrupt Service Routines

Custom ISR in the Teensy LC

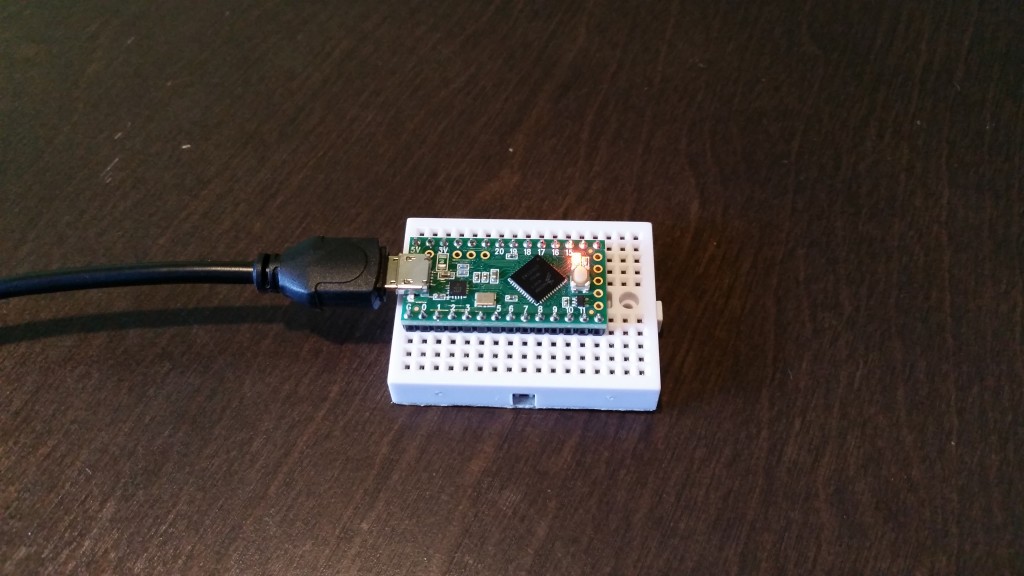
As a follow-on to my PWM experiments, I wanted to create a custom interrupt service routine (ISR) in the Teensy LC. This would be similar to using the ISR() macro in an ATmega-based Arduino. Because the ARM has different vectors (and some other weird/cool things, like configurable interrupt priority levels), I knew the normal ATmega vectors would not work. Luckily, PJRC created a set of vectors to work with the Teensy, which can be found in this code.

You don’t need any additional components for this example. We are just going to flash the on-board LED using our custom ISR.

Continue Reading
Edison and RFduino

Using Python and BLE to Receive Data from the RFduino

Edison and RFduino

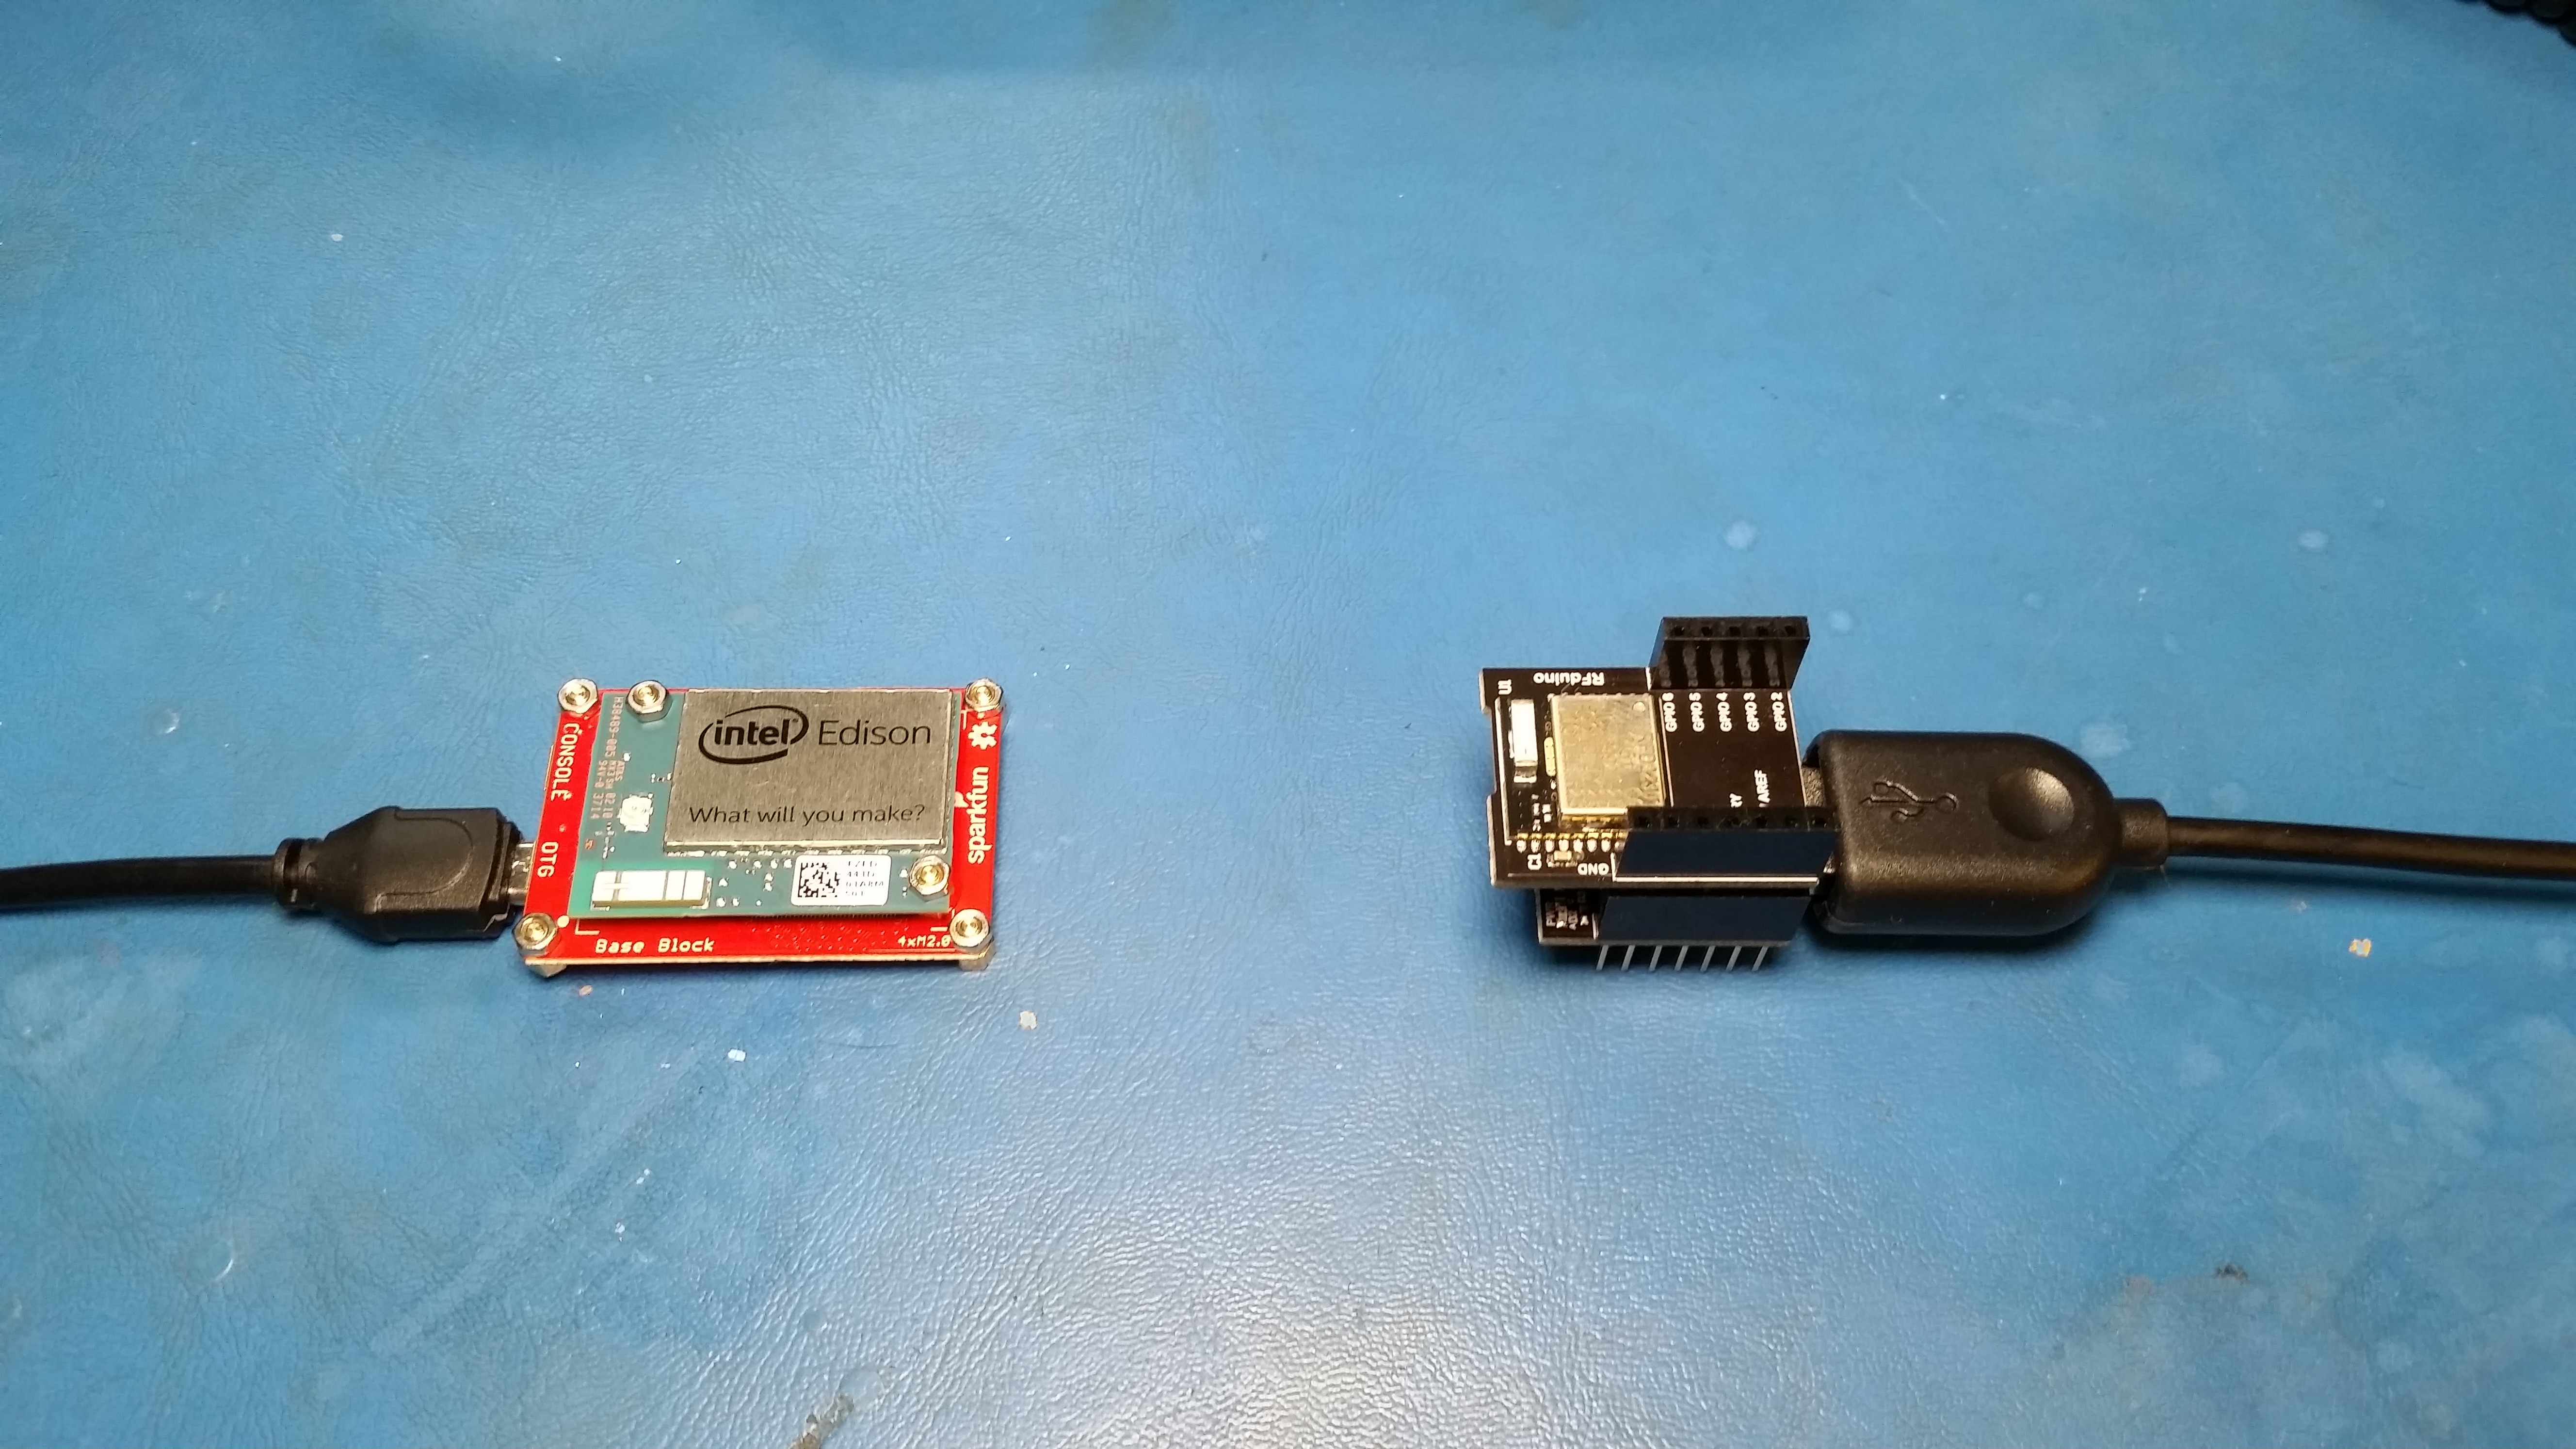
It’s should be no surprise that I enjoy working with the Edison. It may not be as easy to work with as the Raspberry Pi, but I still like it.

My current project includes getting the Edison to talk Bluetooth Low Energy (BLE) to another device. The RFduino is the device in question, as I should be able to receive data as well as control peripherals attached to the RFduino. The final project will be an addition to the IoT YouTube series that I am working on (at SparkFun). I’m not spoiling anything!

Continue Reading
The Teensy LC doing PWM the hard way

Learning the Teensy LC: Manual PWM

Teensy_LC_PWM

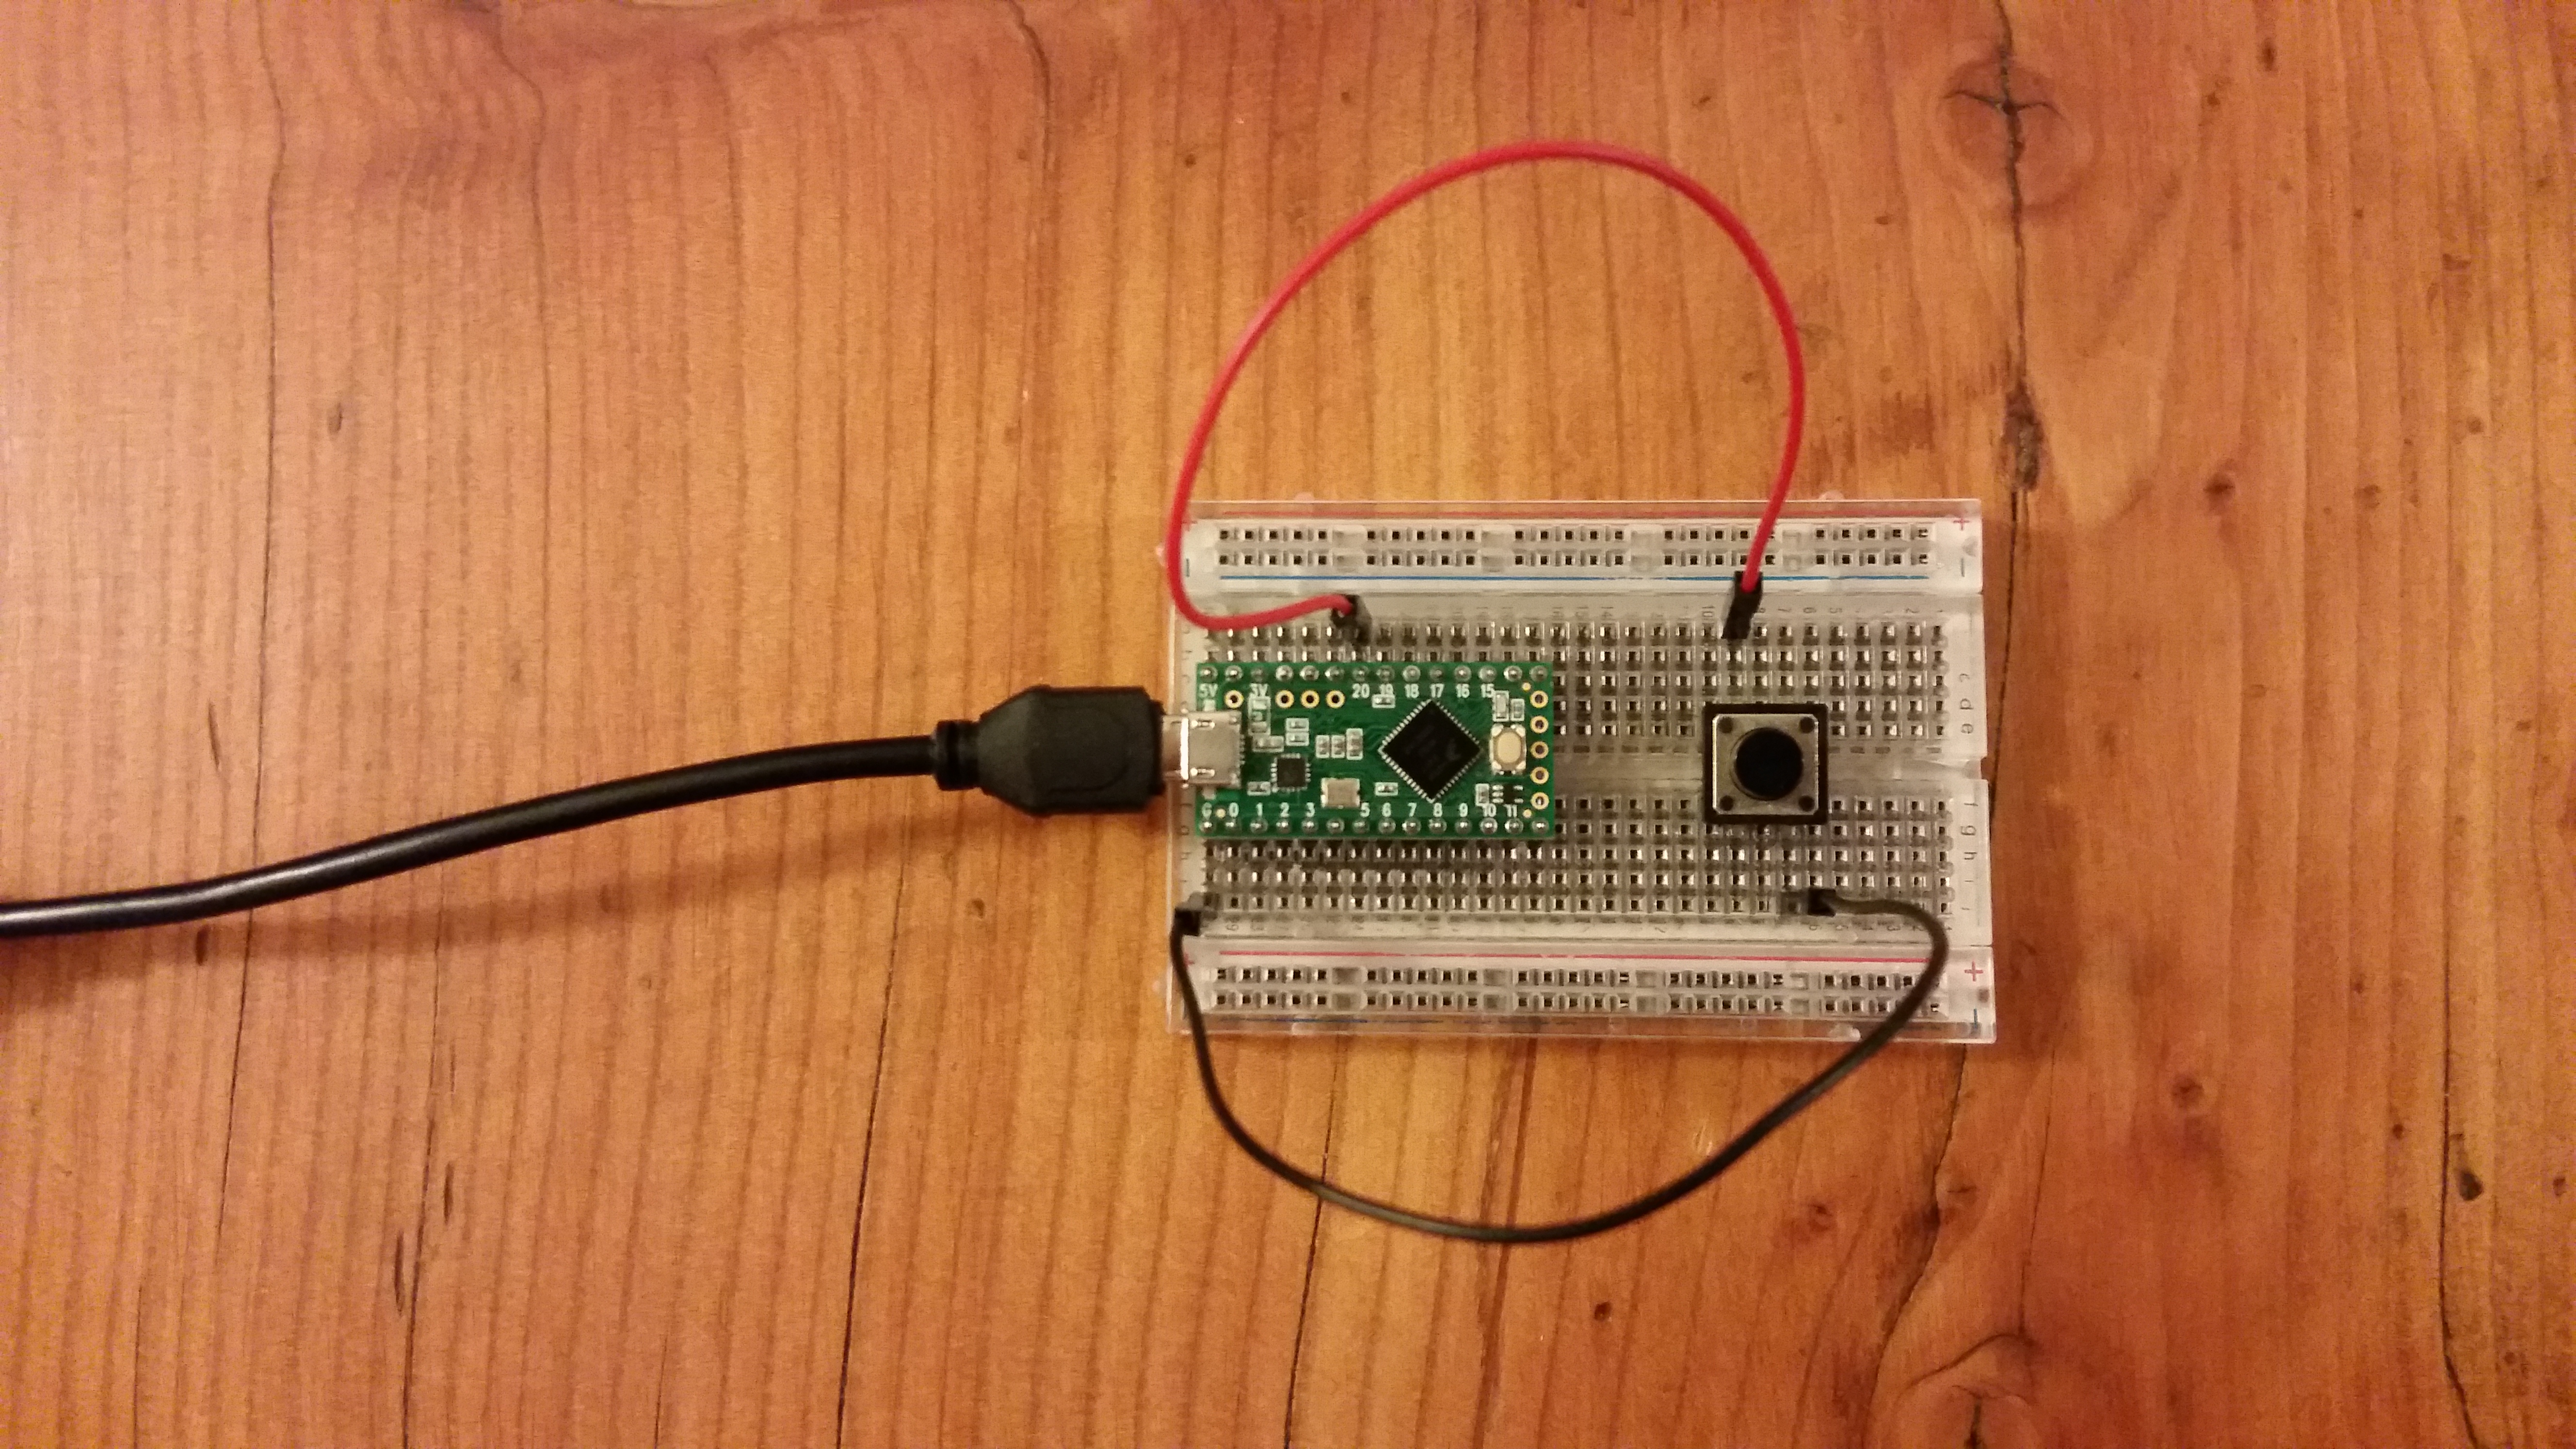
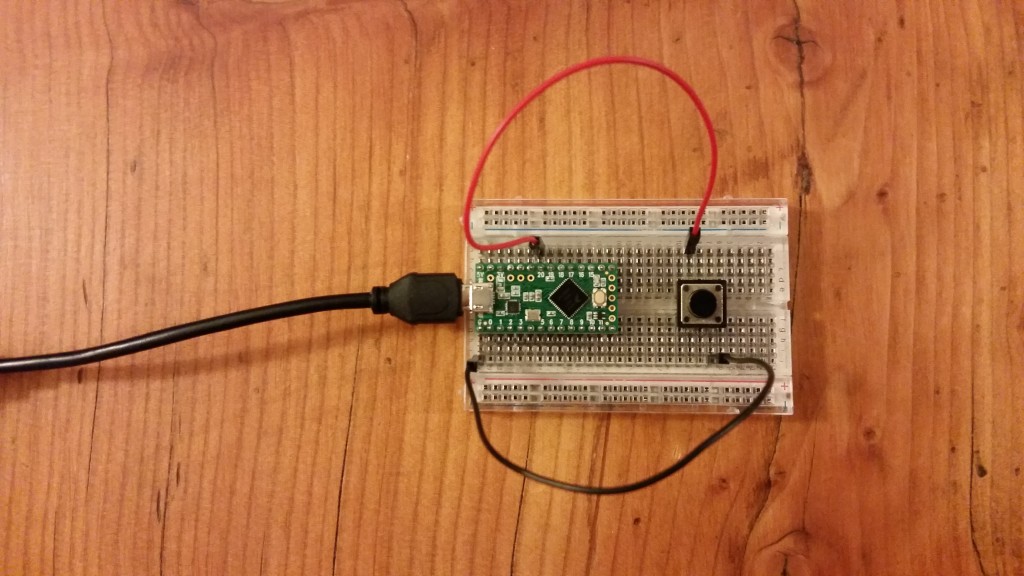
I’m in the process of learning how to use the Teensy LC, which is the newest Arduino-compatible module from PJRC. It is built around the MKL26Z64VFT4 (ARM Cortex-M0+), which can be had for around $2.20 for 100 (according to Digi-Key). I really like the microcontroller, as it is much more powerful than the ubiquitous ATmega 328p (not that I don’t like the 328p) for about the same price.

The awesome people at PJRC have gone through the process of creating a set of libraries and hardware definitions so that you can program the entire Teensy line from Arduino. It is quite slick, and if you have not tried it yet, I suggest you give it a shot. It does require installing some software on top of the Arduino IDE, but it opens up the world of ARM to Arduino users.

Because I have decided to use the Teensy LC (or, more specifically, the MKL26Z64VFT4) for a personal project, I wanted to learn how to manually set up interrupts. As it turns out, ARM interrupts are more complicated than the interrupts found in most ATmega processors. More importantly, I wanted to learn how to do this from the Arduino IDE (because reasons). PJRC still has many of the labels for registers and bit fields set to the Teensy 3.1, which work well enough for the Teensy LC, but might not be correct.

Continue Reading

Quick Tip: Reading Fuse Bits in an Arduino

If you are playing around with avrdude and fuses in an Arduino, you might run into an error like:

avrdude: safemode: lfuse reads as 0
avrdude: safemode: hfuse reads as 0
avrdude: safemode: efuse reads as 0

This is because the Arduino bootloader cannot access fuses in the ATmega. To fix this, we can use another Arduino as an in-system programmer (ISP).

Continue Reading