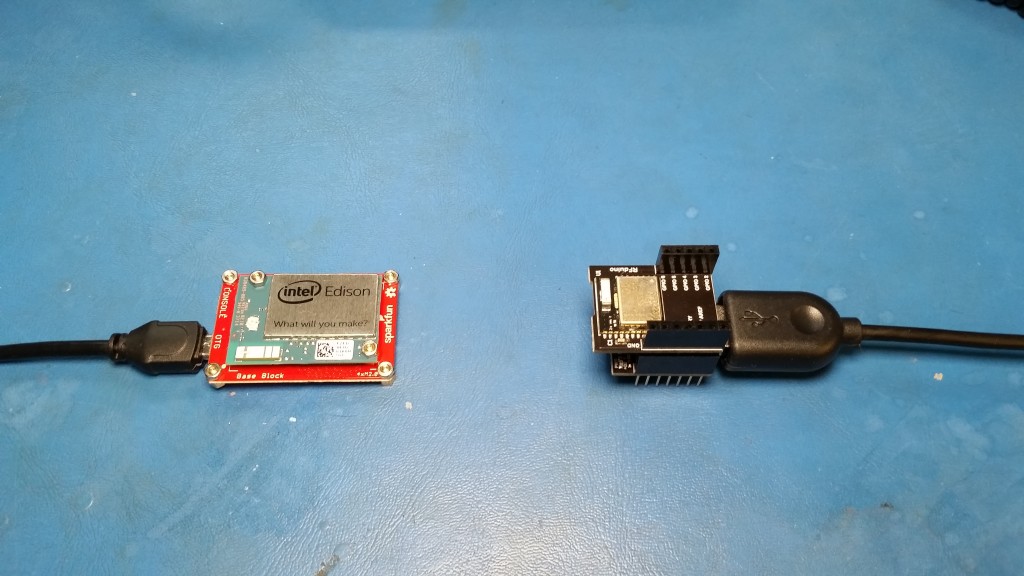
It’s should be no surprise that I enjoy working with the Edison. It may not be as easy to work with as the Raspberry Pi, but I still like it.
My current project includes getting the Edison to talk Bluetooth Low Energy (BLE) to another device. The RFduino is the device in question, as I should be able to receive data as well as control peripherals attached to the RFduino. The final project will be an addition to the IoT YouTube series that I am working on (at SparkFun). I’m not spoiling anything!
Turns out, I’m a complete noob at Bluetooth. I know very little about the terminology, protocol, or libraries. The best I could find for Python is IanHarvey’s bluepy package. As far as I could tell, it is still a work in progress, with updates almost every day. I picked a particular revision because it seemed to work the best on the Edison. A lot of this work is also based on Kiruss’ blog post, Getting RFduino working with Linux.
Configure the RFduino
- I used the RFduino Dev Kit for this, but you can program the RFduino any way you want
- Install Arduino 1.6.3 (this is the only one that works with RFduino when I wrote this)
- Follow the directions here to install RFduino in the Arduino software
- Upload the Temperature example (from RFduino_BLE examples)
Configure the Edison
- I used an Edison and Base Block
- Install Ubilinux on the Edison (you can use this guide)
- Log in and ‘su’ to get root access
- Connect to WiFi (also found in the Ubilinux installation guide)
Start the bluetoothctl interactive prompt
bluetoothctl
In bluetoothctl, type:
scan on
Wait until you see the RFduino pop up. Copy down its MAC address. Then, type:
scan off
You will need to pair with the RFduino (where xx:xx:xx:xx:xx:xx is the MAC address of the RFduino):
pair xx:xx:xx:xx:xx:xx
You can also attempt to connect with the RFduino:
connect xx:xx:xx:xx:xx:xx
Once you are done playing in the bluetoothctl interface, go ahead and exit:
exit
Using Python to Control BLE
You can use Linux commands to connect and communicate via Bluetooth, but the real fun comes from doing it programmatically (Bash scripting excepted, of course). To start, update apt-get and install some libraries:
apt-get update
apt-get install build-essential libdbus-1-dev
Clone and compile bluepy (there is a helper file written in C). Notice that we are checking out a specific revision of bluepy. At the time of this writing, the newest version did not work for me.
git clone https://github.com/IanHarvey/bluepy.git
cd bluepy
git checkout 7d2864686f8b3daad021ea042adc322276e75045 .
cd bluepy
make
There is a good chance that we will need to restart our Bluetooth interface:
hciconfig hci0 down
hciconfig hci0 up
Now, try the btle.py example. We specify the address as “random” (very brief explanation of random address).
python btle.py xx:xx:xx:xx:xx:xx random
You should see an output like:
Service <uuid=Generic Attribute handleStart=8 handleEnd=11> :
    Characteristic <Service Changed>, supports INDICATE
Service <uuid=Generic Access handleStart=1 handleEnd=7> :
    Characteristic <Device Name>, supports READ WRITE
    -> 'RFduino'
    Characteristic <Appearance>, supports READ
    -> '4\x12'
    Characteristic <Peripheral Preferred Connection Parameters>, supports READ
    -> '\x10\x00\x18\x00\x00\x00d\x00'
Service <uuid=2220 handleStart=12 handleEnd=65535> :
    Characteristic <2221>, supports NOTIFY READ
    -> '\x00\x00\xd8A'
    Characteristic <2222>, supports WRITE NO RESPONSE WRITE
    Characteristic <2223>, supports WRITE NO RESPONSE WRITE
This means that you were able to connect to the RFduino with Python! Rejoice, and then take a look at the output. The important part here is the third Service, which contains a non-standard UUID. The first Characteristic is marked as “NOTIFY READ” and contains the identifier 0x2221, which is short for the UUID 00002221-0000-1000-8000-00805f9b34fb. We can use that information to create a short Python script that continuously reads the temperature value (labeled with the UUID 0x2221) being sent by the RFduino.
cd ../..
nano ble_test.py
In our new Python script, paste in the following code. Also, you will need to change the “xx:xx:xx:xx:xx:xx” to your RFduino’s MAC address (keep the quotation marks).
import binascii
import struct
import time
from bluepy.bluepy.btle import UUID, Peripheral

temp_uuid = UUID(0x2221)

p = Peripheral("xx:xx:xx:xx:xx:xx", "random")

try:
    ch = p.getCharacteristics(uuid=temp_uuid)[0]
    if (ch.supportsRead()):
        while 1:
            val = binascii.b2a_hex(ch.read())
            val = binascii.unhexlify(val)
            val = struct.unpack('f', val)[0]
            print str(val) + " deg C"
            time.sleep(1)

finally:
    p.disconnect()
Save and exit (ctrl+x and ‘y’). Run the script with:
python ble_test.py
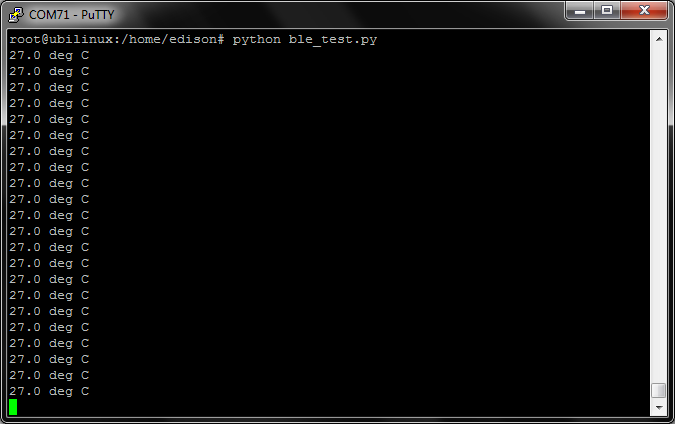
And you should see a nice stream of temperature data flowing:
As far as I can tell, the RFduino is reading its own internal temperature, so that reading may not mean much. However, it is a start to being able to read any sensor or control any device across a BLE link!


I continually get the following error when trying to connect to my RFdunio using your scripts:
“Failed to connect to peripheral %s, addr type: %s” % (addr, addrType))
bluepy.bluepy.btle.BTLEException: Failed to connect to peripheral , addr type: random
Do you have any idea why this is happening?
Sorry I didn’t see this until now! For some reason WordPress stopped sending me email notifications.
What do you you have running on the RFduino? You loaded the Temperature example, right? If so, were you able to connect using bluetoothctl?
It is only receiving the last value sent from RFduino program loop instead of all three. What can be the issue?
Which RFduino example are you using? The temperature one I referenced (https://github.com/RFduino/RFduino/blob/master/libraries/RFduinoBLE/examples/Temperature/Temperature.ino) should only send one value as a float.
Yes. Just changed the struct unpack command to accommodate int and removed the sleep command. Also tried changing the sleep interval but no success.
val = struct.unpack(‘i’, val)[0]
The values I am sending from RFduino are three different values one by one during a single program loop.
RFduinoBLE.sendInt(aaWorld.x);
RFduinoBLE.sendInt(aaWorld.y);
RFduinoBLE.sendInt(aaWorld.z);
But the program is only receiving last value i.e. the value of aaWorld.z
The three values are being received perfectly on my Android device.
Can you figure out the reason?
Try printing out the results from p.getCharacteristics(uuid=temp_uuid) (without the [0] index) to see if you are receiving all 3 values. Otherwise, you might have to set up 3 different characteristics with their own UUID and read them separately (i.e. calling getCharacteristic() 3 times).
I am receiving only one value from getCharacterisitc function. I have the same UUID for all the three values and android is receiving values perfectly fine using the same UUID.
I have not had a chance to test this. You should be able to pack more than one value in a characteristic, so it sounds like a problem with the Python code. If you need to get all 3 now, you could try making 3 different characteristics, each with it’s own UUID.
Thank you so much for ur tutorial , So can i run a python script on the edison that would be able to read/write data from/to an android device ?
Yes, you can. This tutorial shows how to do it with JavaScript, but the steps are the same. I recommend a Bluetooth debugging app (such as BLE Scanner) for the Android.
It would be very appreciated if you could make a tutorial or explain how to read and write to an android device from Edison using pygattlib (python) https://bitbucket.org/OscarAcena/pygattlib
It has the functions already defined in the examples folder but I can’t make them work. Thanks 🙂
Sorry, but this is not something I can do right now, as I am booked working on Node.JS examples and tutorials. I recommend using something like BLE Scanner to scan for and read BLE characteristics.
hi, there is a way to do this with raspberry pi? i’m new using BLE and need this for a school project. Thanks
Yes, bluepy should work on the Raspberry Pi as well. You will need to make sure that you either have a Raspberry Pi 3 or a Bluetooth dongle capable of BLE.
Hello Shawn,
I followed your tutorial to the Point where I start the Test-script. I get the error:
Import Error: No module named bluepy.btle
This module I didn’t find anywhere. ( Python 2.7X on Raspberry 3 )
The Connection test before with the btle.py program is running fine.
If you are using a Raspberry Pi, I recommend trying the Nuimo SDK as per this discussion.
Edit – nevermind, that’s a wrapper SDK. Let me dig a bit more and get back to you.
I wonder if my code has an error. It’s been so long since I last tried it. However, the import looks like
When I think it should be like this:
Did you try that?
Hello Shawn,
thanks for your Response, You are right, without the double bluepy it is running.
What you do in the example is getting data from the rfduino. Have you an example where i send and receive data? ( LED button on/off ) and get a state Response?
Kind regards,
Achim